How to install software applications on Linux

How do you install an application on Linux? As with many operating systems, there isn’t just one answer to that question. Applications can come from so many sources—it’s nearly impossible to count—and each development team may deliver their software whatever way they feel is best. Knowing how to install what you’re given is part of being a true power user of your OS.
More Linux resources
Repositories
For well over a decade, Linux has used software repositories to distribute software. A «repository» in this context is a public server hosting installable software packages. A Linux distribution provides a command, and usually a graphical interface to that command, that pulls the software from the server and installs it onto your computer. It’s such a simple concept that it has served as the model for all major cellphone operating systems and, more recently, the «app stores» of the two major closed source computer operating systems.
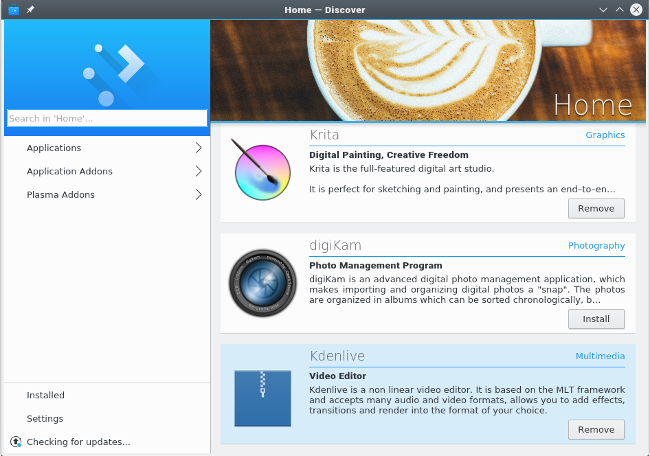
Installing from a software repository is the primary method of installing apps on Linux. It should be the first place you look for any application you intend to install.
To install from a software repository, there’s usually a command:
The actual command you use depends on what distribution of Linux you use. Fedora uses dnf , OpenSUSE uses zypper , Debian and Ubuntu use apt , Slackware uses sbopkg , FreeBSD uses pkg_add , and Illumos-based OpenIndiana uses pkg . Whatever you use, the incantation usually involves searching for the proper name of what you want to install, because sometimes what you call software is not its official or solitary designation:
Once you have located the name of the package you want to install, use the install subcommand to perform the actual download and automated install:
For specifics on installing from a software repository, see your distribution’s documentation.
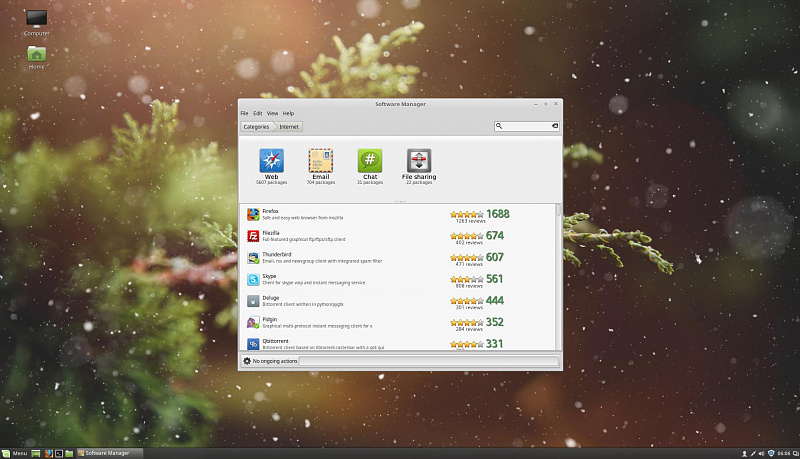
The same generally holds true with the graphical tools. Search for what you think you want, and then install it.
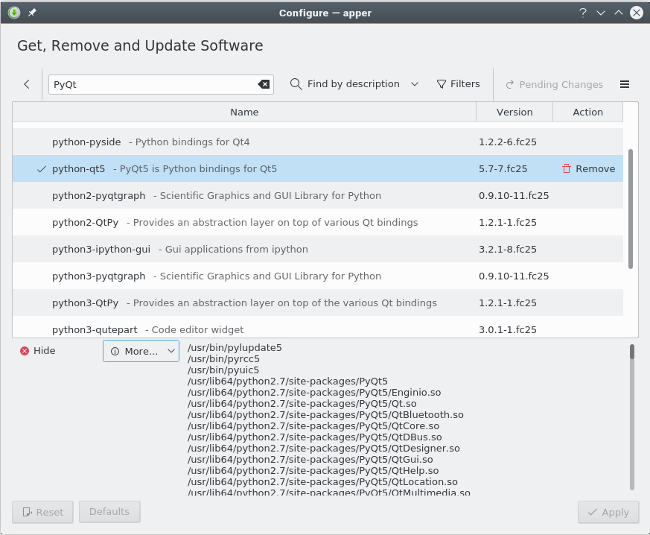
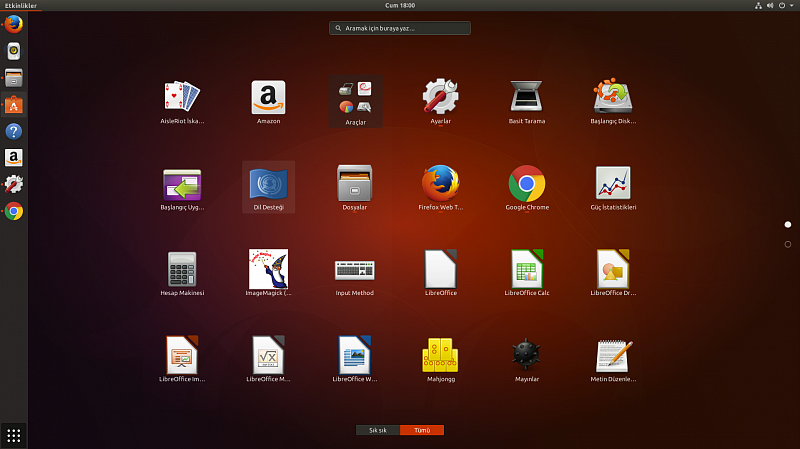
Like the underlying command, the name of the graphical installer depends on what distribution you are running. The relevant application is usually tagged with the software or package keywords, so search your launcher or menu for those terms, and you’ll find what you need. Since open source is all about user choice, if you don’t like the graphical user interface (GUI) that your distribution provides, there may be an alternative that you can install. And now you know how to do that.
Extra repositories
Your distribution has its standard repository for software that it packages for you, and there are usually extra repositories common to your distribution. For example, EPEL serves Red Hat Enterprise Linux and CentOS, RPMFusion serves Fedora, Ubuntu has various levels of support as well as a Personal Package Archive (PPA) network, Packman provides extra software for OpenSUSE, and SlackBuilds.org provides community build scripts for Slackware.
By default, your Linux OS is set to look at just its official repositories, so if you want to use additional software collections, you must add extra repositories yourself. You can usually install a repository as though it were a software package. In fact, when you install certain software, such as GNU Ring video chat, the Vivaldi web browser, Google Chrome, and many others, what you are actually installing is access to their private repositories, from which the latest version of their application is installed to your machine.
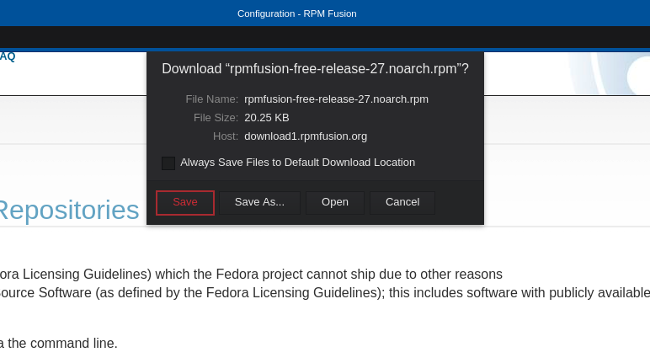
You can also add the repository manually by editing a text file and adding it to your package manager’s configuration directory, or by running a command to install the repository. As usual, the exact command you use depends on the distribution you are running; for example, here is a dnf command that adds a repository to the system:
Installing apps without repositories
The repository model is so popular because it provides a link between the user (you) and the developer. When important updates are released, your system kindly prompts you to accept the updates, and you can accept them all from one centralized location.
Sometimes, though, there are times when a package is made available with no repository attached. These installable packages come in several forms.
Linux packages
Sometimes, a developer distributes software in a common Linux packaging format, such as RPM, DEB, or the newer but very popular FlatPak or Snap formats. You make not get access to a repository with this download; you might just get the package.
The video editor Lightworks, for example, provides a .deb file for APT users and an .rpm file for RPM users. When you want to update, you return to the website and download the latest appropriate file.
These one-off packages can be installed with all the same tools used when installing from a repository. If you double-click the package you download, a graphical installer launches and steps you through the install process.
Alternately, you can install from a terminal. The difference here is that a lone package file you’ve downloaded from the internet isn’t coming from a repository. It’s a «local» install, meaning your package management software doesn’t need to download it to install it. Most package managers handle this transparently:
In some cases, you need to take additional steps to get the application to run, so carefully read the documentation about the software you’re installing.
Generic install scripts
Some developers release their packages in one of several generic formats. Common extensions include .run and .sh . NVIDIA graphic card drivers, Foundry visual FX packages like Nuke and Mari, and many DRM-free games from GOG use this style of installer.
This model of installation relies on the developer to deliver an installation «wizard.» Some of the installers are graphical, while others just run in a terminal.
There are two ways to run these types of installers.
- You can run the installer directly from a terminal:
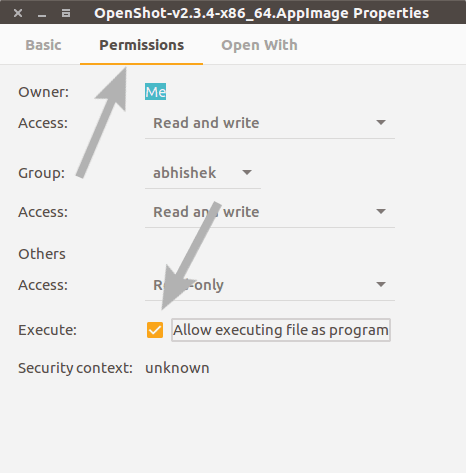
- Alternately, you can run it from your desktop by marking it as executable. To mark an installer executable, right-click on its icon and select Properties.
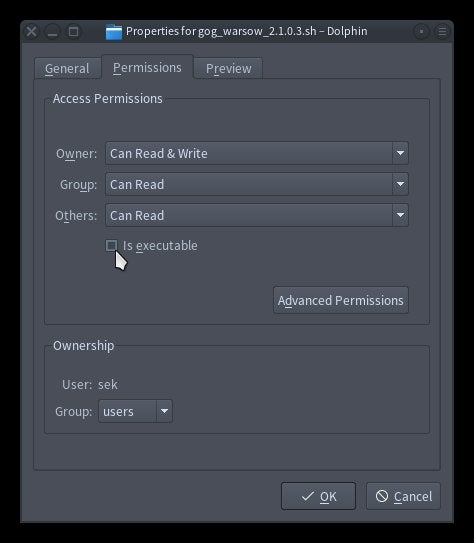
Once you’ve given permission for it to run, double-click the icon to start the install.
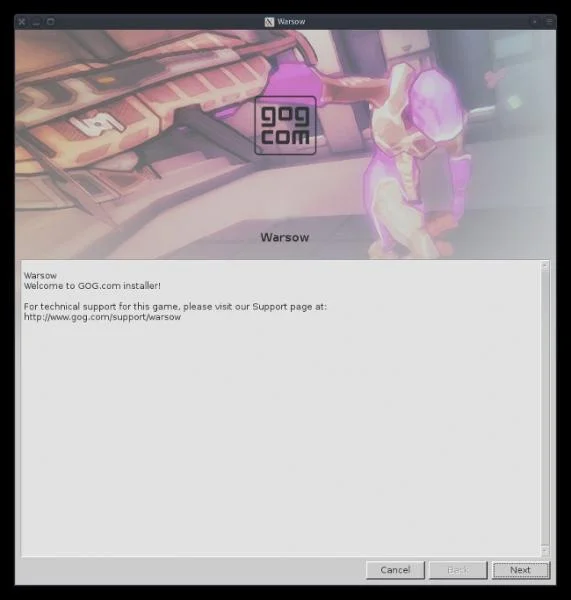
For the rest of the install, just follow the instructions on the screen.
AppImage portable apps
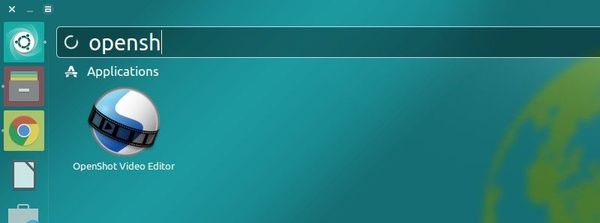
The AppImage format is relatively new to Linux, although its concept is based on both NeXT and Rox. The idea is simple: everything required to run an application is placed into one directory, and then that directory is treated as an «app.» To run the application, you just double-click the icon, and it runs. There’s no need or expectation that the application is installed in the traditional sense; it just runs from wherever you have it lying around on your hard drive.
Despite its ability to run as a self-contained app, an AppImage usually offers to do some soft system integration.
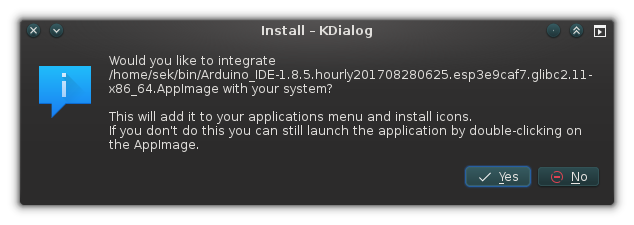
If you accept this offer, a local .desktop file is installed to your home directory. A .desktop file is a small configuration file used by the Applications menu and mimetype system of a Linux desktop. Essentially, placing the desktop config file in your home directory’s application list «installs» the application without actually installing it. You get all the benefits of having installed something, and the benefits of being able to run something locally, as a «portable app.»
Application directory
Sometimes, a developer just compiles an application and posts the result as a download, with no install script and no packaging. Usually, this means that you download a TAR file, extract it, and then double-click the executable file (it’s usually the one with the name of the software you downloaded).
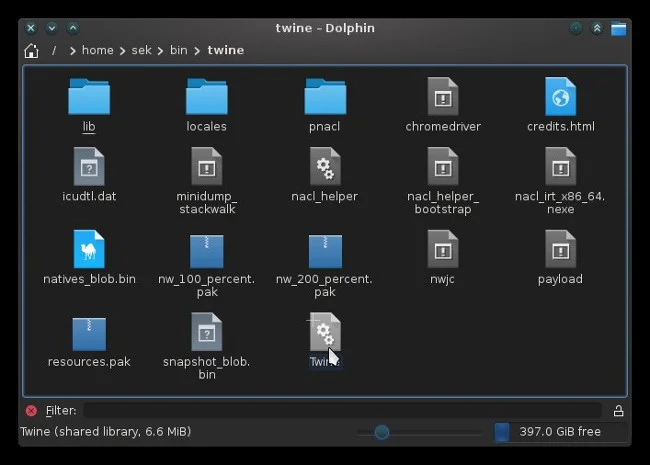
When presented with this style of software delivery, you can either leave it where you downloaded it and launch it manually when you need it, or you can do a quick and dirty install yourself. This involves two simple steps:
- Save the directory to a standard location and launch it manually when you need it.
- Save the directory to a standard location and create a .desktop file to integrate it into your system.
If you’re just installing applications for yourself, it’s traditional to keep a bin directory (short for «binary») in your home directory as a storage location for locally installed applications and scripts. If you have other users on your system who need access to the applications, it’s traditional to place the binaries in /opt . Ultimately, it’s up to you where you store the application.
Downloads often come in directories with versioned names, such as twine_2.13 or pcgen-v6.07.04 . Since it’s reasonable to assume you’ll update the application at some point, it’s a good idea to either remove the version number or to create a symlink to the directory. This way, the launcher that you create for the application can remain the same, even though you update the application itself.
To create a .desktop launcher file, open a text editor and create a file called twine.desktop . The Desktop Entry Specification is defined by FreeDesktop.org. Here is a simple launcher for a game development IDE called Twine, installed to the system-wide /opt directory:
The tricky line is the Exec line. It must contain a valid command to start the application. Usually, it’s just the full path to the thing you downloaded, but in some cases, it’s something more complex. For example, a Java application might need to be launched as an argument to Java itself:
Sometimes, a project includes a wrapper script that you can run so you don’t have to figure out the right command:
In the Twine example, there’s no icon bundled with the download, so the example .desktop file assigns a generic gaming icon that shipped with the KDE desktop. You can use workarounds like that, but if you’re more artistic, you can just create your own icon, or you can search the Internet for a good icon. As long as the Icon line points to a valid PNG or SVG file, your application will inherit the icon.
The example script also sets the application category primarily to Development, so in KDE, GNOME, and most other Application menus, Twine appears under the Development category.
To get this example to appear in an Application menu, place the twine.desktop file into one of two places:
And now the application is installed as it needs to be and integrated with the rest of your system.
Compiling from source
Finally, there’s the truly universal install format: source code. Compiling an application from source code is a great way to learn how applications are structured, how they interact with your system, and how they can be customized. It’s by no means a push-button process, though. It requires a build environment, it usually involves installing dependency libraries and header files, and sometimes a little bit of debugging.
To learn more about compiling from source code, read my article on the topic.
Now you know
Some people think installing software is a magical process that only developers understand, or they think it «activates» an application, as if the binary executable file isn’t valid until it has been «installed.» Hopefully, learning about the many different methods of installing has shown you that install is really just shorthand for «copying files from one place to the appropriate places on your system.» There’s nothing mysterious about it. As long as you approach each install without expectations of how it’s supposed to happen, and instead look for what the developer has set up as the install process, it’s generally easy, even if it is different from what you’re used to.
The important thing is that an installer is honest with you. If you come across an installer that attempts to install additional software without your consent (or maybe it asks for consent, but in a confusing or misleading way), or that attempts to run checks on your system for no apparent reason, then don’t continue an install.
Good software is flexible, honest, and open. And now you know how to get good software onto your computer.
Installing applications in Linux | Complete guide

Linux distributions are one of the best operating systems available. Users are very satisfied to use them. This is because of the full control that we get over it. We love to customize, installing different kinds of applications, its regular hustle free updates, looks, performance, easiness, and the list goes on and on. So in this quick guide, we are going to learn about how to install applications in Linux distributions.
Please enable JavaScript
To install applications on Linux, we have got many different ways and this is because of the diversity that comes along with it. We will be going through all of them in this article.
- Using command line, installing from repository
- From package – .deb, .rpm or source code
- Software center
- Special executables – .appimage, direct executables files
Installing applications in Linux from the repository
A repository in Linux is a place where all the applications are stored – Official and third party. We use the supported package management tool to install the application from it.
For example, if you use Ubuntu or Ubuntu-based Linux distributions then in most cases the package management tool is apt, if it’s Fedora or any other rpm-based distro then it is dnf or rpm and for Arch and its derivatives like Manjaro use pacman.
To install any application or any package just run the following command in the terminal.
Ubuntu & Ubuntu-based distributions
Fedora, Red Hat & derivatives
Arch, Manjaro & Derivatives
Explanation:
sudo: It is super user do. When we need to modify or make any changes in the system we have to use sudo in order to pass in the needed permission. If you are running your Linux system as ‘root user‘ then there is no need to add sudo in the starting
.apt-get or dnf: Here is the package name convention just to show that we are using a particular package management tool.
install: It’s self-explanatory that we want to install something so have to add it as a parameter to the package management tool.
package-name: We need to replace this with the desired package or application name such as Vlc, Firefox, Rhythmbox, or any that you want to install.
Installing applications using package file(s) in Linux
This is similar to Windows if you have ever installed something on it. In this method, you first have to download the supported package file then install it. You can download any application from the given below website.
On the above site, you can choose the package file as per your distribution and install it either by double-clicking on the file. This will open up the software center then click on the install button and that will do the job.
You can also install the package through the installation command. Use the below-given command for that.
To install a .deb file
To install a .rpm file
Installing application using the software center
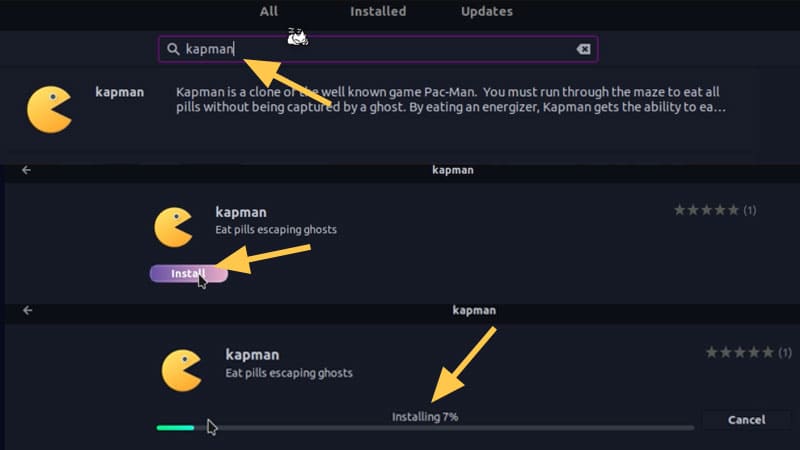
Almost all Linux distributions come with a software center or app store. you can use it to install the application to avoid any hustle. The software center makes the installation process very easy.
Just open it up and search for any application and click on the install button that’s it.
Using executable files
We can also use the specially crafted executable file to use and install applications on our Linux distribution. There are file formats such as direct executable and appimage files
You can simply double-click and run these files in order to use the application. But first, you have to give the file permission to execute.
This permission can be given in two ways. Either you use the below command or the graphical method.
Now, simply execute the file:
Note: The sudo is not necessary if the executable file does not require any root file modification.
So that was it. If you find this article helpful then share it and don’t forget to subscribe to our Youtube channel and let us know what you think about this in the comment section below. Bye ��
Name already in use
If nothing happens, download GitHub Desktop and try again.
Launching GitHub Desktop
If nothing happens, download GitHub Desktop and try again.
Launching Xcode
If nothing happens, download Xcode and try again.
Launching Visual Studio Code
Your codespace will open once ready.
There was a problem preparing your codespace, please try again.
Latest commit
Git stats
Files
Failed to load latest commit information.
About
GUI frontend for install third-party applications
Stars
Watchers
Forks
Releases
Packages 0
Languages
Footer
© 2023 GitHub, Inc.
You can’t perform that action at this time.
You signed in with another tab or window. Reload to refresh your session. You signed out in another tab or window. Reload to refresh your session.
Что такое appinstall linux
Установка программ в Linux
Устанавливаем программы в Linux
Debian, Ubuntu, Linux Mint
- Откройте меню и запустите «Терминал». Сделать это можно также нажатием горячей клавиши Ctrl + Alt + T.

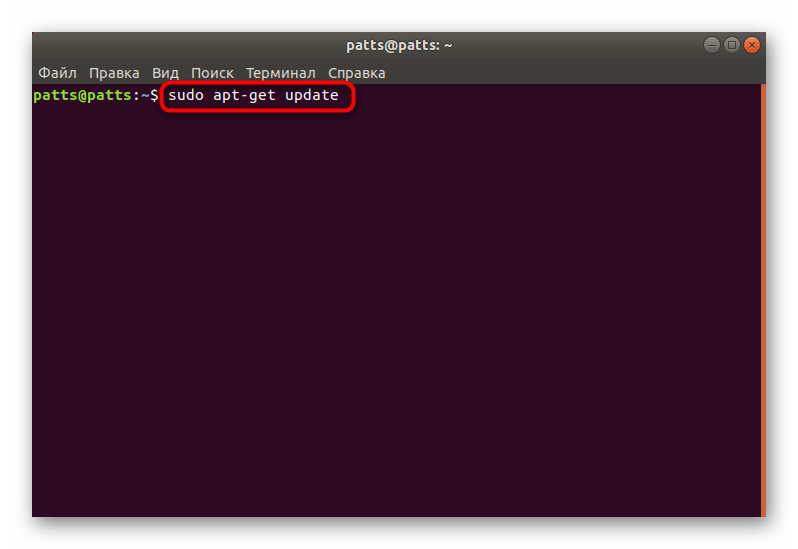
- Сначала убедитесь в том, что все установленные пакеты обновлены. Введите sudo apt-get update и нажмите на клавишу Enter.
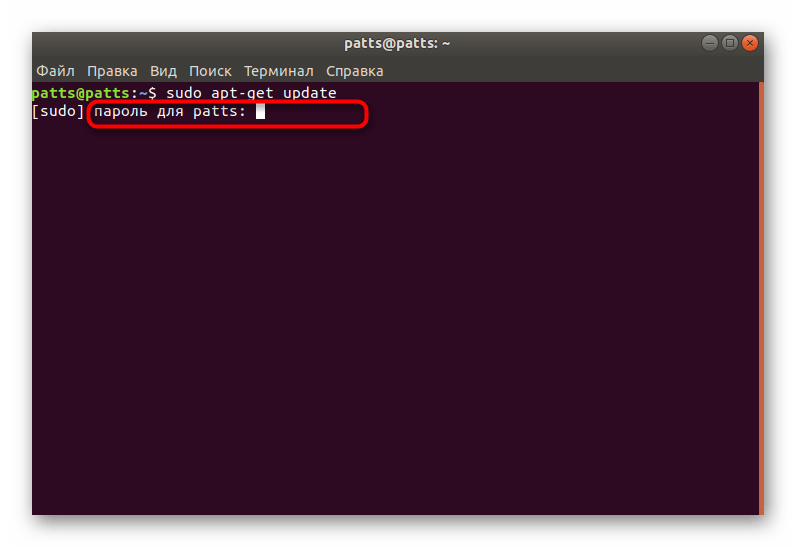
- Все действия через утилиту apt производятся от имени суперпользователя, поэтому придется указать пароль этой учетной записи. Обратите внимание, что вводимые таким образом символы в строке не отображаются.
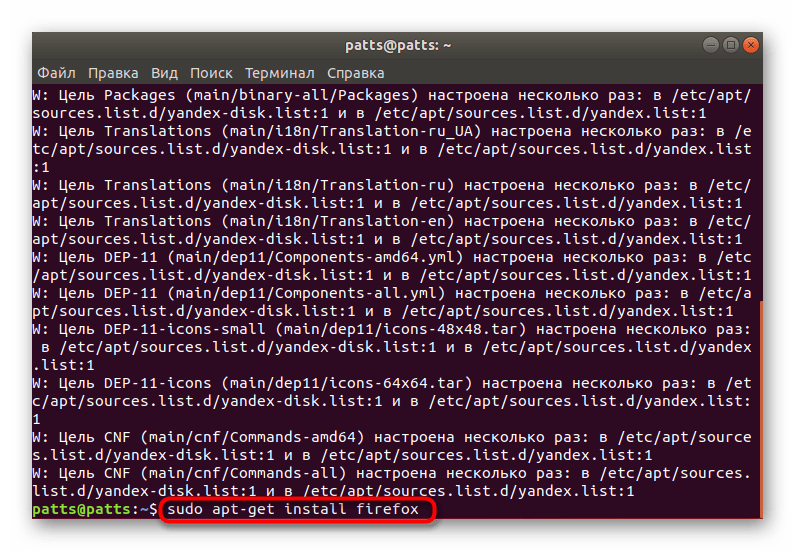
- После успешного окончания обновления библиотек введите sudo apt-get install firefox . Аргумент install отвечает за установку, а firefox указывает название пакета, нужного для загрузки.

RedHat, CentOS и Fedora
- Запустите консоль любым удобным методом.
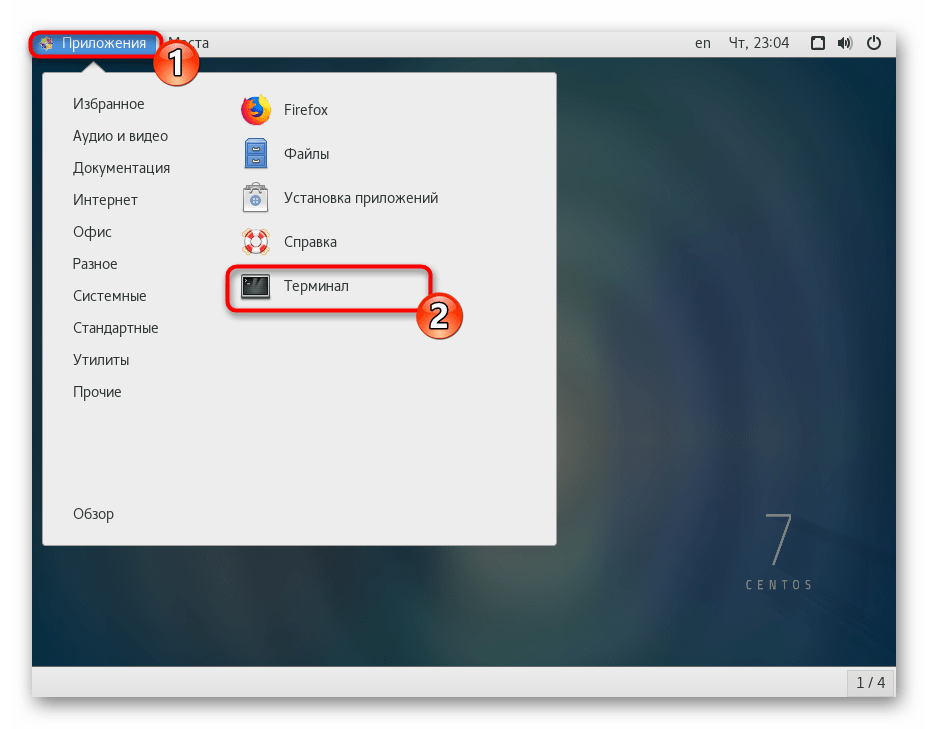
- Обновите список системных репозиториев через sudo yum update .
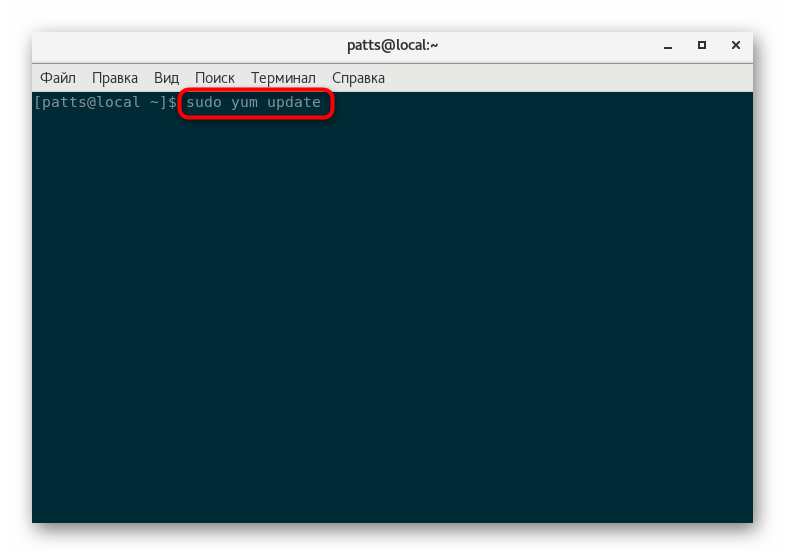
- Подтвердите действие вводом пароля рут-доступа.
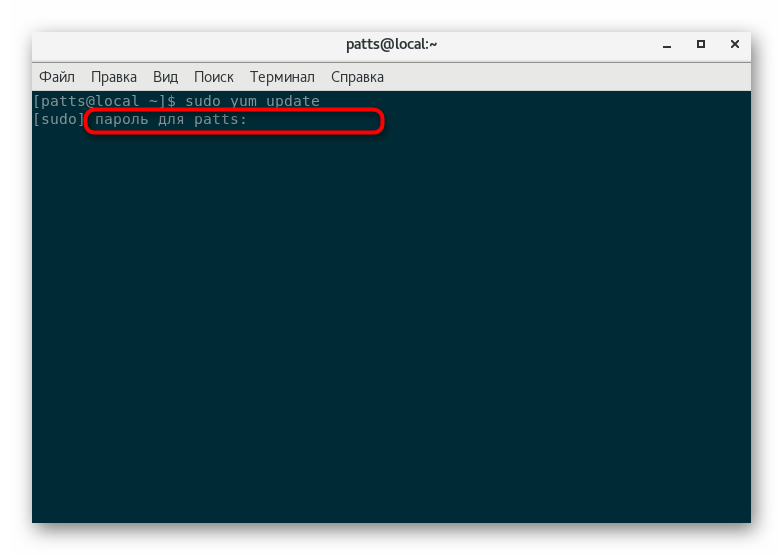
- Примите соглашение с добавлением новых файлов, указав вариант y.
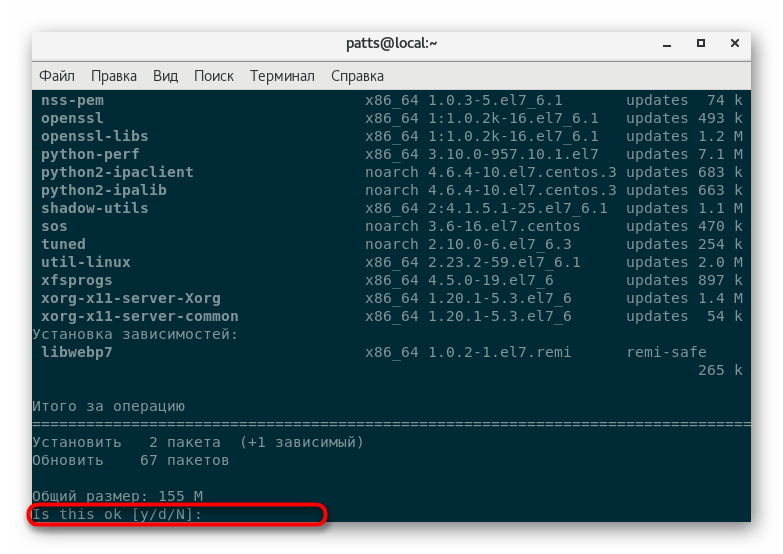
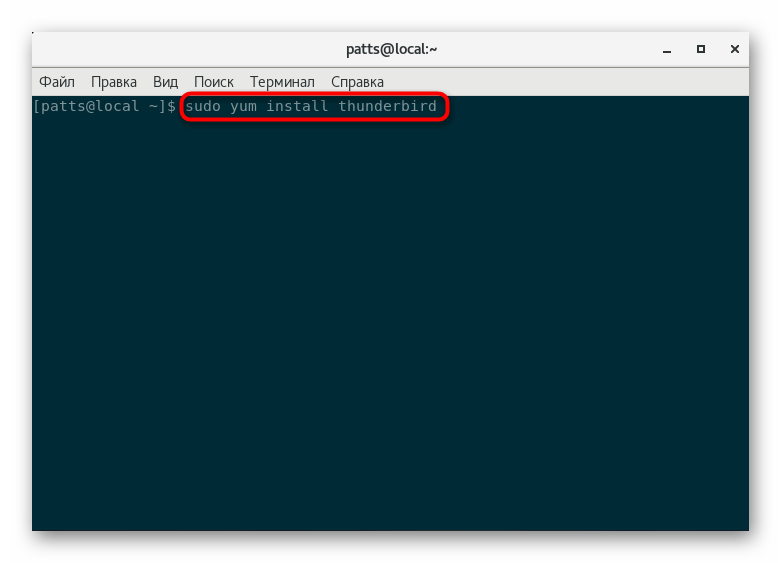
- По окончании обновления пропишите sudo yum install thunderbird и активируйте ее. Мы за пример взяли почтовый клиент Thunderbird, вы же можете заменить последнее выражение в строке на любое другое нужное ПО.
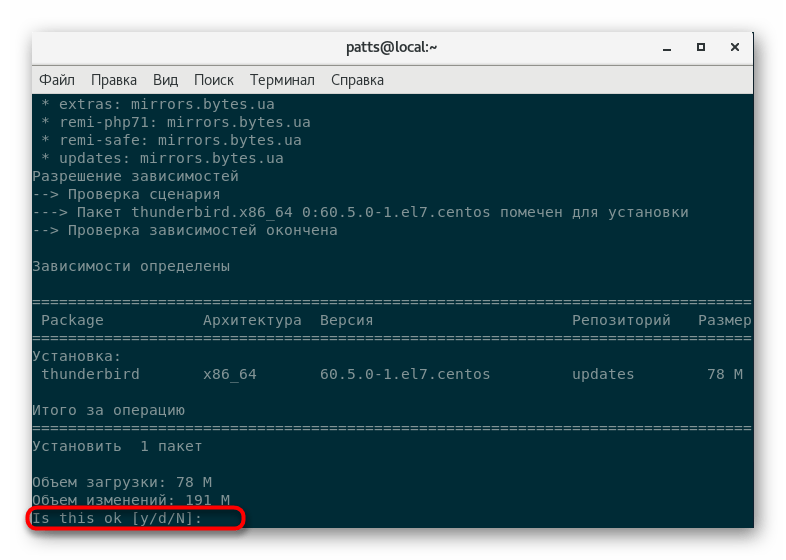
- Здесь также потребуется указать вариант y, чтобы началось скачивание.
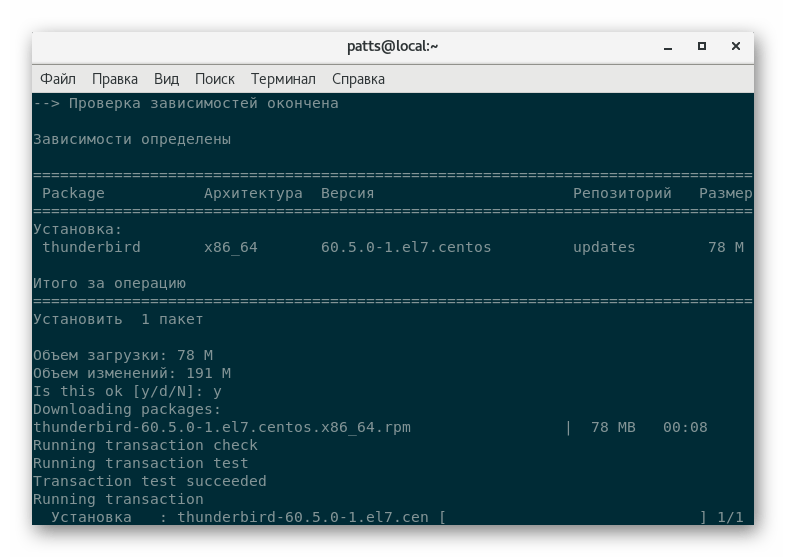
- Ожидайте завершения загрузки и распаковки компонентов приложения.
Arch Linux, Chakra, Manjaro
- Откройте меню графической оболочки и перейдите к работе в классической консоли.
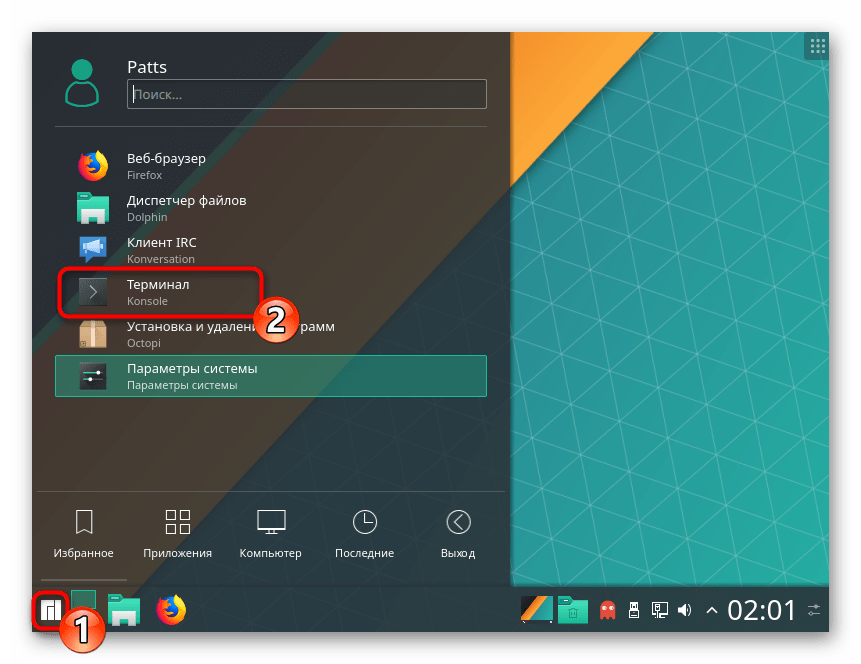
- Установите, например, популярный открытый браузер Chromium. Для этого введите sudo pacman -S chromium . Аргумент -S как раз и отвечает за то, что команде необходимо провести скачивание и инсталляцию программы.

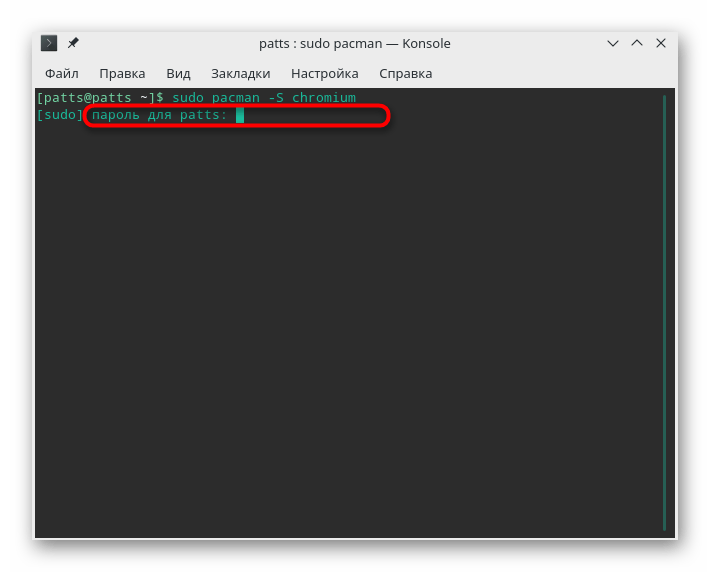
- Подтвердите подлинность учетной записи суперпользователя, введя пароль.
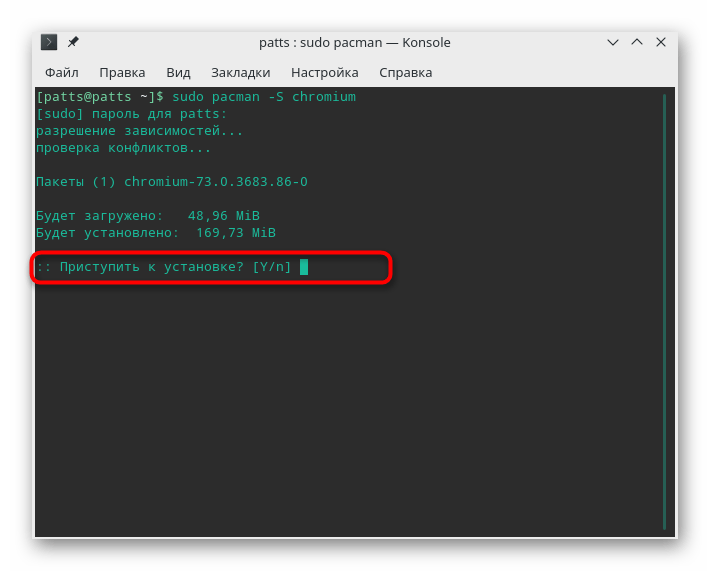
- Примите установку компонентов, выбрав вариант y.
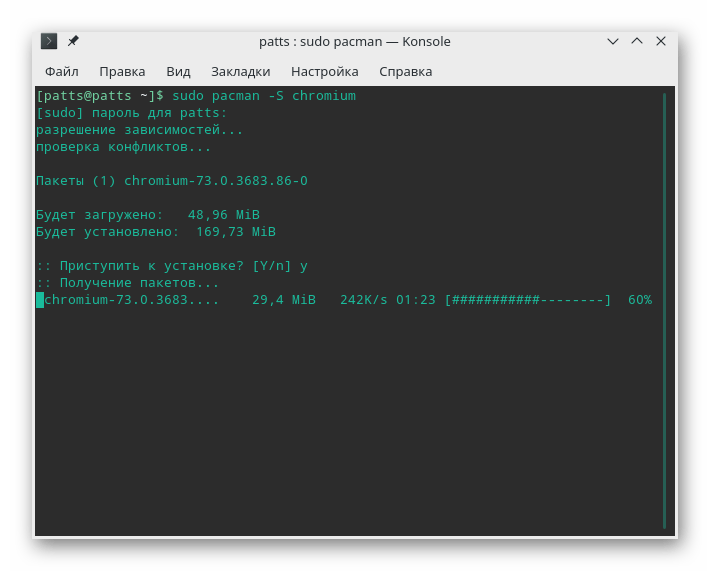
- Ожидайте завершения загрузки: для успешного выполнения этой процедуры потребуется подключение к интернету.
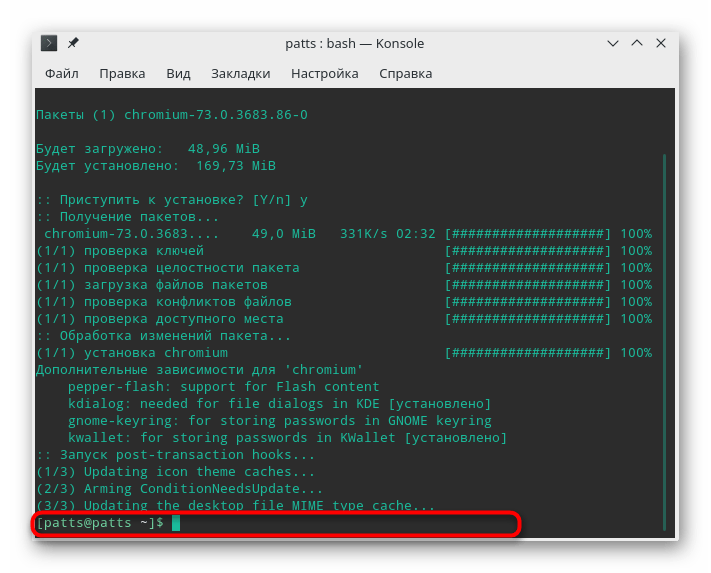
- Если в консоли появилась новая строка ввода, значит установка прошла успешно и можно переходить к работе в приложении.
sudo pacman -S firefox
sudo pacman -S gimp
sudo pacman -S vlc
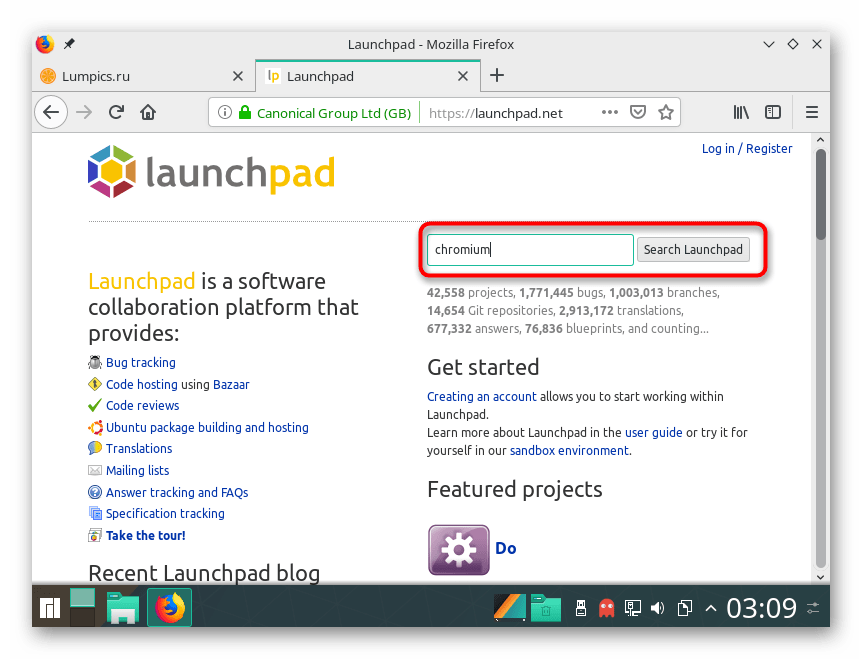
- Перейдите по указанной выше ссылке на главную страницу Launchpad и в поиске введите название софта. Для удобства можно дописать в этой строке еще PPA , что и означает пользовательское хранилище.
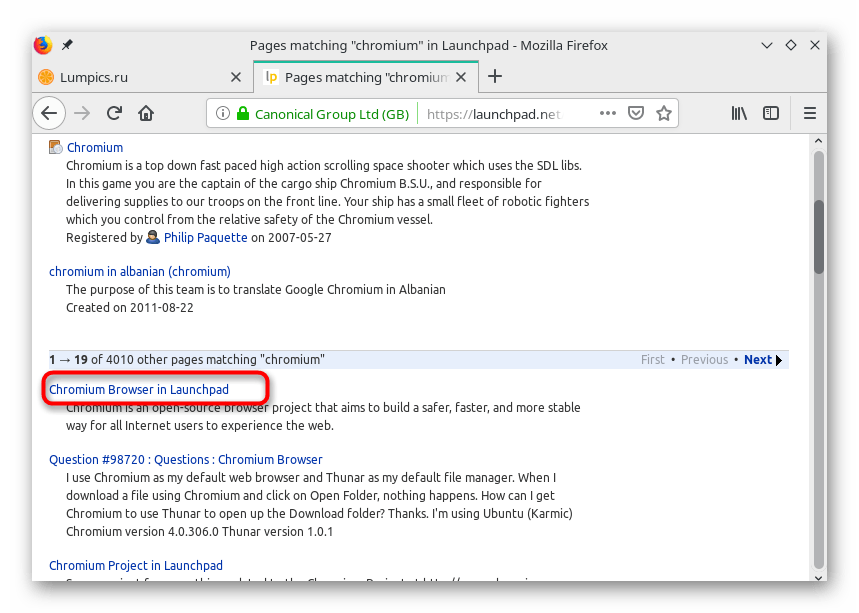
- В результатах отыщите подходящий вариант и нажмите на соответствующую ссылку.
- Ознакомьтесь с возможными пакетами и выберите подходящий.
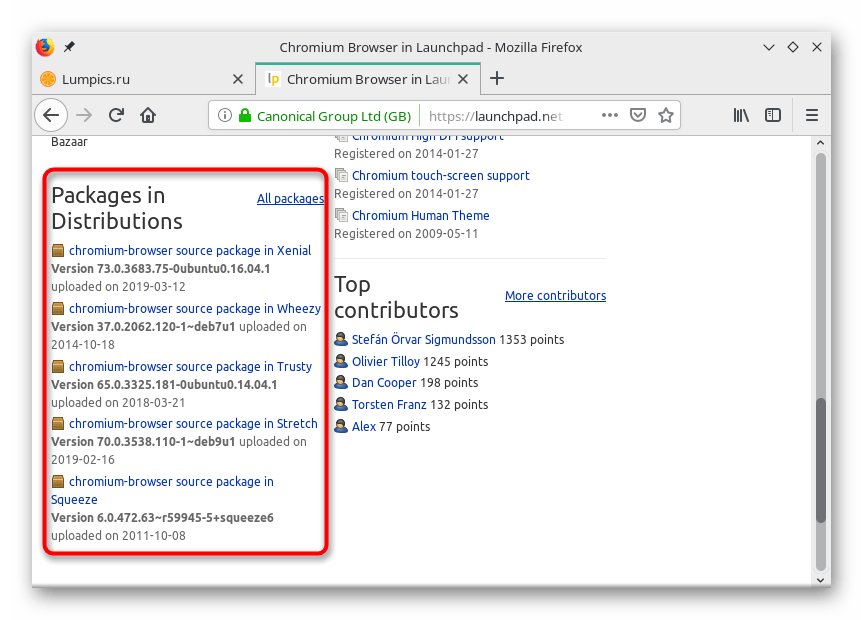
- Перейдите на страницу ПО.

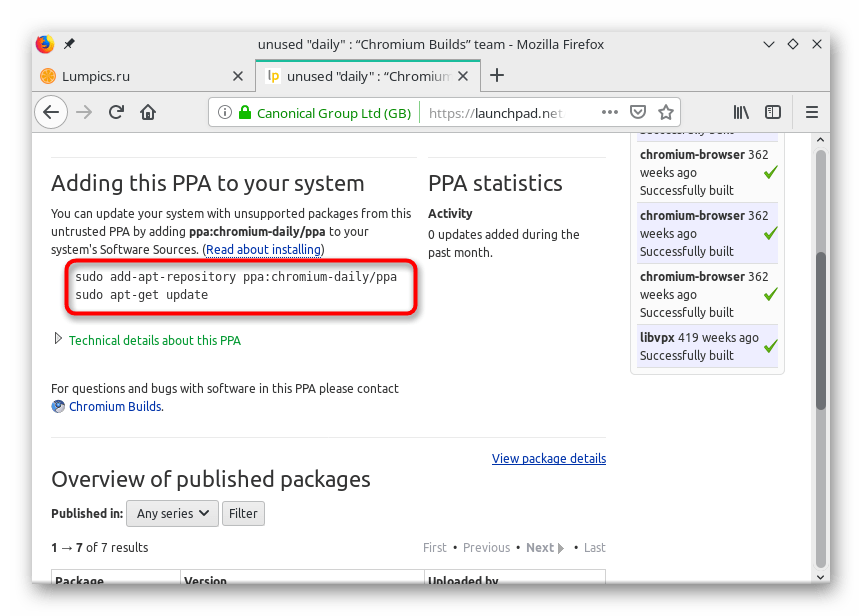
- Попав на страницу PPA, внизу вы увидите команды, с помощью которых и производится инсталляция.
Debian, Ubuntu, Linux Mint
- Отыщите на указанном выше сайте ссылку на репозиторий, затем запустите консоль и вставьте ее туда. Мы возьмем за пример последнюю версию этого веб-обозревателя. sudo add-apt-repository ppa:saiarcot895/chromium-dev .

- Подтвердите действие, введя пароль.
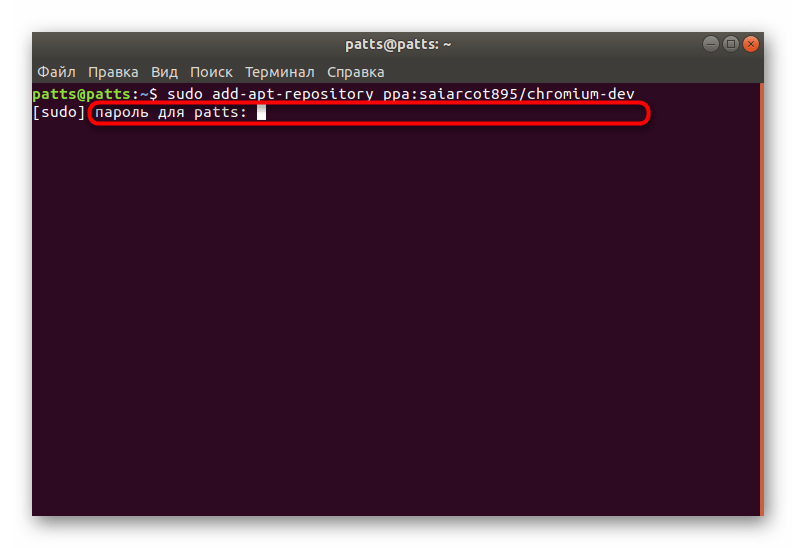
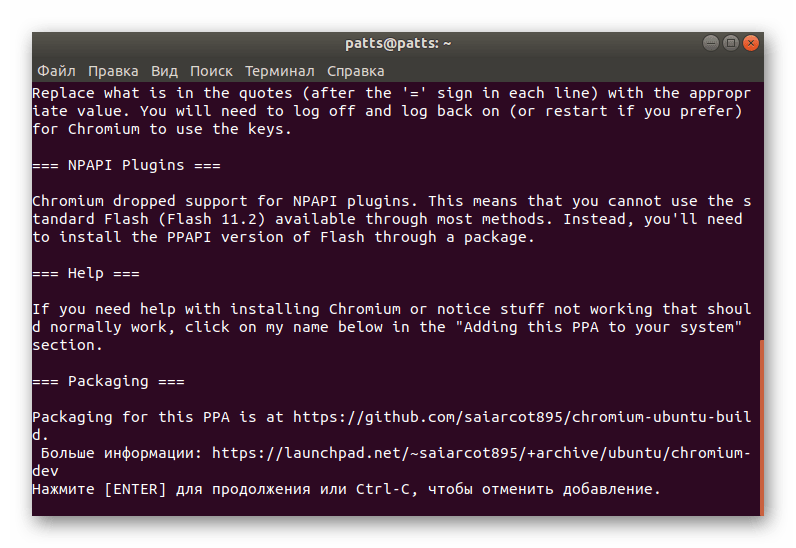
- Далее ознакомьтесь с перечнем пакетов, которые будут внесены в систему, после чего нажмите на клавишу Enter.
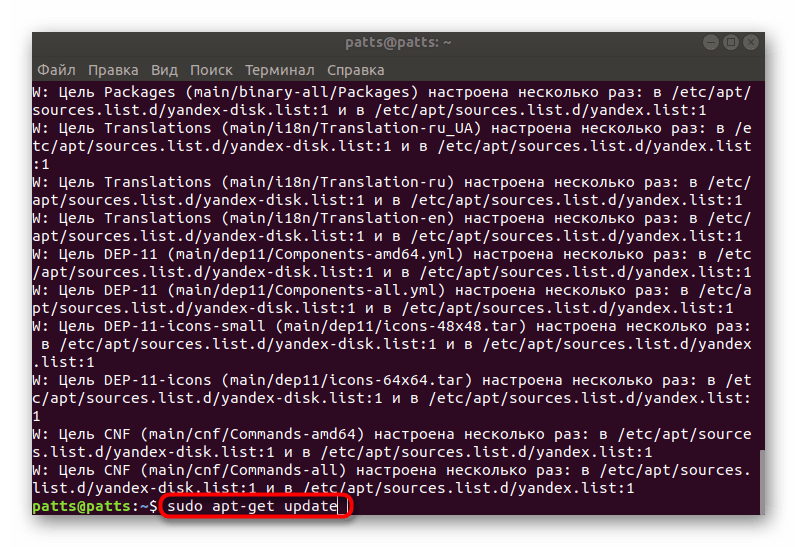
- По окончании процедуры обновите системные библиотеки: sudo apt-get update .
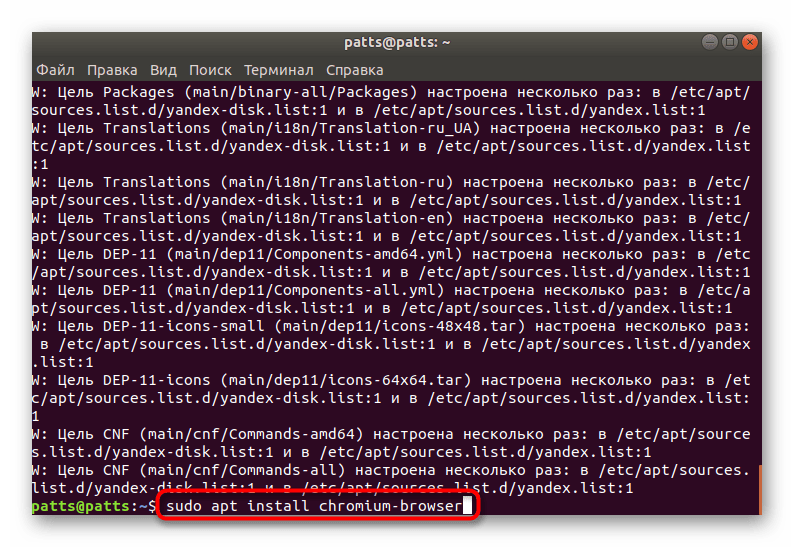
- Используйте уже знакомую команду для установки браузера из добавленного репозитория sudo apt install chromium-browser .
- Примите добавление новых компонентов, выбрав вариант Д.

- После инсталляции загляните в меню приложений. Там должен быть добавлен новый значок, через который и осуществляется запуск браузера.
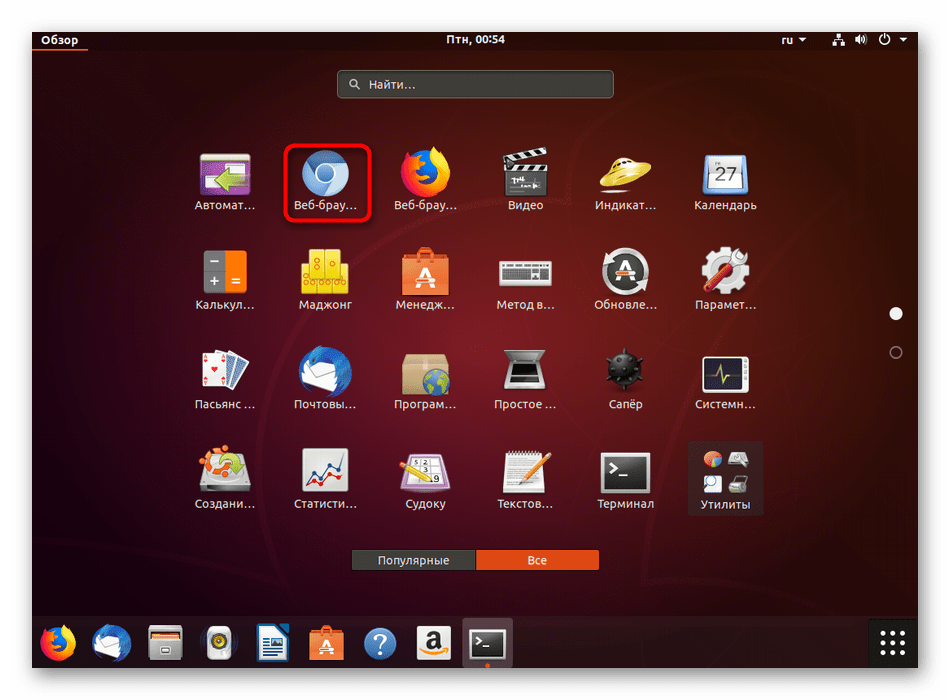
RedHat, CentOS и Fedora
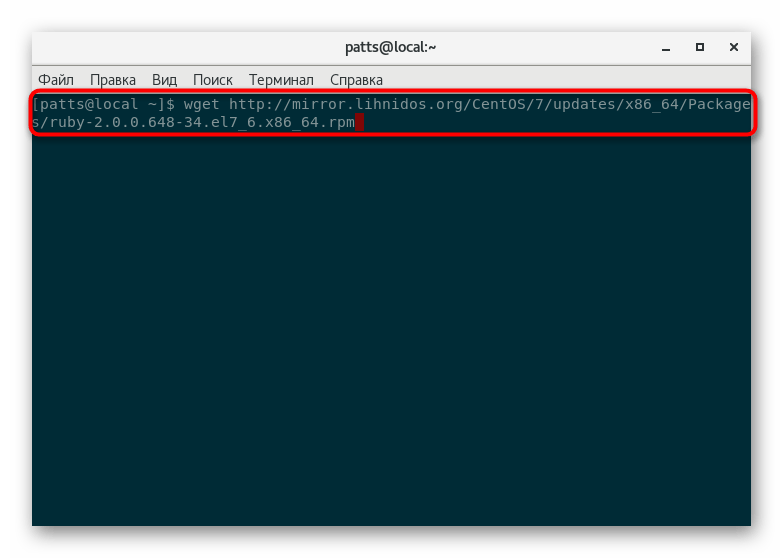
- За пример хотелось бы взять компоненты языка программирования Ruby. Сначала на сайте вам нужно отыскать подходящий пакет, а далее в консоли ввести примерно такой адрес wget http://mirror.lihnidos.org/CentOS/7/updates/x86_64/Packages/ruby-2.0.0.648-34.el7_6.x86_64.rpm . Ссылка будет меняться в зависимости от того, какой репозиторий вы используете. После ввода активируйте команду.
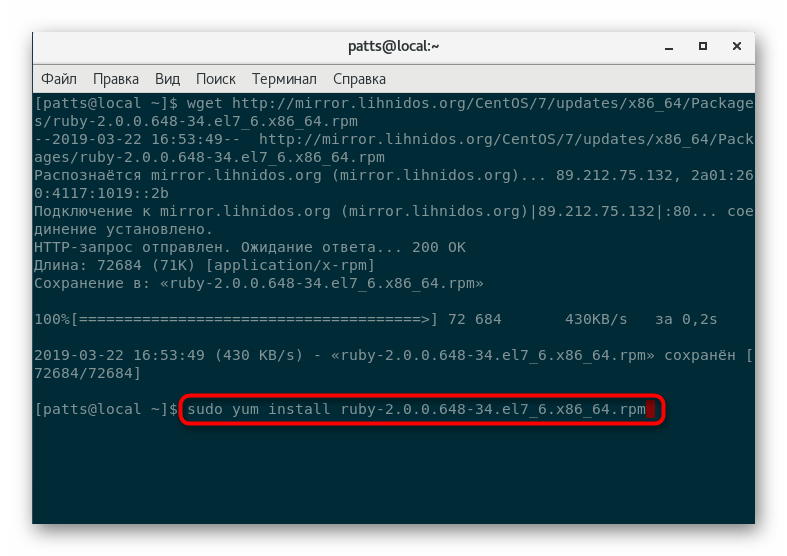
- Далее на компьютер будет загружен пакет, останется только установить его привычным образом, поэтому укажите sudo yum install + name_package .
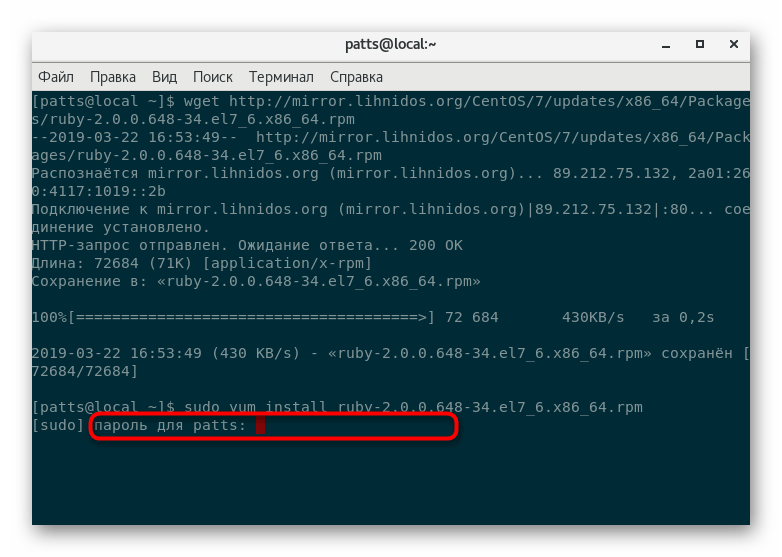
- Активируйте рут-доступ путем ввода пароля от главной учетной записи.
- Ожидайте завершения проверки сценариев и совместимостей.
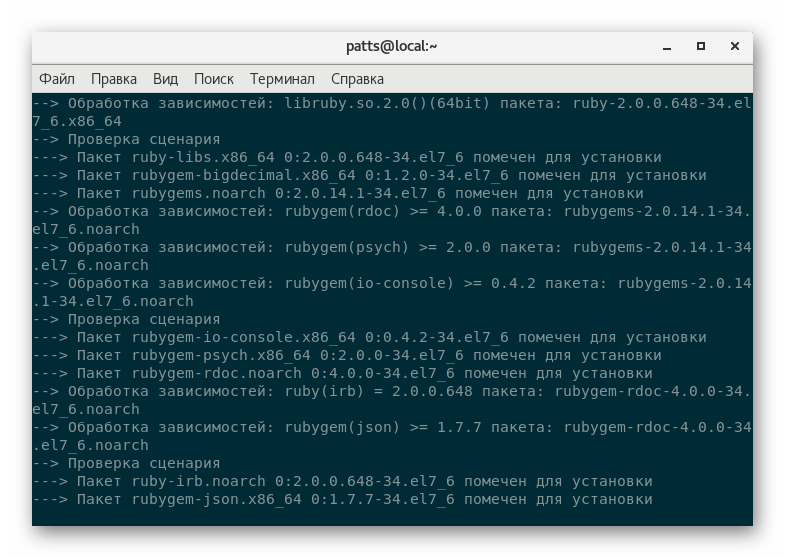
- Подтвердите установку, выбрав подходящий вариант.

Arch, Chakra, Manjaro
- Первоочередно загрузите найденный пакет в домашнюю папку через curl -L -O https://dl.discordapp.net/apps/linux/0.0.9/discord-0.0.9.tar.gz . Ссылка на скачивание архива TAR.GZ всегда указывается на странице программы при просмотре сайта AUR.

- Распакуйте скачанный файл в ту же папку с помощью tar -xvf discord-0.0.9.tar.gz , где discord-0.0.9.tar.gz — название необходимой директории.

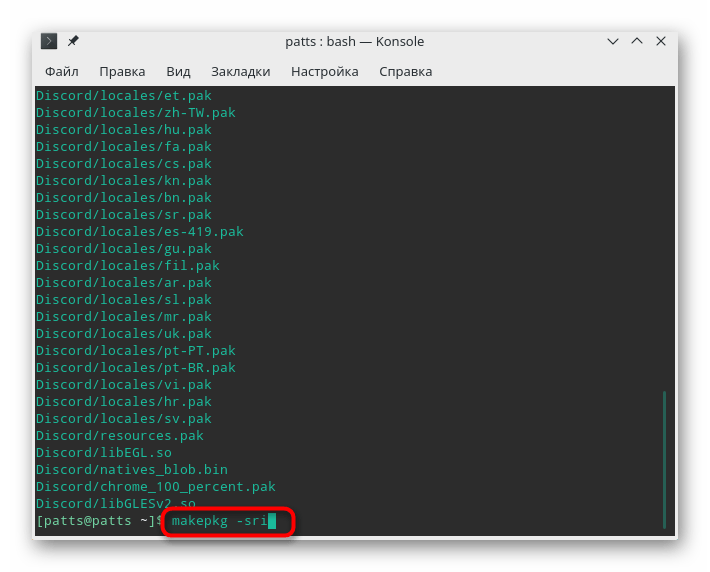
- Используйте утилиту makepkg -sri , чтобы собрать и сразу же установить программу. По завершении этой процедуры можно будет переходить к работе с софтом.
Способ 3: Установка DEB-пакетов
RedHat, CentOS и Fedora
- Установите утилиту для конвертирования через yum install alien .

- Запустите процесс преобразования, введя sudo alien —to-rpm package.deb , где package.deb — название необходимого пакета.
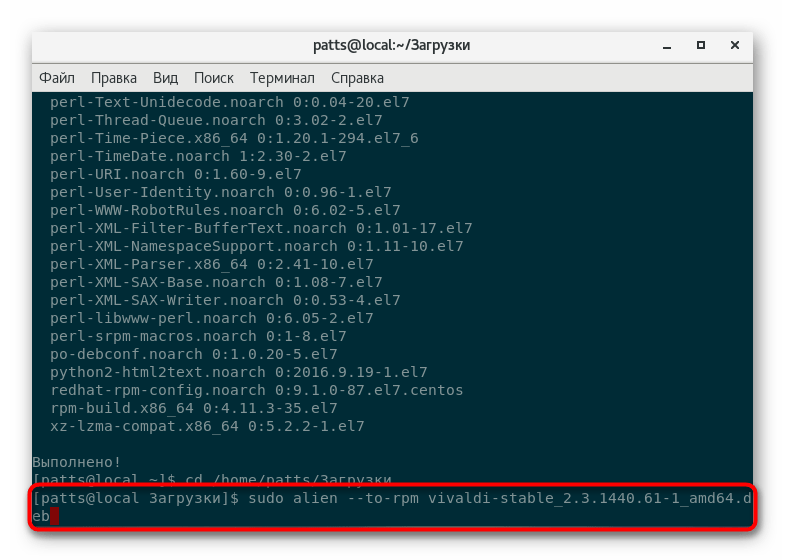
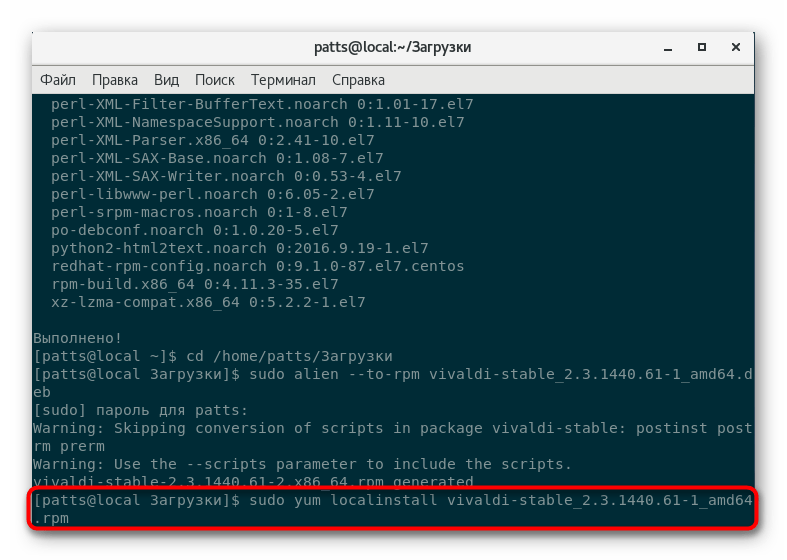
- По завершении конвертирования новый пакет будет сохранен в ту же папку и его останется только распаковать через sudo yum localinstall package.rpm , где package.rpm — название того же файла, но только теперь формата RPM.
Arch Linux, Chakra, Manjaro
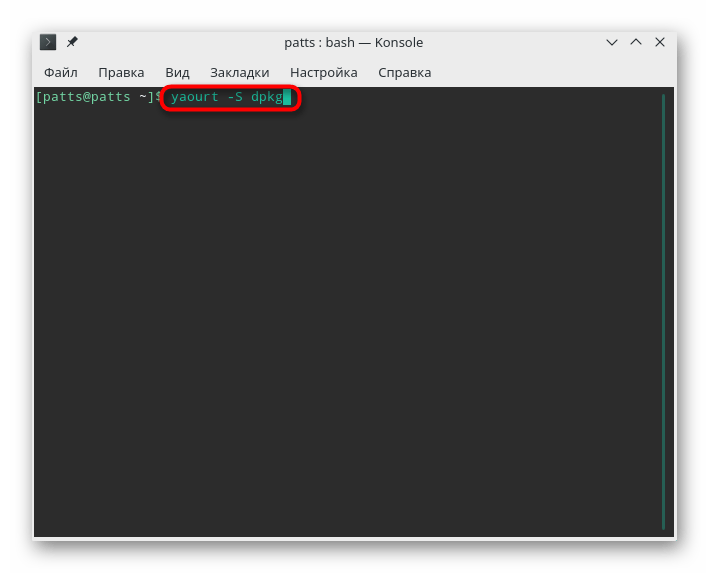
- Для скачивания и установки утилиты используйте yaourt -S dpkg .
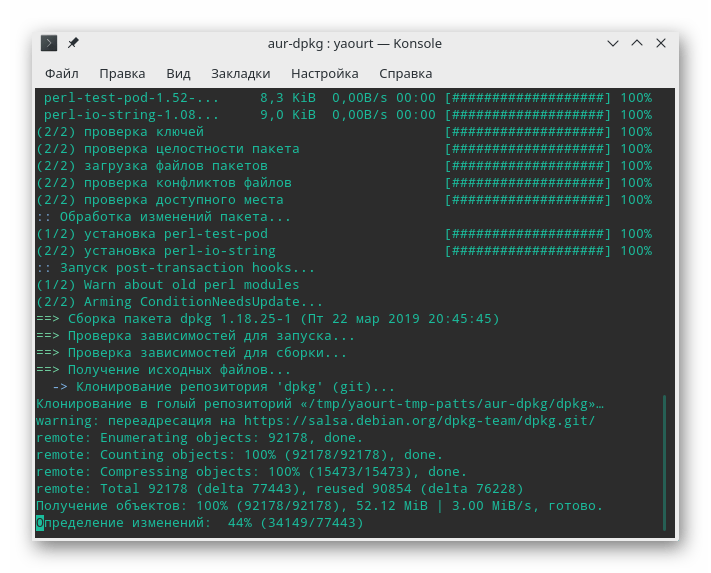
- Во время добавления нужно будет несколько раз подтвердить добавление новых объектов и ввести пароль суперпользователя.
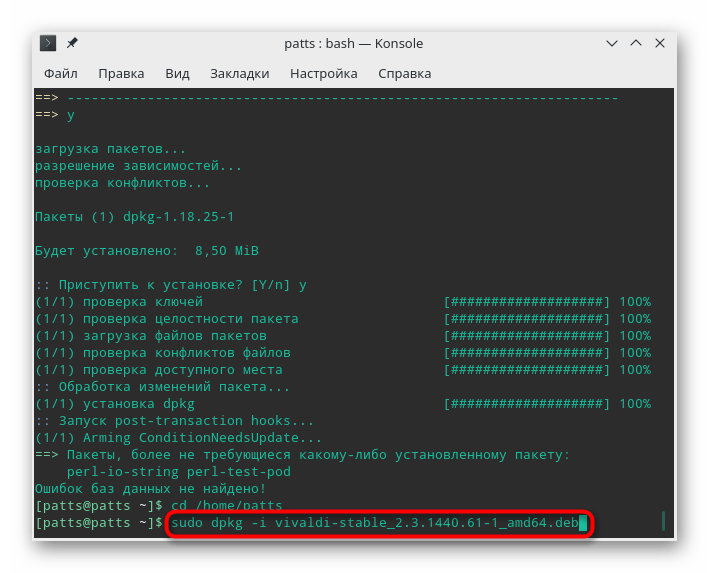
- Осталось только указать sudo dpkg -i name_package.deb и дождаться окончания распаковки. Во время инсталляции на экране может появиться предупреждение об отсутствии некоторых зависимостей, но это не помешает в дальнейшем программе работать корректно.
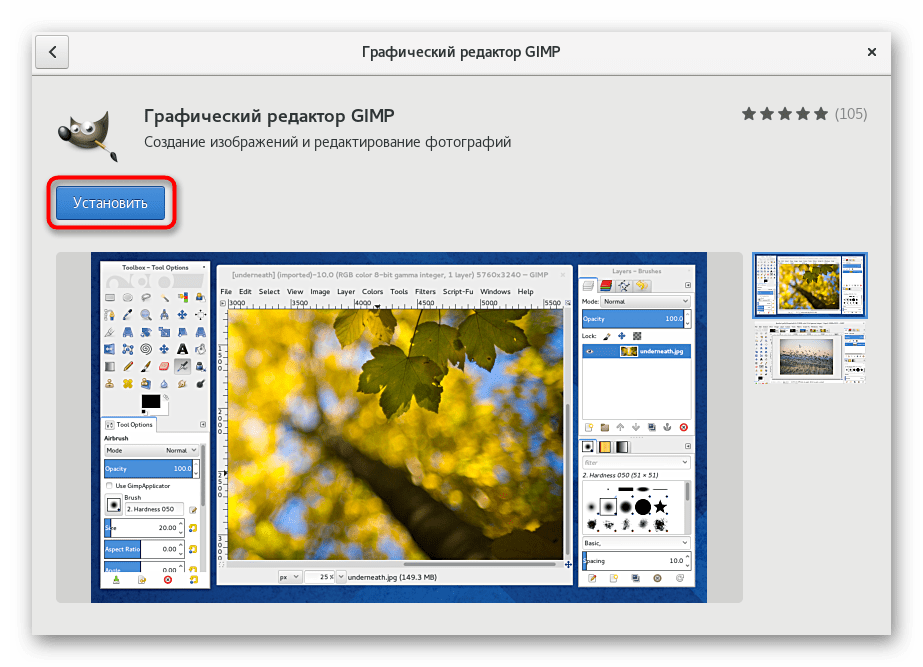
Способ 4: Установка RPM-пакетов
Способ 5: Установка программ в архивах TAR.GZ
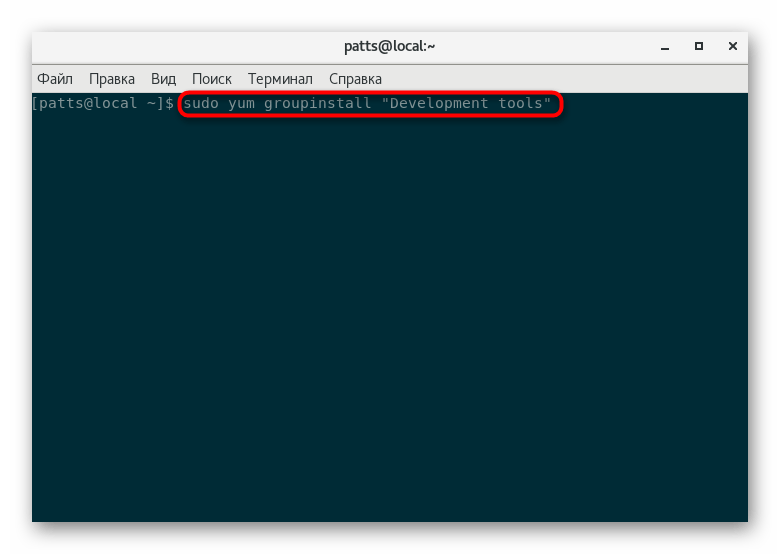
- Сначала через консоль добавьте в систему средства разработки: sudo yum groupinstall «Development tools» .
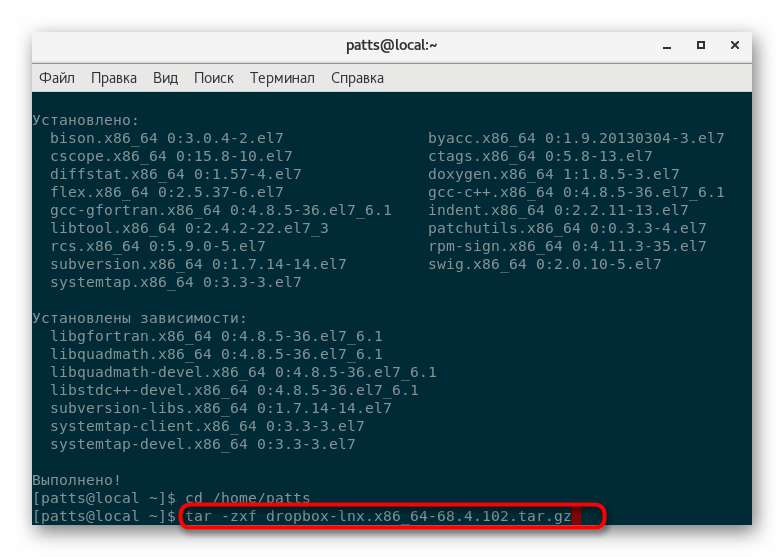
- Затем распакуйте имеющийся архив через tar -zxf archive_name.tar.gz .
- По завершении разархивации переместитесь в готовую папку через cd archive_name и выполните там поочередно такие команды:
./configure
make
sudo make install .

Как использовать AppImage в Linux [Ультимативное руководство]
![Как использовать AppImage в Linux [Ультимативное руководство]](https://images.unsplash.com/photo-1581291518633-83b4ebd1d83e?crop=entropy&cs=tinysrgb&fit=max&fm=jpg)
Что такое AppImage?
AppImage не устанавливает программное обеспечение традиционным способом.
Возможности AppImage
Как использовать AppImage в Linux
Шаг 1. Загрузите пакет .appimage
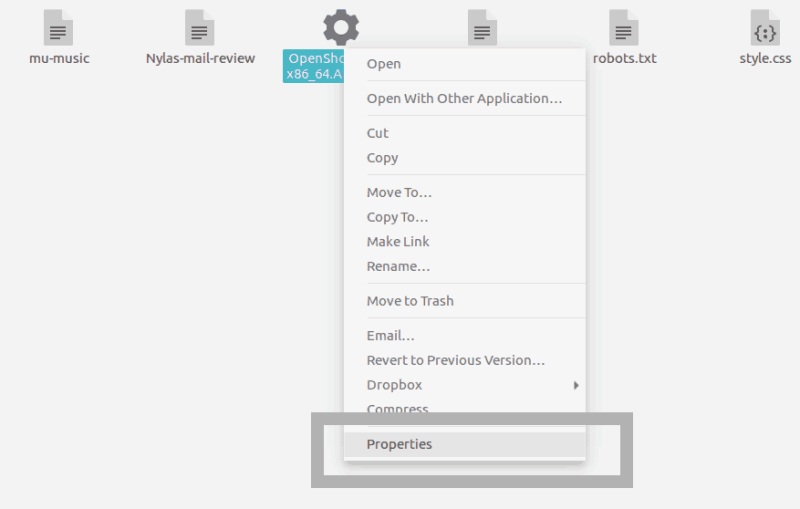
Шаг 3. Запустите файл AppImage
Как удалить программу AppImage
Что нужно помнить при использовании AppImage в Linux
/Downloads$ ./compress-pdf-v0.1-x86_64\ (1).AppImage /tmp/.mount_compreWhr2rq/check: line 3: xterm: command not found Traceback (most recent call last): File «compress-pdf_Qt.py», line 5, in from PyQt5 import QtCore, QtGui, QtWidgets ModuleNotFoundError: No module named ‘PyQt5’

Что такое appinstall linux

Как устанавливать приложения на Linux


How to install software applications on Linux
How do you install an application on Linux? As with many operating systems, there isn’t just one answer to that question. Applications can come from so many sources—it’s nearly impossible to count—and each development team may deliver their software whatever way they feel is best. Knowing how to install what you’re given is part of being a true power user of your OS.
More Linux resources
Repositories
For well over a decade, Linux has used software repositories to distribute software. A «repository» in this context is a public server hosting installable software packages. A Linux distribution provides a command, and usually a graphical interface to that command, that pulls the software from the server and installs it onto your computer. It’s such a simple concept that it has served as the model for all major cellphone operating systems and, more recently, the «app stores» of the two major closed source computer operating systems.
Installing from a software repository is the primary method of installing apps on Linux. It should be the first place you look for any application you intend to install.
To install from a software repository, there’s usually a command:
The actual command you use depends on what distribution of Linux you use. Fedora uses dnf , OpenSUSE uses zypper , Debian and Ubuntu use apt , Slackware uses sbopkg , FreeBSD uses pkg_add , and Illumos-based OpenIndiana uses pkg . Whatever you use, the incantation usually involves searching for the proper name of what you want to install, because sometimes what you call software is not its official or solitary designation:
Once you have located the name of the package you want to install, use the install subcommand to perform the actual download and automated install:
For specifics on installing from a software repository, see your distribution’s documentation.
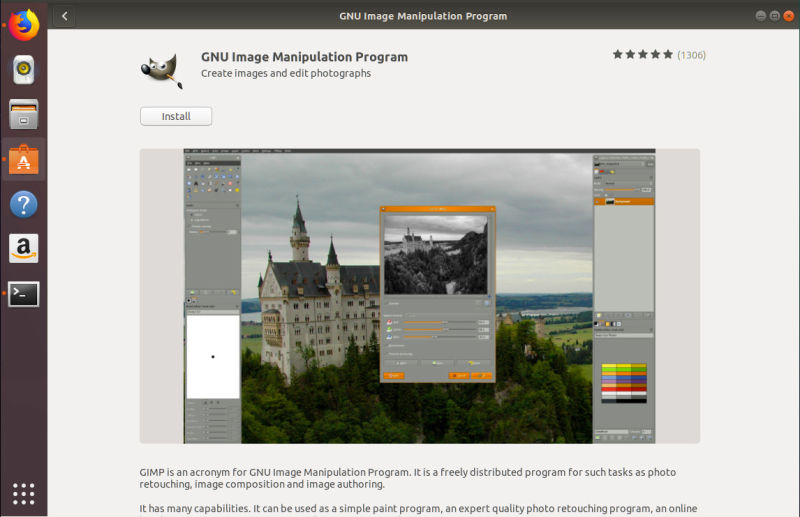
The same generally holds true with the graphical tools. Search for what you think you want, and then install it.
Like the underlying command, the name of the graphical installer depends on what distribution you are running. The relevant application is usually tagged with the software or package keywords, so search your launcher or menu for those terms, and you’ll find what you need. Since open source is all about user choice, if you don’t like the graphical user interface (GUI) that your distribution provides, there may be an alternative that you can install. And now you know how to do that.
Extra repositories
Your distribution has its standard repository for software that it packages for you, and there are usually extra repositories common to your distribution. For example, EPEL serves Red Hat Enterprise Linux and CentOS, RPMFusion serves Fedora, Ubuntu has various levels of support as well as a Personal Package Archive (PPA) network, Packman provides extra software for OpenSUSE, and SlackBuilds.org provides community build scripts for Slackware.
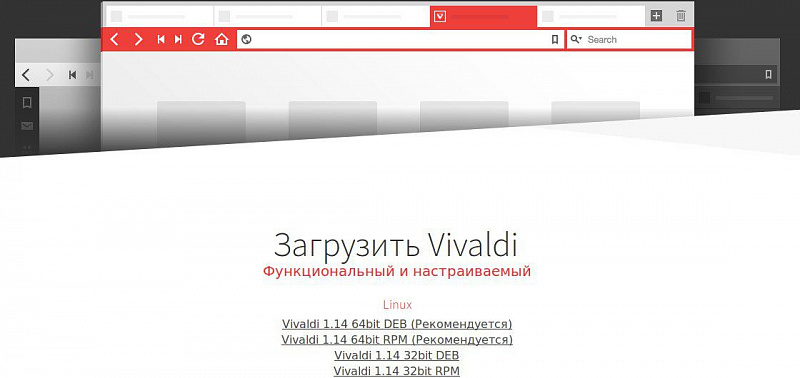
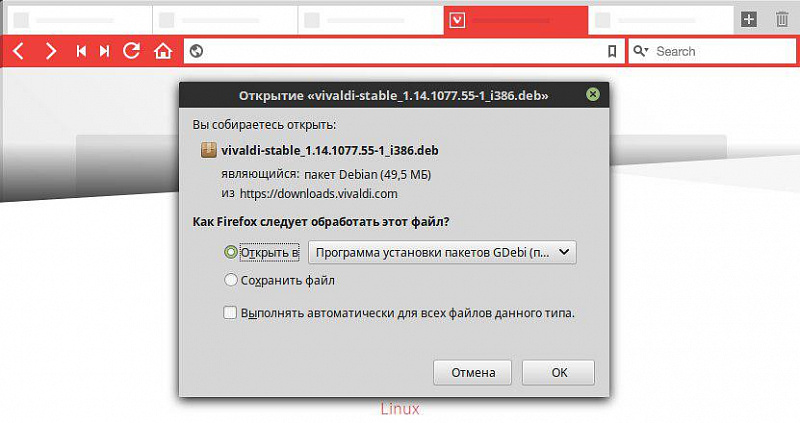
By default, your Linux OS is set to look at just its official repositories, so if you want to use additional software collections, you must add extra repositories yourself. You can usually install a repository as though it were a software package. In fact, when you install certain software, such as GNU Ring video chat, the Vivaldi web browser, Google Chrome, and many others, what you are actually installing is access to their private repositories, from which the latest version of their application is installed to your machine.
You can also add the repository manually by editing a text file and adding it to your package manager’s configuration directory, or by running a command to install the repository. As usual, the exact command you use depends on the distribution you are running; for example, here is a dnf command that adds a repository to the system:
Installing apps without repositories
The repository model is so popular because it provides a link between the user (you) and the developer. When important updates are released, your system kindly prompts you to accept the updates, and you can accept them all from one centralized location.
Sometimes, though, there are times when a package is made available with no repository attached. These installable packages come in several forms.
Linux packages
Sometimes, a developer distributes software in a common Linux packaging format, such as RPM, DEB, or the newer but very popular FlatPak or Snap formats. You make not get access to a repository with this download; you might just get the package.
The video editor Lightworks, for example, provides a .deb file for APT users and an .rpm file for RPM users. When you want to update, you return to the website and download the latest appropriate file.
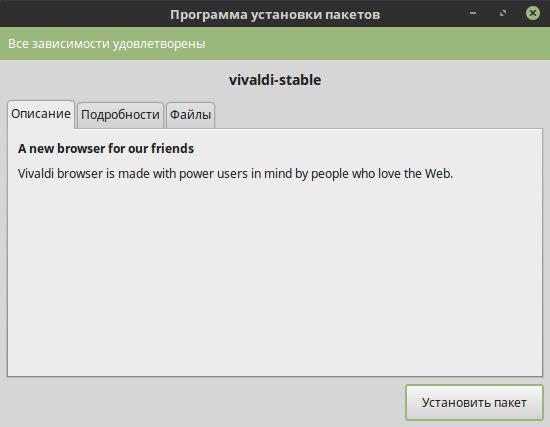
These one-off packages can be installed with all the same tools used when installing from a repository. If you double-click the package you download, a graphical installer launches and steps you through the install process.
Alternately, you can install from a terminal. The difference here is that a lone package file you’ve downloaded from the internet isn’t coming from a repository. It’s a «local» install, meaning your package management software doesn’t need to download it to install it. Most package managers handle this transparently:
In some cases, you need to take additional steps to get the application to run, so carefully read the documentation about the software you’re installing.
Generic install scripts
Some developers release their packages in one of several generic formats. Common extensions include .run and .sh . NVIDIA graphic card drivers, Foundry visual FX packages like Nuke and Mari, and many DRM-free games from GOG use this style of installer.
This model of installation relies on the developer to deliver an installation «wizard.» Some of the installers are graphical, while others just run in a terminal.
There are two ways to run these types of installers.
- You can run the installer directly from a terminal:
- Alternately, you can run it from your desktop by marking it as executable. To mark an installer executable, right-click on its icon and select Properties.
Once you’ve given permission for it to run, double-click the icon to start the install.
For the rest of the install, just follow the instructions on the screen.
AppImage portable apps
The AppImage format is relatively new to Linux, although its concept is based on both NeXT and Rox. The idea is simple: everything required to run an application is placed into one directory, and then that directory is treated as an «app.» To run the application, you just double-click the icon, and it runs. There’s no need or expectation that the application is installed in the traditional sense; it just runs from wherever you have it lying around on your hard drive.
Despite its ability to run as a self-contained app, an AppImage usually offers to do some soft system integration.
If you accept this offer, a local .desktop file is installed to your home directory. A .desktop file is a small configuration file used by the Applications menu and mimetype system of a Linux desktop. Essentially, placing the desktop config file in your home directory’s application list «installs» the application without actually installing it. You get all the benefits of having installed something, and the benefits of being able to run something locally, as a «portable app.»
Application directory
Sometimes, a developer just compiles an application and posts the result as a download, with no install script and no packaging. Usually, this means that you download a TAR file, extract it, and then double-click the executable file (it’s usually the one with the name of the software you downloaded).
When presented with this style of software delivery, you can either leave it where you downloaded it and launch it manually when you need it, or you can do a quick and dirty install yourself. This involves two simple steps:
- Save the directory to a standard location and launch it manually when you need it.
- Save the directory to a standard location and create a .desktop file to integrate it into your system.
If you’re just installing applications for yourself, it’s traditional to keep a bin directory (short for «binary») in your home directory as a storage location for locally installed applications and scripts. If you have other users on your system who need access to the applications, it’s traditional to place the binaries in /opt . Ultimately, it’s up to you where you store the application.
Downloads often come in directories with versioned names, such as twine_2.13 or pcgen-v6.07.04 . Since it’s reasonable to assume you’ll update the application at some point, it’s a good idea to either remove the version number or to create a symlink to the directory. This way, the launcher that you create for the application can remain the same, even though you update the application itself.
To create a .desktop launcher file, open a text editor and create a file called twine.desktop . The Desktop Entry Specification is defined by FreeDesktop.org. Here is a simple launcher for a game development IDE called Twine, installed to the system-wide /opt directory:
The tricky line is the Exec line. It must contain a valid command to start the application. Usually, it’s just the full path to the thing you downloaded, but in some cases, it’s something more complex. For example, a Java application might need to be launched as an argument to Java itself:
Sometimes, a project includes a wrapper script that you can run so you don’t have to figure out the right command:
In the Twine example, there’s no icon bundled with the download, so the example .desktop file assigns a generic gaming icon that shipped with the KDE desktop. You can use workarounds like that, but if you’re more artistic, you can just create your own icon, or you can search the Internet for a good icon. As long as the Icon line points to a valid PNG or SVG file, your application will inherit the icon.
The example script also sets the application category primarily to Development, so in KDE, GNOME, and most other Application menus, Twine appears under the Development category.
To get this example to appear in an Application menu, place the twine.desktop file into one of two places:
And now the application is installed as it needs to be and integrated with the rest of your system.
Compiling from source
Finally, there’s the truly universal install format: source code. Compiling an application from source code is a great way to learn how applications are structured, how they interact with your system, and how they can be customized. It’s by no means a push-button process, though. It requires a build environment, it usually involves installing dependency libraries and header files, and sometimes a little bit of debugging.
To learn more about compiling from source code, read my article on the topic.
Now you know
Some people think installing software is a magical process that only developers understand, or they think it «activates» an application, as if the binary executable file isn’t valid until it has been «installed.» Hopefully, learning about the many different methods of installing has shown you that install is really just shorthand for «copying files from one place to the appropriate places on your system.» There’s nothing mysterious about it. As long as you approach each install without expectations of how it’s supposed to happen, and instead look for what the developer has set up as the install process, it’s generally easy, even if it is different from what you’re used to.
The important thing is that an installer is honest with you. If you come across an installer that attempts to install additional software without your consent (or maybe it asks for consent, but in a confusing or misleading way), or that attempts to run checks on your system for no apparent reason, then don’t continue an install.
Good software is flexible, honest, and open. And now you know how to get good software onto your computer.