MCP что это в компьютере?
 Всем привет MCP, вот где вы это увидели? Честно, я не знаю где увидели вы это, но вот я это видел только в программах, которые измеряют температуру компа. Вот там есть такое как MCP. И вот мне всегда было интересно, вот что это такое? Если слово MCP расшифровать, то будет такая фраза как Media and Communications Processor, что означает чипсет материнской платы и таки да, он греется!
Но какая нормальная температура MCP? Ну, нормальная я думаю это в районе 50 градусов и ниже, а вот если у вас 60-70, то это означает что чипсет просит охлаждения! Лучше повесить сверху какой-то вентиляторчик, запитать его 5-тьма вольтами и он будет тихо работать и чипсет греться не будет!
Вот еще узнал что чипсеты nForce сильнее греются остальных, из-за этого может отойти пайка, может чип тупо перегореть ну и плата вообще может полететь. Но блин, какой у меня чипсет я уже не помню, но знаю что температура его в районе 30-40 градусов, в принципе считаю это нормой.
Вот где чипсет размещается, примерно вот в этой области:

Ну это старая материнка, но на новых примерно в том же месте. Вот только видите, на картинке выше, то там НЕТ РАДИАТОРА, а на других материнках он есть! То есть где-то есть, где-то нет, но если чип любит греться, что радиатор обычно таки ставят. Но если поставить сверху вентиляторчик то будет вообще супер
Да и вообще я в этой инфе НЕ УВЕРЕН, но НАПИШУ: вроде бы MCP относится только к тем материнкам, у которых есть чипсет nForce, а это от фирмы NVIDIA. Вот как сам чипсет выглядит, это кстати nForce 2:

Ну только он тут не на материнке конечно, а так бы сказать отдельно
Вот на этой материнке точно чипсет от nVidia, тут без вопросов:

Кстати материнка вот эта, то она занесена в красную книгу так бы сказать, ибо редкая оч и старая оч и вообще на тот момент это была РОСКОШЬ! Это топовая материнка под названием Chaintech 7NJS, фирму такую я не знаю даже, да и вообще таких материнок было не оч много! Материнка была под AMD и стоила прилично денег! Эх, ностальгия блина! Я нашел в сети кое что, это комплект этой материнки, ну извините я уже достал вас наверно, но мне так понравился комплект, что я хочу показать его и вам, смотрите:

Ребята, это просто БОГАТСТВО…… Эх, мне бы такую материнку подарили в то время… Ну в какое время то? Ну а я скажу, это примерно нууу около 14 лет назад была материнка такая, а сейчас 2017-тый идет! Комплектация просто божественная на то время! Это просто НЕТ СЛОВ.
Так, ладно, что-то я увлекся. Все ребята, будем заканчивать, надеюсь что вам тут все было понятно, коль что не так, то не ругайте. Удачи вам ну и буду рад вас видеть у себя снова
How to Fix McpManagementService Error on Windows 11
Some Windows 11 users have discovered that one service (McPManagementService) is currently not functioning and displays a ‘failed to read description error (error code: 15100)’. Aside from this error message, this problem doesn’t seem to produce any additional effects. This type of problem is only reported to occur on Windows 11.
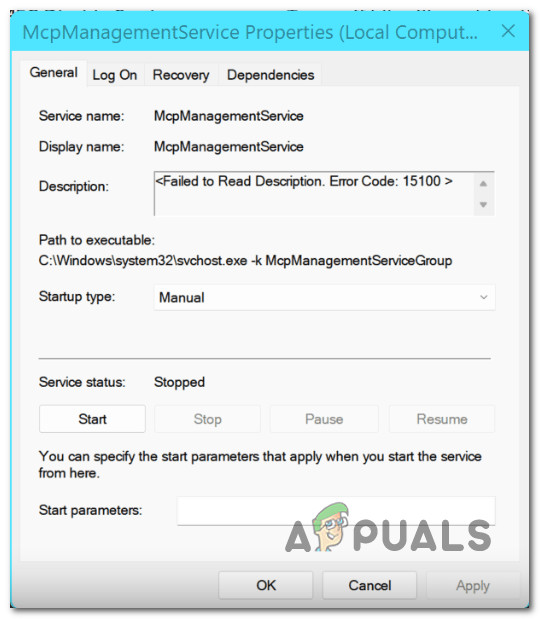 McpManagementService
After we’ve investigated this particular issue thoroughly, it turns out that there are several different scenarios that might cause this type of problem on Windows 11. Here’s a list of potential culprits that you should be aware of:
- Interference is caused by devicecensus.exe – As it turns out, one of the most common instances, where you will encounter this problem, is when the devicecensus.exe process is actually causing the problem by indirectly creating a TaskSkill argument. In this case, you can get the issue fixed by running an elevated Command Prompt or Powershell command.
- Missing or Corrupted Microsoft C++ Visual Redist Packages – According to several affected users, this type of problem is also encountered when a key dependency of McPManagementService is actually missing (or corrupted). To fix this problem, make sure you install every relevant Microsoft C++ Visual Redist. Packages.
- Malware or spyware infection – You should not disregard a potential malware or spyware interference from the culprit’s list. To make sure this is not the case, deploy a deep virus scan with a capable tool like Malwarebytes in order to deal with a potential case of virus infection.
- Recent system change – There are a lot of potential 3rd party interference cases where you will suddenly notice this error after a new driver or feature update was installed. If you don’t want to figure out the culprit yourself, an easy and quick way to fix it is to use System Restore to revert your PC back to a state in which this problem was not occurring.
- System file corruption – One of the most common instances where you will get constant errors pointing towards the McPManagementService service is some type of system file corruption that affects the service. In this case, start with SFC and DISM scans and progress towards a clean install or repair install procedure if the issue persists.
Now that we went over every potential cause of this error, let’s go over every confirmed fix that other users have successfully used and see which one of them makes a difference in your case.
1. Kill the DeviceCensus.exe process
It turns out that one of the situations, when you will run into this issue most frequently, is when the devicecensus.exe process is at the root of the issue by unintentionally creating a TaskSkill argument. In this situation, performing a Powershell or elevated Command Prompt command will resolve the problem.
Several affected users have confirmed that once they did this (either from Command Prompt or Powershell) the problem was resolved and no new instances of the McPManagementService-related error.
You can kill the responsible DeviceCensus.exe process in one of two ways:
1.1. Via Powershell
If you want to use Powershell, you need to open up an elevated terminal with admin access:
- Press Windows key + R to open up a Run dialog box. Next, type ‘powershell’ inside the text box and press Ctrl + Shift + Enter to open up an elevated Powershell window.
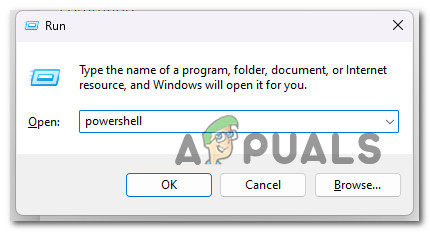 Access the Powershell window
 - When you’re prompted by the User Account Control (UAC), click Yes to grant admin access.
- Once you’re inside the elevated Powershell window, type the following command to kill the devicecensus.exe process:
1.2. Via CMD
If you decide to use CMD, make sure you open an elevated window otherwise the command below won’t work:
- Press Windows key + R to open up a Run dialog box. Next, type ‘CMD’ inside the text box and press Ctrl + Shift + Enter to open up an elevated Powershell window.
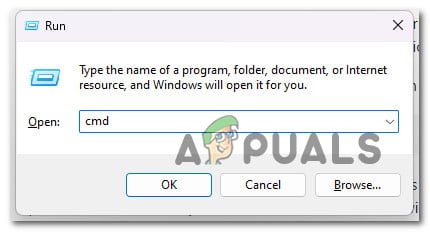 Open up the Command Prompt
 - When you’re prompted by the User Account Control (UAC), click Yes to grant admin access.
- Once you’re inside the elevated CMD window, type the following command to kill the devicecensus.exe process:
If the same problem is still occurring and you still see new errors related to the McPManagementService despite following the instructions above, move down to the next method below.
2. Reinstall Microsoft C++ Visual Redist. Packages
This type of issue, according to multiple impacted users, can also arise when a crucial McPManagementService dependency is genuinely missing (or corrupted). Make sure to install the necessary Microsoft C++ Visual Redist packages in order to resolve this issue.
Remember that Windows 11 doesn’t actually ship with these dependencies set up since only older games and applications still make use of them.
After installing both the x86 and x64 versions of the Visual Studio 2013 redist releases, a number of users who were experiencing the McPManagementService error reported that the issue was finally resolved.
Downloading and installing the most recent packages from the Microsoft website will allow you to verify that.
The methods to carry out this and install the lacking Visual C++ requirements on your machine are as follows:
-
To get started, go to the official Microsoft website and download the Visual C++ x86 and x64 packages.
When center-aligned, the Obtain the lacking Redist executables.
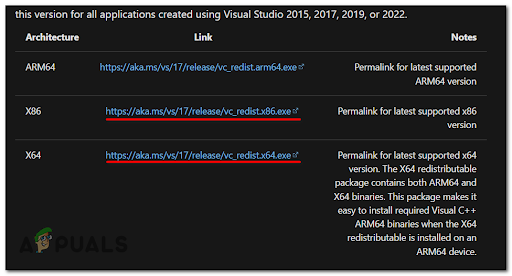 Download the missing redist packages
Move on to the next probable solution below if this method wasn’t successful in your situation or if you already had all the necessary Visual C++ dependencies.
3. Deploy an antispyware scan
A possible virus or spyware intrusion from the list of offenders should not be disregarded. Apply a thorough virus scan using a powerful program like Malwarebytes to deal with a potential virus infection to make sure this is not the case.
Malware that has accessed your system and is consuming all of your CPU resources may be the cause of this problem. You can resolve the problem in this instance by running a full Malwarebytes scan to get rid of the virus infestation.
Ironically, the failure of some services, such as the McpManagementService, might also be a sign of a virus infection.
In other instances, the McpManagementService can potentially be malware masquerading as a legitimate system process and seeking to access system resources.
To make sure that this is not the case, you should perform a comprehensive scan using a reliable anti-malware tool. There are other ways to go about doing this, but since Malwarebytes is one of the most potent security scanners and works equally well on malware and adware, we recommend utilizing it.
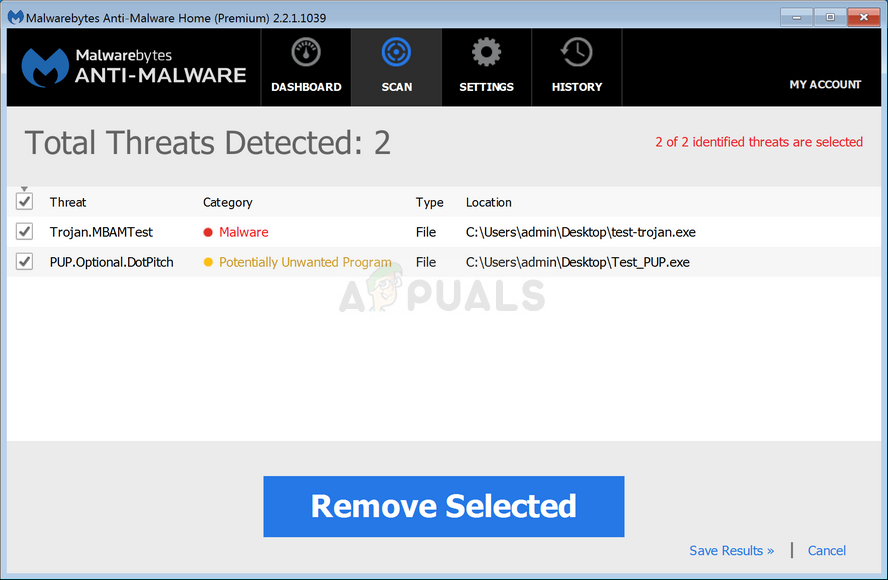 Malwarebytes
Open Event Viewer to check if there are any new instances of the McpManagementService error.
If the same type of issue continues, proceed to the next procedure stated below.
4. Perform SFC and DISM scans
If none of the aforementioned fixes for the McPManagementService error have worked for you, the next step is to conduct a system corruption issue investigation.
By promptly running SFC (System File Checker) and DISM (Deployment Image Servicing and Management) scans, the vast majority of likely issues that could be the root of this error code can be resolved.
Although the two built-in tools are roughly comparable, we suggest running both types of scans fast one after the other to increase your chances of fixing the issue without having to perform a clean install or repair install.
Your initial action should be an SFC scan. This scan will use a local archive to replace corrupt Windows files with healthy ones, so there is NO need for an Internet connection.
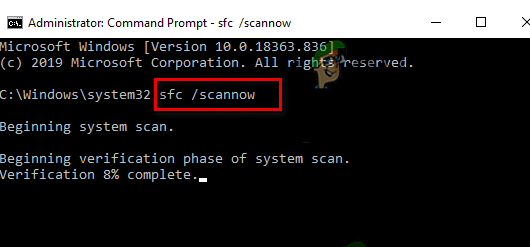 Deploying an SFC scan
After starting this process, refrain from resuming, turning off, or closing the elevated CMD window.
By doing this, there is a potential that your PC’s HDD or SSD would suffer from further local issues.
After the SFC scan is finished, restart your computer, and when it comes back up, begin a DISM scan.
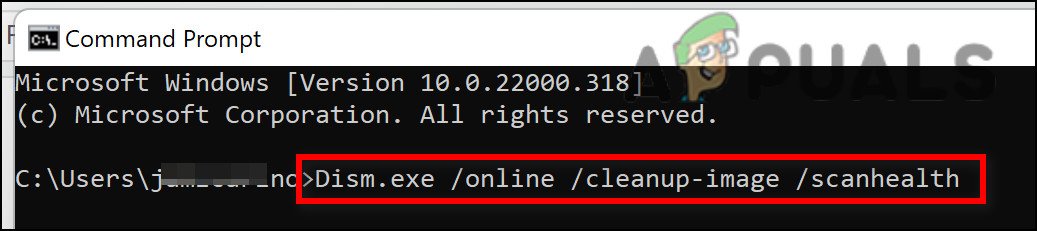 Deploying a DISM scan
Notably, DISM requires a constant Internet connection in order to replace damaged files with their healthy equivalents, unlike an SFC check. This is necessary because, unlike SFC, which uses a local file archive, DISM gets brand-new copies that are free of corruption from a feature of Windows Update.
After the DISM scan is complete, restart your computer once more to determine if the problem has been fixed.
If the problem is still there, move on to the next potential fix below.
5. Use System Restore
When a new driver or feature update was installed, there are many possible instances of third-party intervention where you would suddenly discover this issue. Use System Restore to return your PC to a time when this issue was not present if you don’t want to investigate the cause further. This is a simple and quick cure.
You can roll back your computer to a previous system restore point if you’ve exhausted all other options to undo a system alteration that is resulting in the McPManagementService. This has helped several users find a solution to the problem.
You can restore your computer to a previous state using the Windows System Restore feature. This can be applied to resolve issues like broken systems.
To get your computer back in working order, follow these steps:
- To launch the Run command, press the Windows key + R.
- To launch the System Restore wizard, type “rstrui” in the Run box and press Enter.
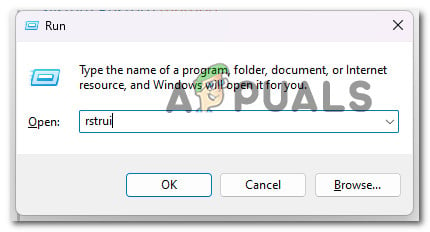 Opening the System Restore
 - Select Select a different restore point on the following screen, then press the Next button.
- Choose a restore point that was created earlier than the moment you noticed significant resource utilization, then click Next again.
 Picking the System Restore
 - After the restoration process has begun, click Finish and watch as your computer restarts.
- Restart Windows 11 to see if the problem has been fixed.
If the same kind of problem is still present, move on to the probable solution below.
6. Perform a clean install or repair install
If none of the aforementioned approaches have worked for you, the only option left is to entirely replace all of the impacted system file dependencies with healthy replacements.
At this point, your only choices are to perform a clean install or a repair install (in-place upgrade). If you encounter issues, we firmly advise selecting an in-place update (repair installation), if offered:
Отключаем потенциально опасные службы Windows
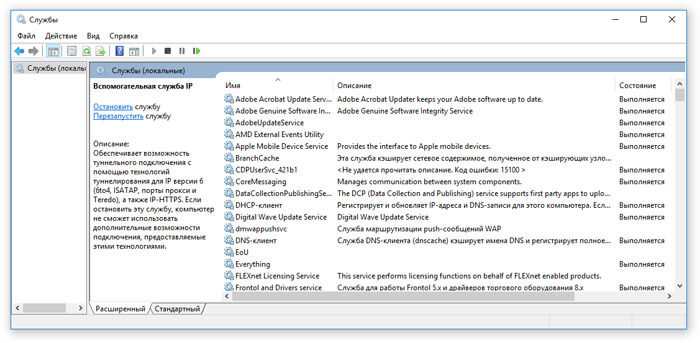
С целью обеспечения безопасности вашего компьютера необходимо отключать некоторые потенциально опасные службы Windows. Кроме того, отключение некоторых служб позволяет немного ускорить работу вашего персонального компьютера.
Где находится список служб Windows?
Открыть окно администрирования служб можно несколькими вариантами:
-
Самый быстрый способ: Пуск — Выполнить (или комбинация клавиш Win+R), вводим services.msc, затем Ок


Как отключить службы Windows?
У нас открылось окно со списком всех служб Windows. Каждая служба имеет свое название и описание, где есть информация за что служба отвечает.

Чтобы отключить службу необходимо дважды нажать на нужной службе. После чего откроется окно с настройками службы.
В открывшемся окне необходимо изменить тип запуска на «Вручную» или «Отключена».
После чего необходимо остановить службу, нажав на соответствующую кнопку «Остановить».

Какие службы Windows отключать?
Отключать службы нужно аккуратно. Убедитесь, что работа той или иной службы не требуется для функционирования каких-либо нужных вам служб, приложений или устройств.
Перед отключением службы необходимо посмотреть какие службы зависят от отключаемой. Для просмотра зависимостей необходимо зайти в настройки службы и перейти во вкладку «Зависимости». Верхний список служб — это службы от которых зависит выбранная служба, нижний — какие службы зависят от выбранной службы.
Если списки пустые, то можно смело отключать службу.

Потенциально опасные службы Windows, которые используются для внешних атак
Удаленный реестр (RemoteRegistry) — позволяет удаленным пользователям изменять параметры реестра на вашем компьютере. Если остановить службу, то реестр может быть изменен только локальными пользователями, работающими на компьютере.
Службы терминалов (TermService) — служба предназначена для удаленного подключения к компьютеру по сети. Данная служба является основной для удаленного рабочего стола, удаленного администрирования, удаленного помощника и служб терминалов.
Служба обнаружения SSDP (SSDPSRV) — служба предназначена для обнаружения UPnP-устройств в домашней сети. UPnP (Universal Plug and Play) — универсальная автоматическая настройка и подключение сетевых устройств друг к другу, в результате чего сеть может стать доступной большому числу людей.
Планировщик заданий (Shedule) — данная служба позволяет настраивать расписание автоматического выполнения задач на компьютере. Автоматически запускает различные программы, скрипты и т. п. в запланированное время. Часто используется вирусами для автозагрузки или для отложенного выполнения. Многие легальные программы используют данную службу для своей работы, например антивирусы для ежедневного обновления антивирусных баз. Посмотреть список заданий можно тут: Пуск — Программы — Стандартные — Служебные — Назначенные задания.
Диспетчер сеанса справки для удаленного рабочего стола (Remote Desktop Help Session Manager) — служба управляет возможностями Удаленного помощника.
Telnet (Telnet) — позволяет удаленному пользователю входить и запускать программы, поддерживает различные клиенты TCP/IP Telnet, включая компьютеры с операционными системами Unix и Windows. Обеспечивает возможность соединения и удалённой работы в системе по протоколу Telnet (Teletype Network) с помощью командного интерпретатора. Данный протокол не использует шифрование и поэтому очень уязвим для атак при применении его в сети. Если эта служба остановлена, то удаленный пользователь не сможет запускать программы.
Вторичный вход в систему (Seclogon) — служба позволяет запускать процессы от имени другого пользователя.
How to fix McpManagementService error code 15100 in Windows?
Issue: How to fix McpManagementService error code 15100 in Windows?
Hello, I have been having some problems with my Windows recently and noticed that there's an error under the McpManagementService which says “Failed to read description, Error Code: 1510.” Could you please advise on how to resolve this? Thanks in advance.
- 1. Check the system for corruption
- 2. Shut down the DeviceCensus.exe process
- 3. Try using security software
- 4. Reinstall Microsoft Visual C++ Redistributable
- Protect your online privacy with a VPN client
- Data recovery tools can prevent permanent file loss
- References
Windows is an intricate operating system, and for it to work as intended, thousands of components are implemented. Windows Services is one such part that is considered to be integral – dozens of them come pre-installed with the operating system itself. Some of the services might also be implemented by third-party software or even malware to help with its operation whenever the computer is active.
Services run in the background, and, depending on their settings, some launch immediately after the operating system is booted. For example, the Windows Update service enables the detection, download, and installation of updates, and if it is not running, users would be able to update their systems automatically.
Users can change these settings and startup types if they require to. However, just like any other components, these ones can malfunction as well, and many users were recently complaining about the McpManagementService service, which comes up with error code 15100.
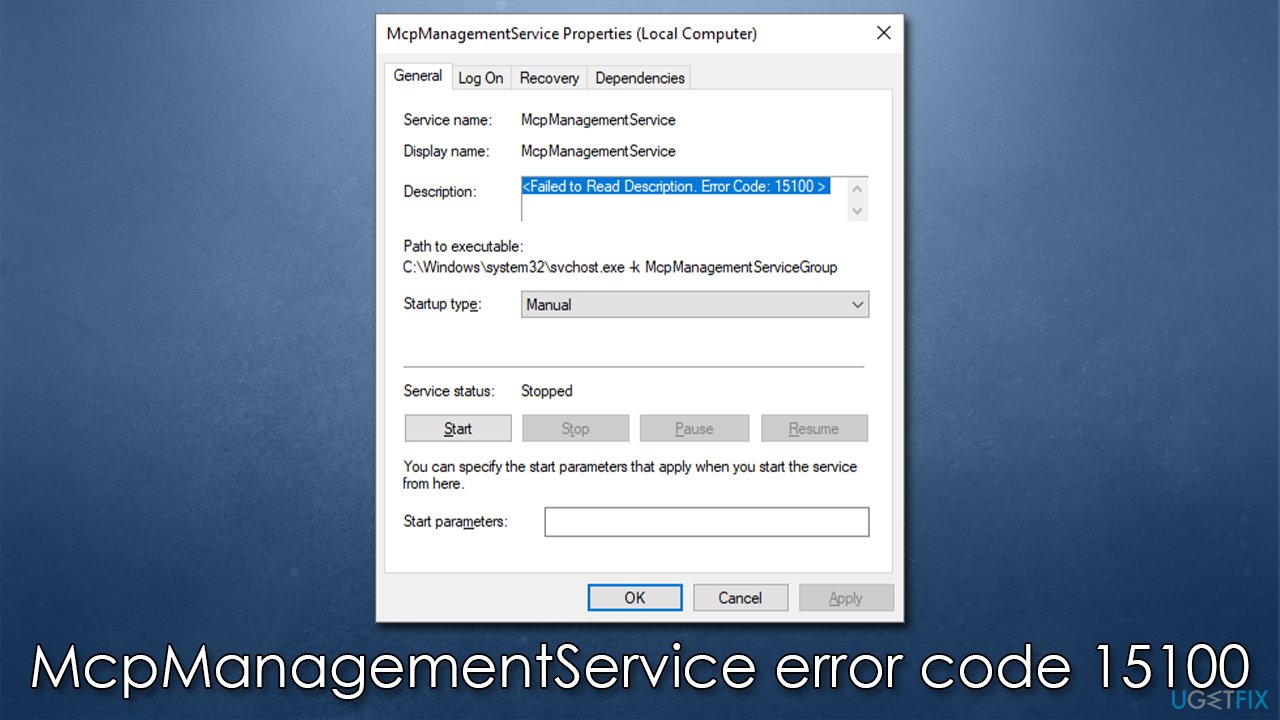
The message can be seen in the Description part of the Services window, and it reads, “Failed to read description, Error Code: 15100.” While it usually doesn't cause any issues with the normal OS functions, some users claimed that they had issues with certain Windows features (such as audio), and the error was preventing them from finding a resolution.
In this article, we will show several steps that should help you fix the error on Windows platforms. Before you proceed, we recommend you run a scan with Reimage Mac Washing Machine X9 – an automatic PC repair software that can find and repair underlying issues quickly and effectively, resulting in the resolution of BSODs, [1] DLL errors, registry corruption, and similar. Otherwise, proceed with the solutions below.
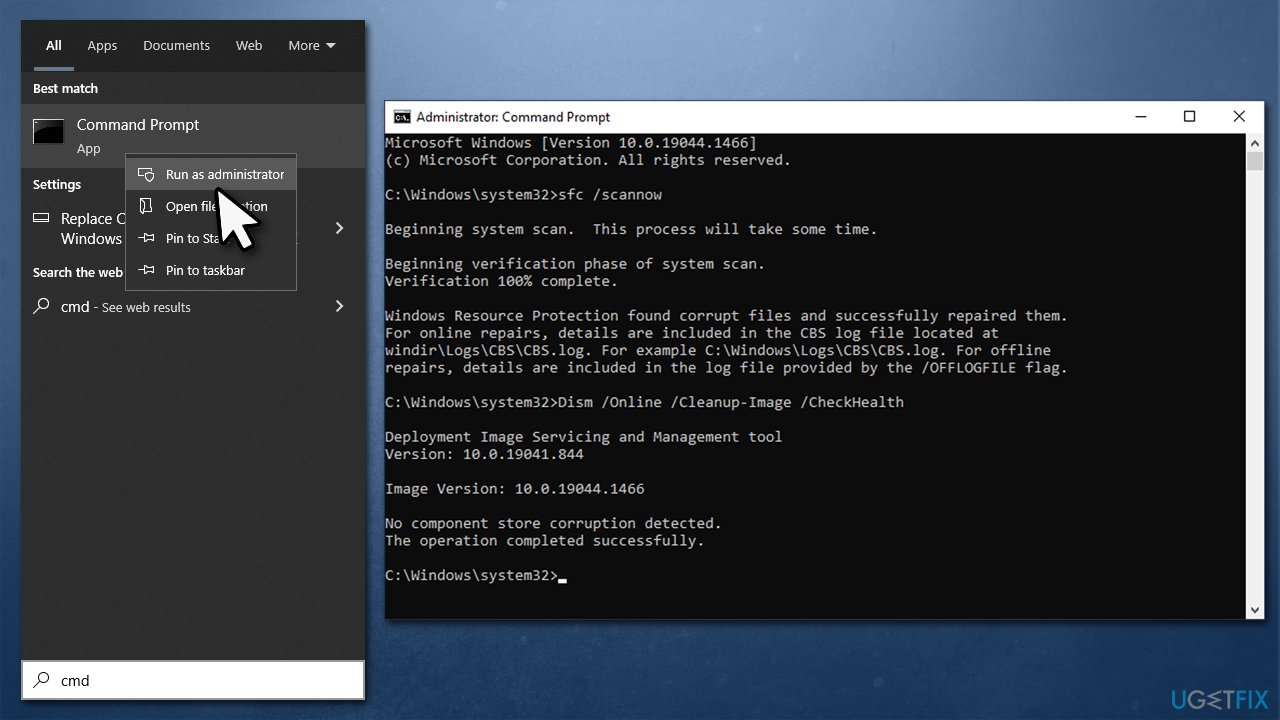
1. Check the system for corruption
Corrupted system files might be the reason for many system failures that cause errors, including in Services. Therefore, we recommend starting with checking the device with SFC and DISM scans.
- Type cmd in Windows search
- Right-click on Command Prompt and pick Run as administrator
- When the confirmation prompt shows up, click Yes
- In this window, type in the following commands, pressing Enter after each:
sfc /scannow
DISM /Online /Cleanup-Image /CheckHealth
DISM /Online /Cleanup-Image /ScanHealth
DISM /Online /Cleanup-Image /RestoreHealth - Once done, restart your device and check if the error code 15100 comes back.
2. Shut down the DeviceCensus.exe process
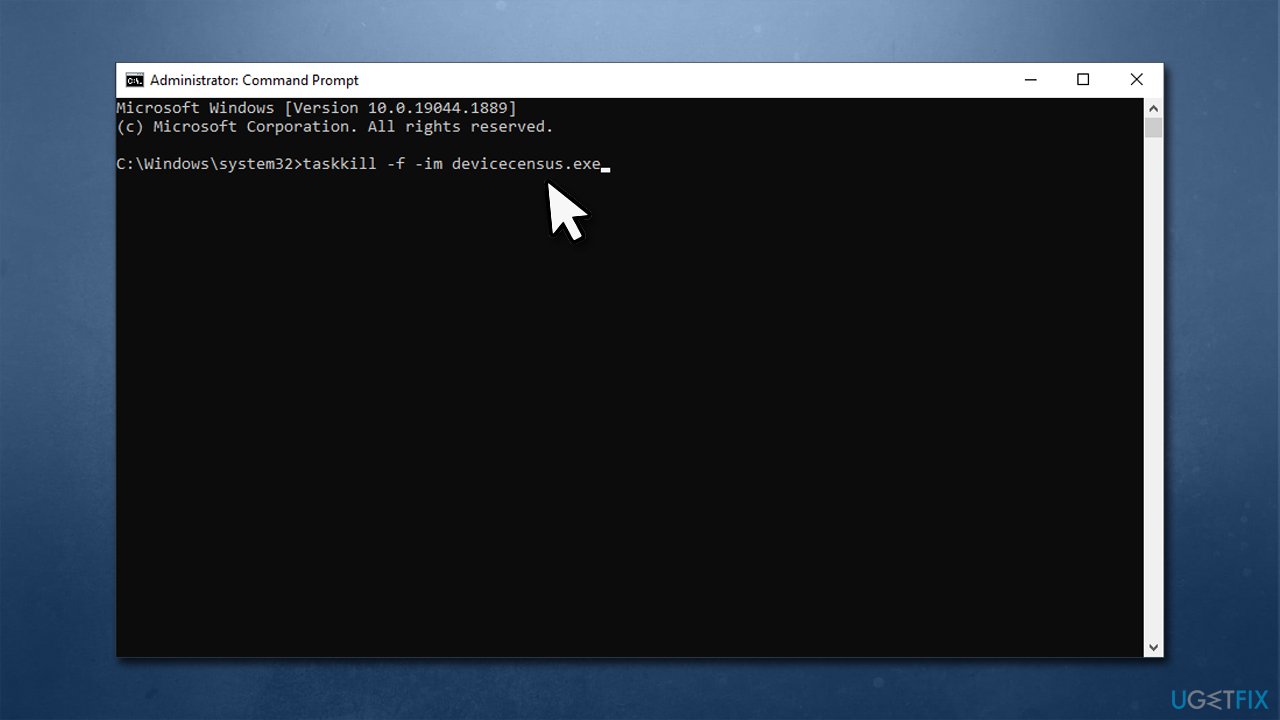
As some users mentioned, the issue lay within the DeviceCensus.exe process. Shutting it down via the elevated Command Prompt resolved the error for many:
- Open Command Prompt as administrator
- In the new window, type in the following command line and press Enter:
taskkill -f -im devicecensus.exe - Check if the issue has been resolved.
3. Try using security software
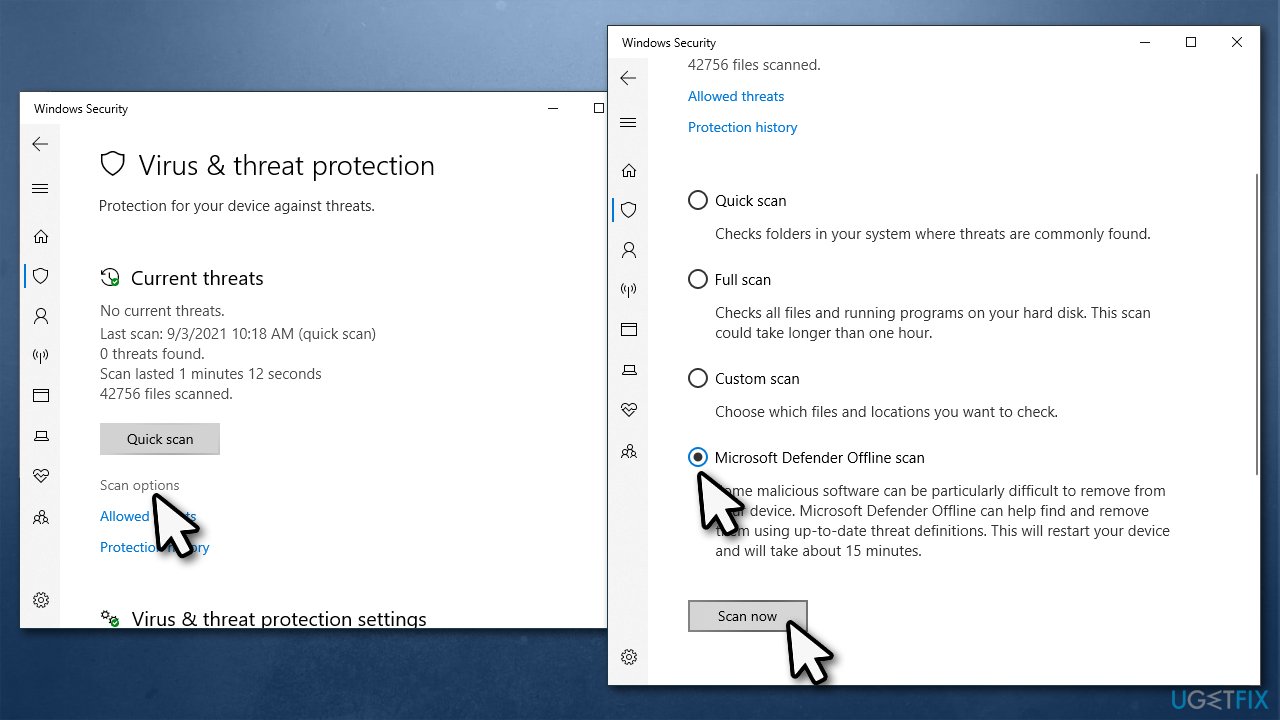
In some cases, system files might get infected or even replaced by malware. The “Failed to read description, Error Code: 15100” error might be caused by a malware [2] infection. Malware might destroy certain files or damage them, resulting in various errors. Thus, we recommend you run a scan with an anti-malware tool – while third-party software is sometimes superior, running Microsoft's offline scan should get rid of even the most stubborn parasites.
- Type Windows Security in Windows search and press Enter
- Select Virus & threat protection and pick Scan options
- Choose Microsoft Defender Offline scan and click Scan now
- Your computer will immediately reboot and begin a deep scan.
4. Reinstall Microsoft Visual C++ Redistributable
Missing or corrupted Visual C++ [3] redist packages can be the reason for the error to occur.