Как установить kali linux на vmware
This guide is about virtualizing Kali Linux inside of VMware, allowing you to have a Kali VM. This is a great way to use Kali, as it is completely separate from the host, allows you to interact with other VMs (as well as the host, and other machines on the network), and allows you to revert to snapshots.
If you are trying to install VMware on Kali Linux (as a host), please see our guide.
The guide below is what we use to generate our pre-made Kali Linux VMware images. You may alter this to your needs. We always generate the images using the latest version of VMware Workstation, as Player and Fusion don’t have the same level of functionally and controls over settings.
You will need to enable virtualization in your BIOS/UEFI for (e.g. Intel VT-x/AMD-V)
Wizard
Upon starting up VMware Workstation, select “Create a New Virtual Machine”.

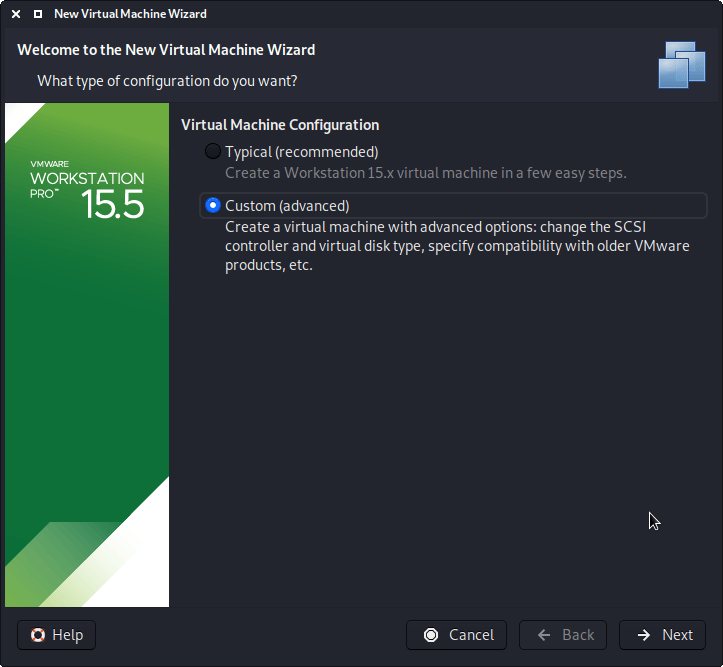
When you have the option, select “Custom (advanced)” for the Virtual Machine Configuration, as this will allow us to have more control over the creation of the VM.
The next screen is “Virtual Machine Hardware Compatibility”, which we use “Workstation 8.x”.
This allows for more users to benefit from Kali Linux out of the box (without having to edit the .vmx file to downgrade). If you are using a later version of VMware than v8, upon start up, VMware will prompt about upgrading the VM. This will remove any limitations caused by older VMware profiles. However, most users do not have their Kali Linux VM using all these extra resources (see screenshot below), so they wouldn’t benefit from having the latest profile, which is why we ship with a older profile.

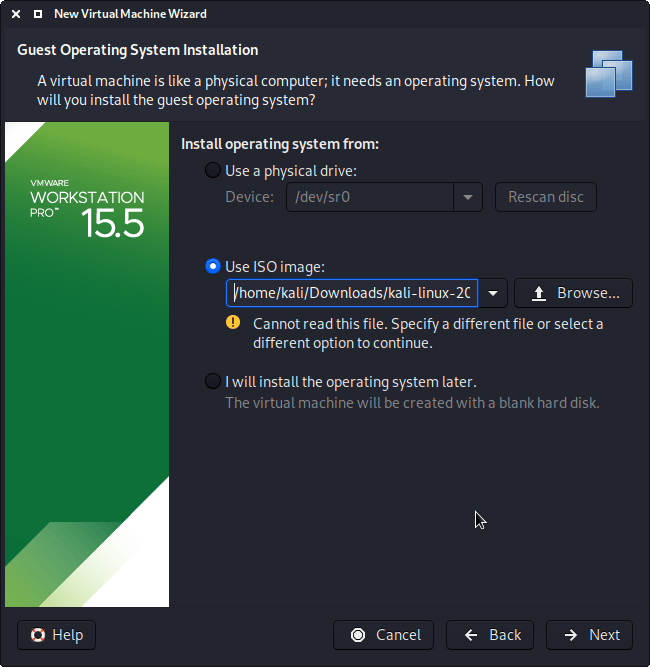
On this screen, we select the Kali Linux image to use to install from. We select “Browse”, and navigate to the location of the ISO that we downloaded. For more information on what image to download, we have written up a guide.
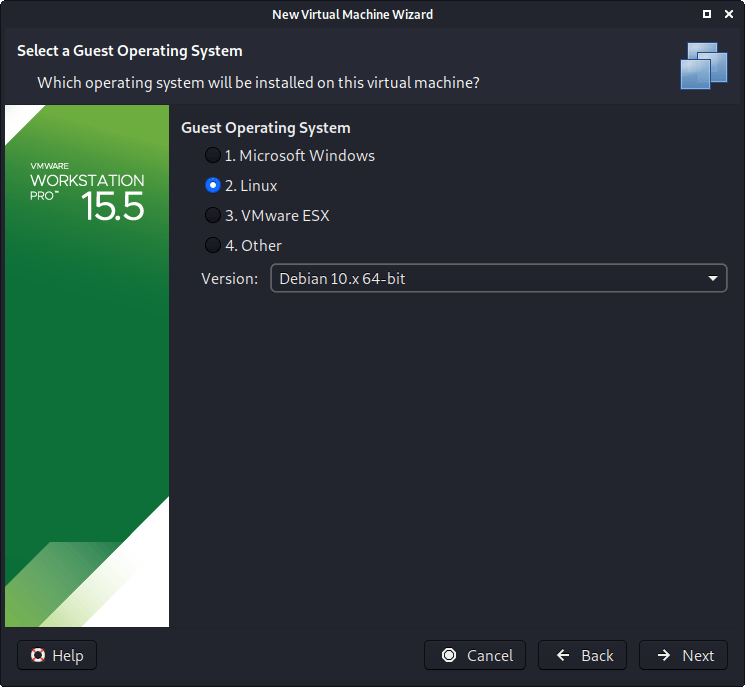
When you see the “Guest Operating System” screen, select “Linux”, and then the latest version of Debian for the version (as Kali is based on Debian). In this example, its Debian 10. We are going to be use the x64 image to install Kali, so we have selected 64-bit.
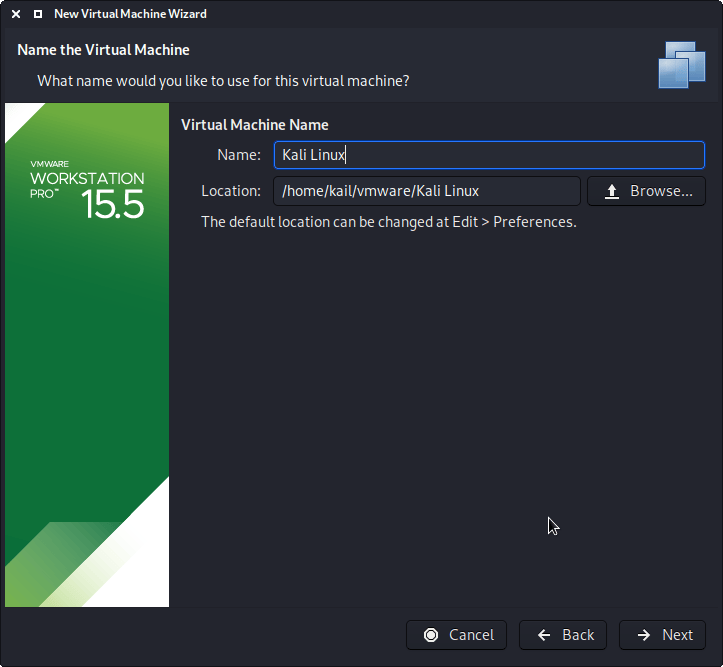
The next screen is “Virtual Machine Name”, which is where you name the VM. This name is also used as the filename (such as the configuration, hard disk and snapshot — which is not changed from this point).
We are keeping it generic in this guide, by using “Kali Linux” (as Kali Linux is a rolling distribution, and we update Kali Linux). However for our releases, we use the version number in the name as it is a fixed release ( kali-linux-YYYY.N-vmware-ARCH . Example: kali-linux-2022.4-vmware-amd64 ).
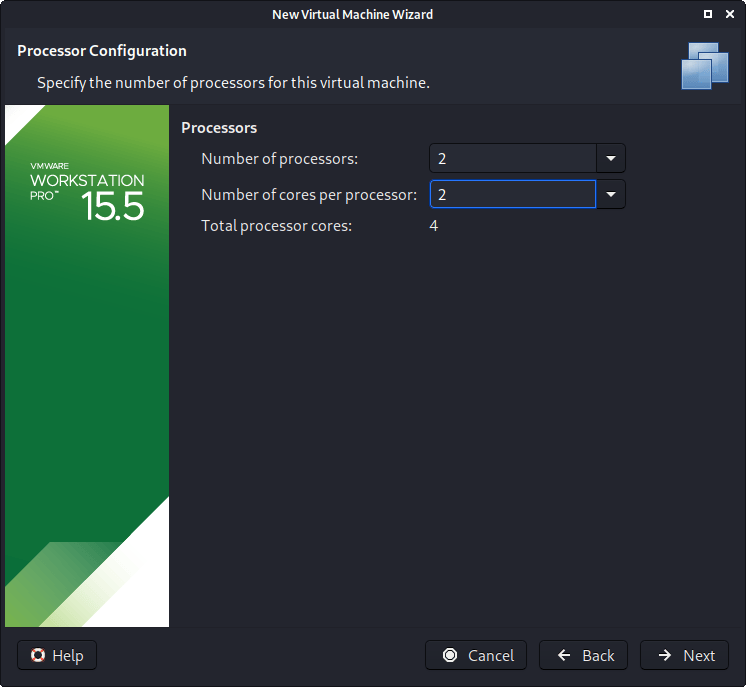
The next screen is “Processors”. Here we can start to define how many resources we give the VM. Kali will be able to perform more tasks simultaneously and quicker if it is allocated more resources. We select “2 processors” and “2 cores per processors”, giving a total of 4 cores. You may wish to use more or less depending on your system requirements.
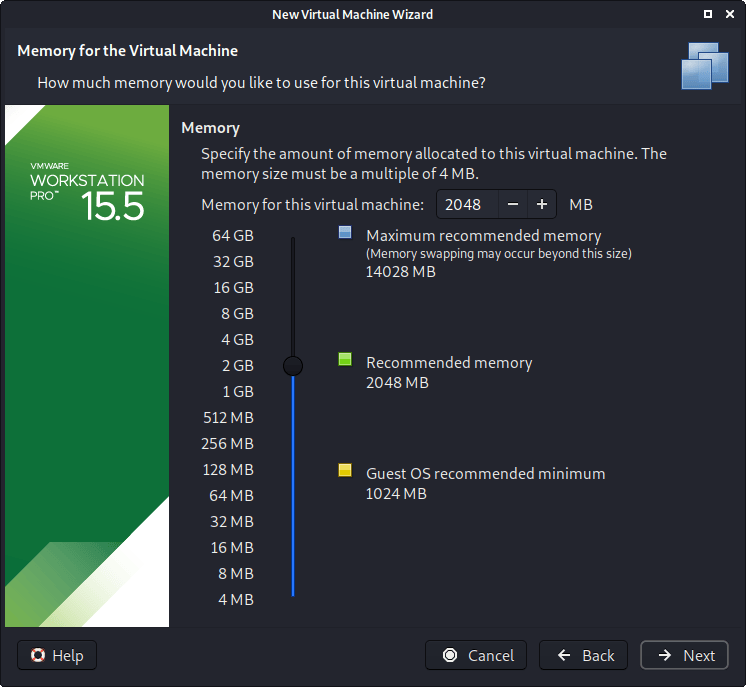
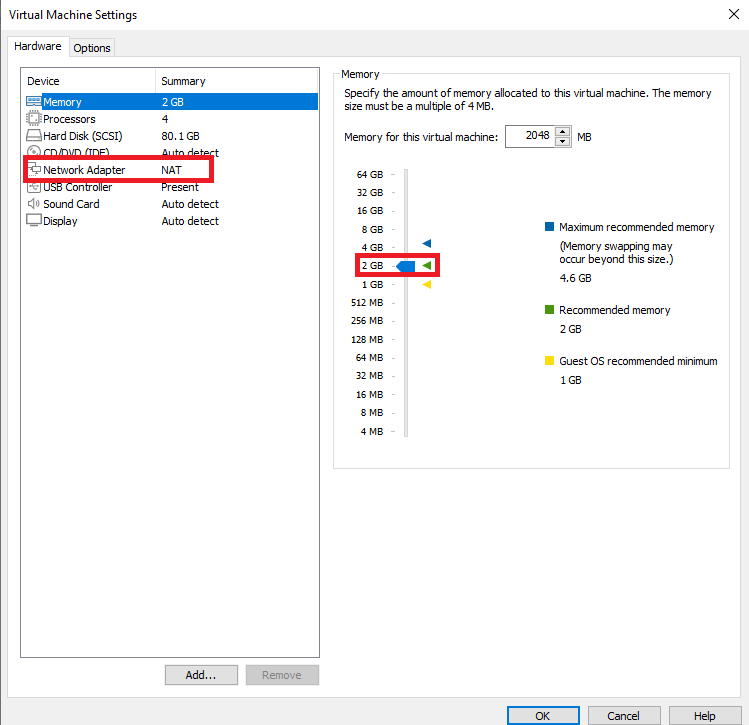
“Memory” is the next section, where we can define how much RAM to use. Again, the higher amount of RAM, the more applications can be open and at increased performance. Various tools inside of Kali can be demanding of resources. When we make the general VMs, we select 2GB (2048 MB) for RAM, but we often increase this for our personal machines as we have high-performing devices with spare RAM which Kali can utilize.
We are then presented with “Network Connection”. We default to using a NAT connection. However, this can easy be altered (even when the VM is powered on). This allows for Kali VM to talk to the Internet, as well as the rest of the LAN connection, without it taking up an additional IP address. The downside to this is it will not be able to receive reverse shells (without port forwarding inside of VMware).

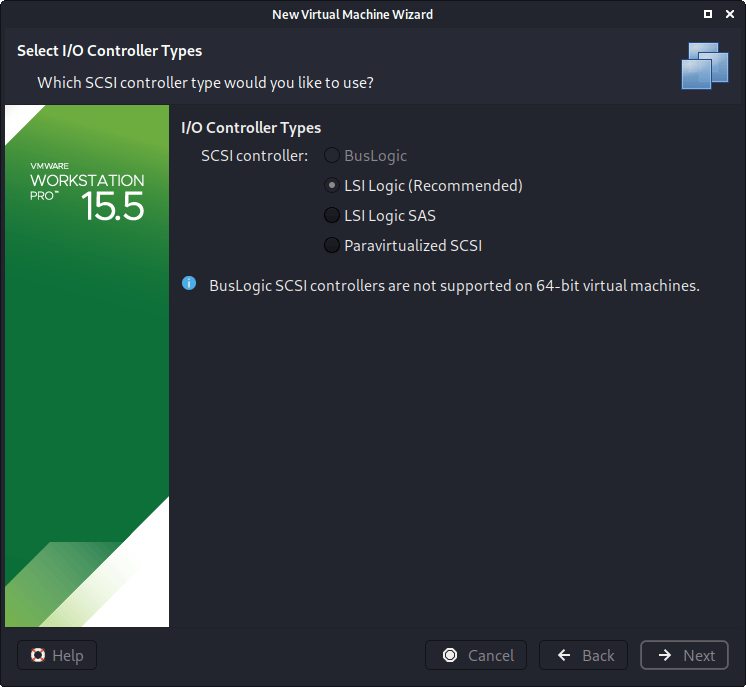
Next is “I/O Controller Types”. We accept the default value of “LSI Logic”.
Next is “Virtual Disk Type”. We accept the default value of “SCSI”

The following screen is “Disk”, which allows us to “create a new virtual disk”

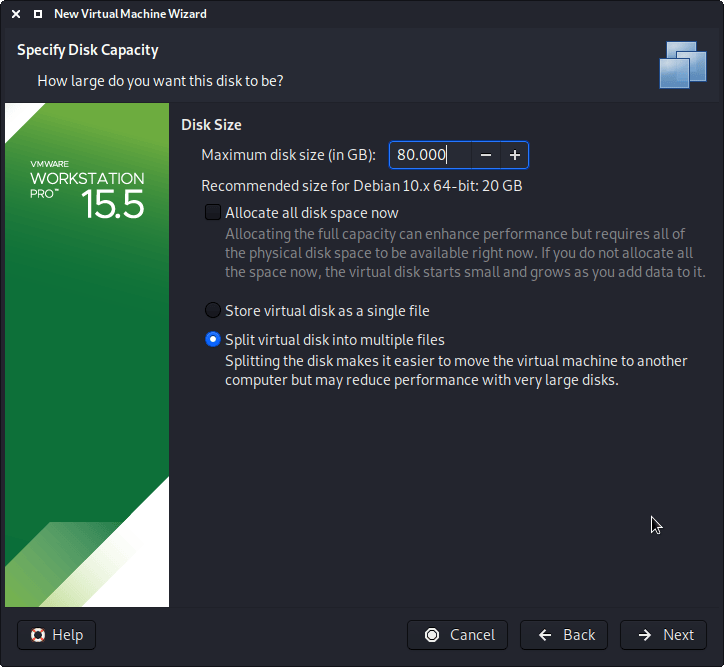
This screen below, “Disk Size”, allows us to define how large the virtual hard disk will be. We use “80 GB” for our VMs.
We also don’t have it in a single file, but instead “Split virtual disk into multiple files”. The VM hard disk will grow over time, to the maximum size, as we do not enable the “Allocate all disk space”.
It is possible to increase/decrease the hard disk after the VM has been created, however, if you have installed Kali, you’ll need to then also grow or shrink the partition for the space to reflect that.
When it comes to the “Disk File” screen, we accept the default value, which has been defined from our VM name earlier in the setup process.

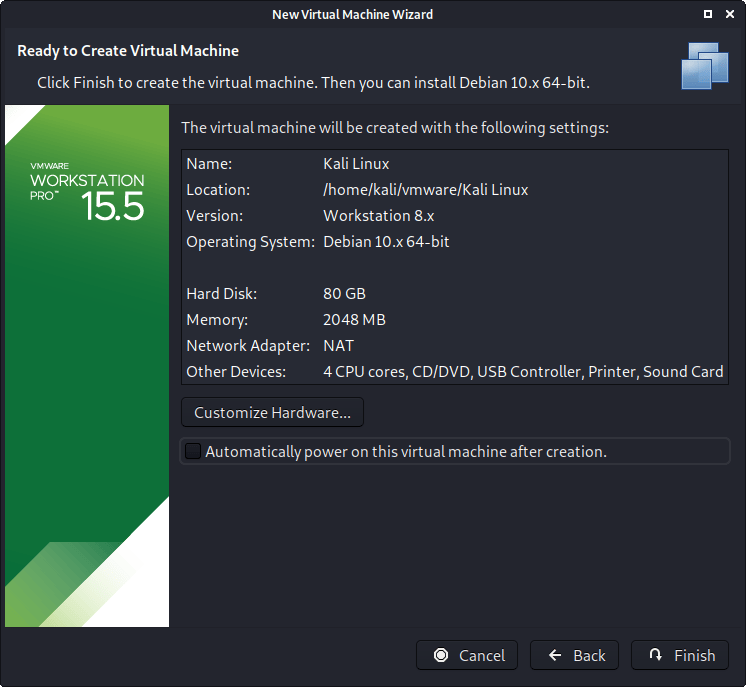
We are then presented the final screen for the VM setup wizard, which gives us an overview of the settings we picked.
We are happy with what’s shown to us, so we then press “Finish”. If you try and “Customize Hardware” at this stage, before the VM is fully created, not every setting is visible.
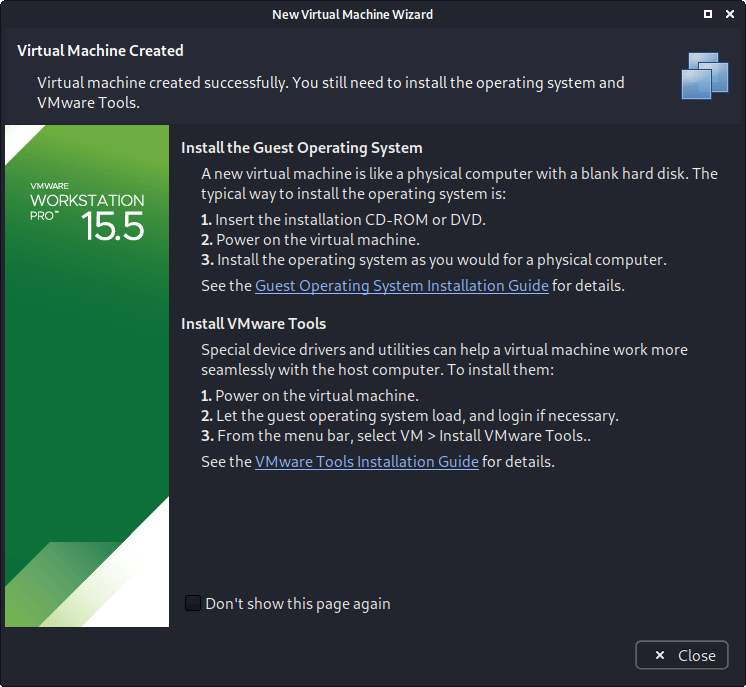
If this is the first time using the wizard, you may have the following prompt explaining how installing “VMware tools” will give you a better experience when using the VM.
After reading and understanding the page, you may wish to tick the “Don’t show this page again”, before pressing close.
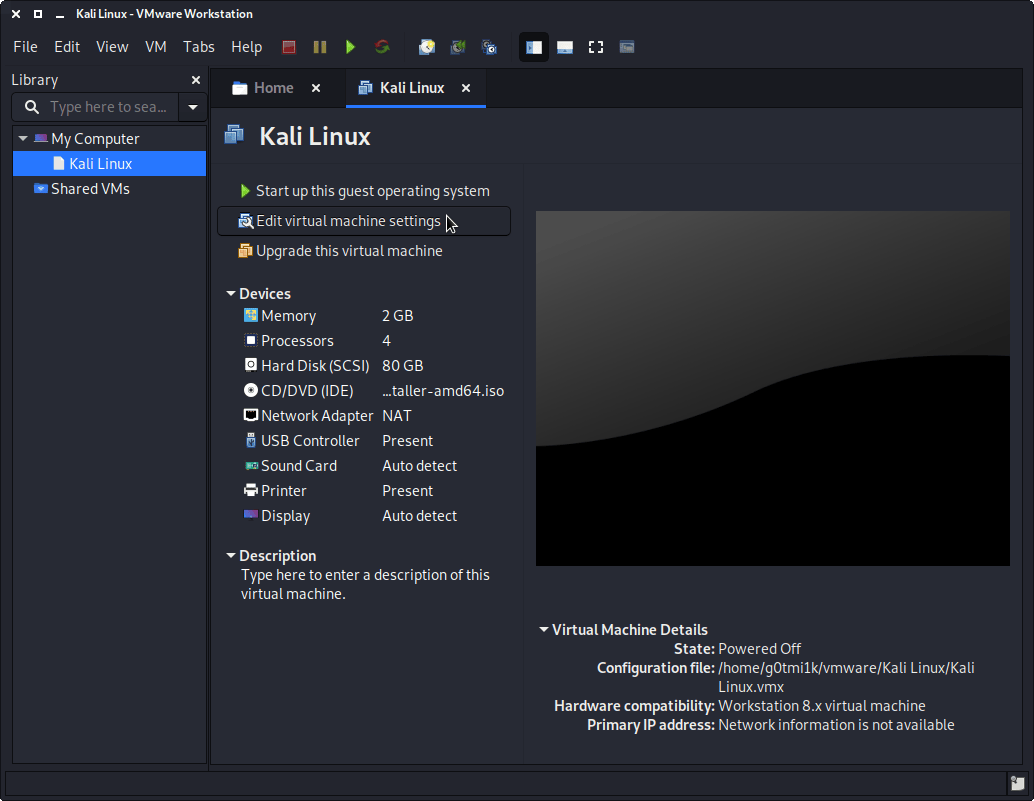
Edit Settings
Before we start up the VM, we now edit its settings, by pressing “Edit virtual machine settings”.
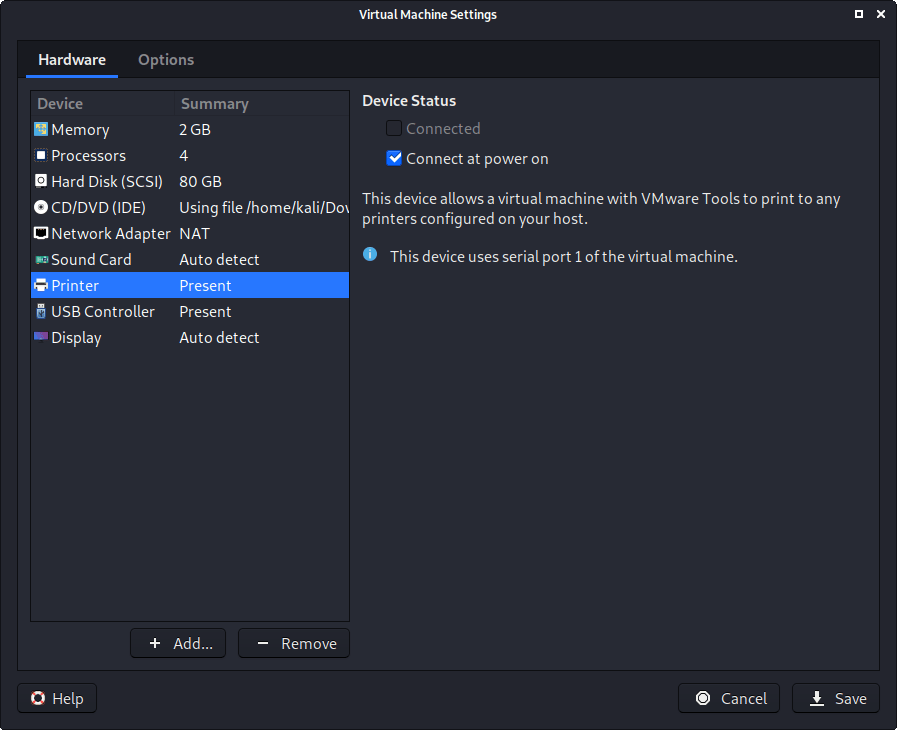
We do not have a use for a printer, so we remove it. Navigate to the “Printer” section, and then press “Remove”.
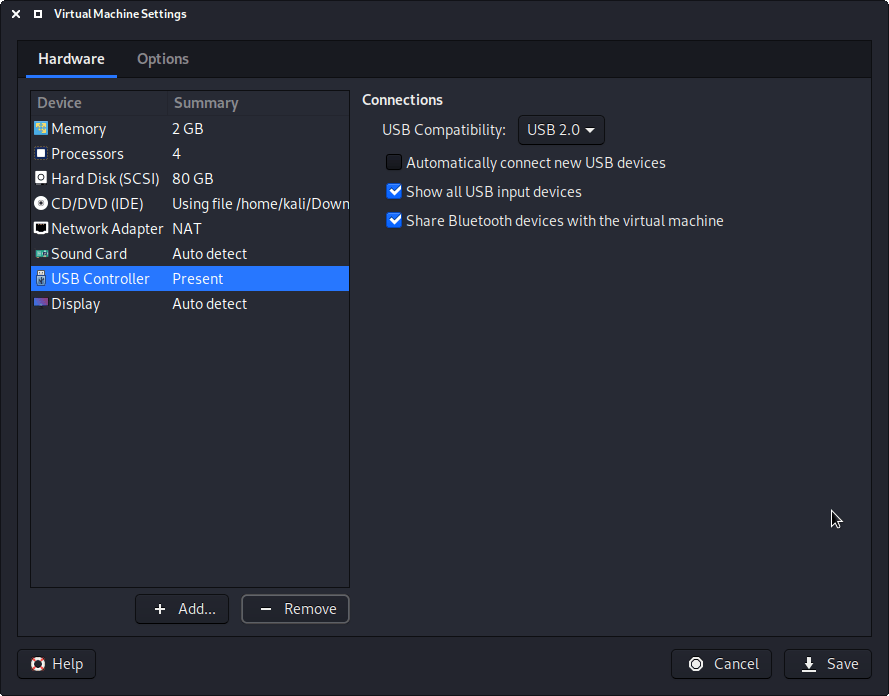
You may wish to edit the “USB” settings to alter how USB devices behave. Here we have disabled “Automatically connect new USB devices” (may not have the option depending on your VMware version) and enabled “Show all USB input devices”.
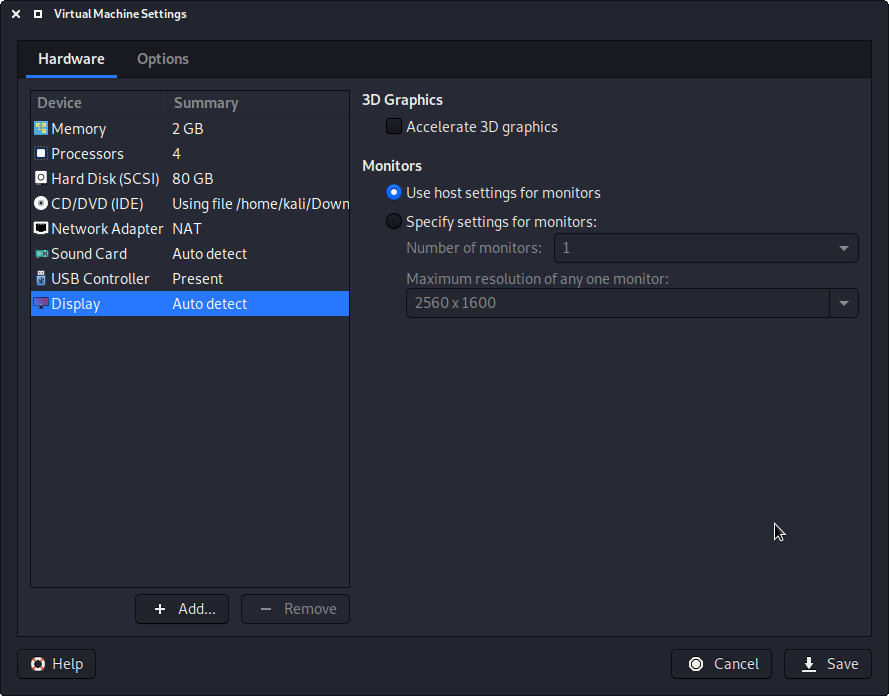
Another item to point out is in the “Display” section. Make sure that “Accelerated 3D graphics” is disabled, as people have reported that causes issues.
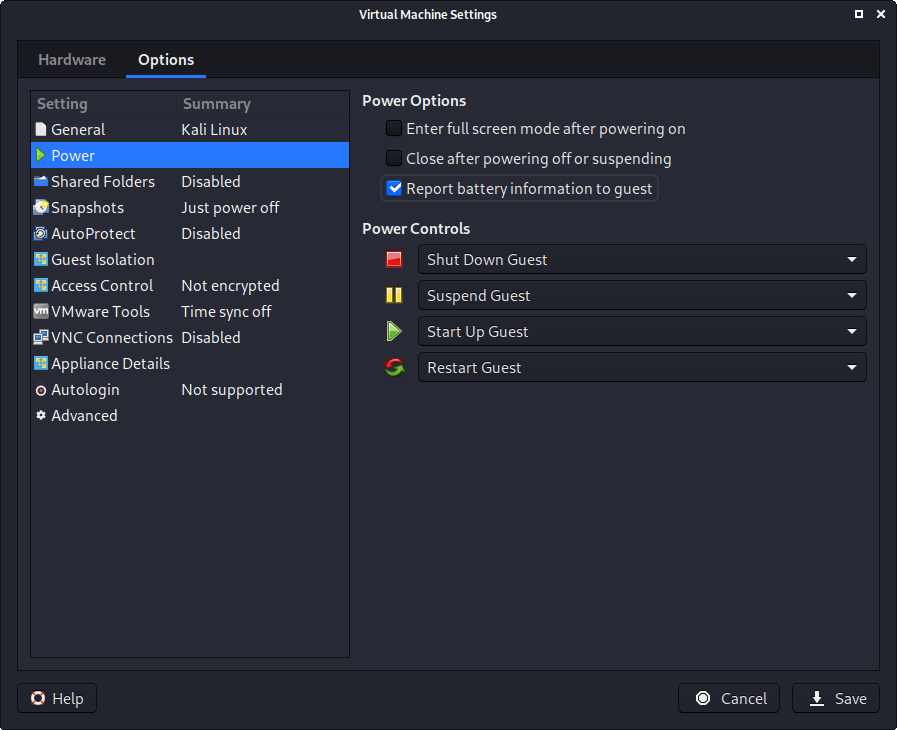
We then move over to the “Options” tab, and move down to “Power”. We choose to enable “Report battery information to guests”, as it is a handy thing for users who use Kali on a laptop/notebook.
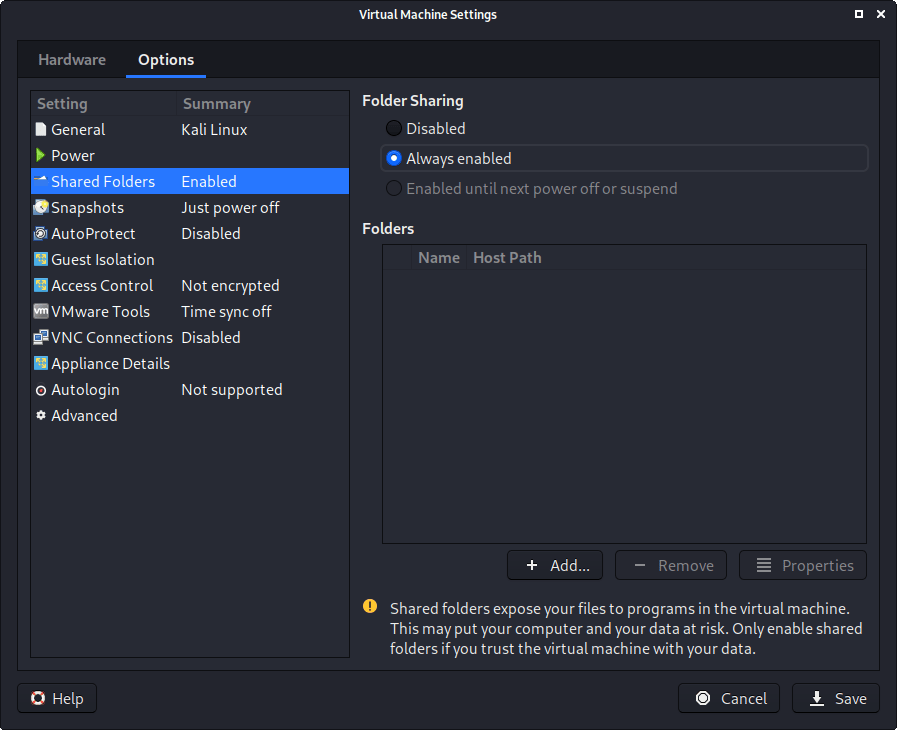
In “Shared folders”, we select “Always enable”. At this stage, do not share any paths, as some users may not wish for it.
The final option we alter is “VMware Tool”, where we enable “Synchronize guest time with host”.

After all this is done, we save, start up the VM, and then continue installing Kali Linux as we normally would for a bare metal install.
During Kali Linux setup process, the install wizard should detect if its inside a VM. If it is, should then automatically install any additional tools (such as open-vm-tools ) to give a better user experience. If you want to manually re-install it, you can see our VMware Guest Tools Guide.
How to Install Kali Linux in VMware
In this Tutorials, We will Declare How to Install Kali Linux in VMware Workstation 15.5 Pro and how to install VMware Workstation step by step guide. This is a virtual installation method with the help of which you can use Linux along with windows and other operating systems.
What do you need Installation a Kali Linux In VMWare?
- VMware Workstation
- Kali Linux ISO Images
- Minimum 20 GB Disk Space
- Minimum 2 GB RAM
How to Install VMware Workstation?
VMware Workstation is a hosted hypervisor. It only runs on Windows and Linux operating systems and that too in 64-bit operating systems. With the help of this, we can set up virtual machines on a single physical machine And you can execute many of the operating systems on your physical machine with the help of a virtual machine.
VMware Workstation is developed by VMware in May 1999. The first released version is 1.0 and the current version is 15.5.1. VMware Workstation is composed of only C and C++ languages.
You can download VMware from its official website (www.vmware.com). If you want, you can use any version above 12.0 version, I use VMware Workstation Pro 15.5.1 version in these tutorials. This is the latest version to be done so you can download and install it if you want. The installation of this is a very easy step, you can install it by doing next-next, by the way, I have made a video tutorial to help you people. If we go, let’s learn the installation of Kali Linux directly.
How to Download Kali Linux ISO Images?
Go to Kali Linux official website (www.kali.org) and download the latest version according to your system. If your system is 64-bit, then you should only download it and if your system is 32-bit, then you should download it and do not download it anymore.
If you want to know about Kali Linux, then you can read my tutorials, I have defined the live booting process of Kali Linux in this tutorial as well as about Kali Linux. I am going to use 2.0 version of Kali Linux in this tutorial, the latest version of Kali Linux has been released 2020.1a. If you want then you can use it.
How to Install Kali Linux in VMware
Let’s go started
☆ Step 1:-
Open your VMware Workstation 15.5 and click Create a New Virtual Machine button.
☆ Step 2:-
Select what type of configuration do you want? Click Typical (recommended), Create a workstation 15.x virtual machine in a few easy steps and click the next button.
☆ Step 3:-
Select the Installer disc image file (ISO). Click the Browse button and select your operating system and click the next button.
☆ Step 4:-
Select a guest operating system. Which operating system will be installed on this virtual machine, Select gets operating system “Linux” and version “Debian 9.x” and click the next button.
☆ Step 5:-
Enter the Name of the virtual machine (Anything you wish), and select the installation path of the virtual machine and click the next button.
☆ Step 6:-
Enter Specify disk capacity, Recommended size for Debian 9.x: 20GB and select store virtual disk as a single file or split virtual disk into multiple files Anything you wish and click next button.
☆ Step 7:-
Configure your hardware, select the number of the processor: 2 and the number of cores per processor: 2 and total processor cores: 4. If you want good performance, you should take 4 processors from work to work, and at most, you can see according to your PC.
☆ Step 8:-
The virtual machine will be created with the following setting, click Finish to create the virtual machine. Then you can install Debian 9.x.
☆ Step 9:-
Now click Power on this virtual machine. Click on it, your Kali Linux will start booting from your virtual machine.
☆ Step 10:-
Snap Graphical Install “the calmer you become, the more can hear”.
☆ Step 11:-
According to your compatibility, select your language which you want to use in the installation process. The selected languages will also be the default language for the installed system
☆ Step 12:-
The selected location will be used to set your time zone (According to your location) and also, for example, to help select the system location and time. This is a shortlist of location based on the language you selected choose “other” if your location is not listed. You select your location according to your country, I am from India, so I have selected India.
☆ Step 13:-
You can configure your keyword according to your compatibility language, I am choosing American English in this tutorial, you can select it if you want.
☆ Step 14:-
load installer components for CD wait for few minutes.
☆ Step 15:-
Enter the hostname for this system. I have given the name of my system Technical Education, you should keep any name according to you.
☆ Step 16:-
Set up users and passwords, so that your system is safe from any malicious or unqualified access and hit continue button.
☆ Step 17:-
If you choose guided partitioning for an entire disk and will next be asked which disk should be used you will still have a chance later to review and customize to results. Select Guided — use entire disk and click the Continue button.
☆ Step 18:-
note that all data on this disk you select will be crashed, but not before yours have confirmed that you really want to make the changes. Select disk to partition: 21.5G VMware Virtuals.
☆ Step 19:-
This disk can be partitioned using one of several different schemes. If you are unsure, choose the first one. Select Partitioning scheme: All files in one partition(recommended for new users).
☆ Step 20:-
This is an overview of your currently configured partition and mount points. Now click “Finish partitioning and write changes to disk” and click Continue Button to the next step.
☆ Step 21:-
The partition table of the following device is changed. The following partition is going to be formatted. Write the changes to disk? Click “Yes” and hit the continue button.
☆ Step 22:-
Installation of the system “Copying data to disk” Please wait new Minutes.
☆ Step 23:-
Configure the package manager. Use a network mirror? Click “No” and hit the continue button.
☆ Step 24:-
Installation the GROUB boot loader on a hard disk please wait 15–20 Minutes.
☆ Step 25:-
Installation of the GROUB boot loader to the master boot record. Click Yes and Continue.
☆ Step 26:-
Select device for boot loader installation location. Select /dev/sda and click the Continue button.
☆ Step 27:-
Finishing the installation wait a few minutes.
☆ Step 28:-
Congratulation! Installation is Complete, Click Continue.
☆ Step 29:-
Finishing the installation wait for few seconds.
☆ Step 30:-
Enter your Username. Your User name is by default “root”.
☆ Last Step 31:-
Enter your password. No one should enter the same password that you had set at the time of installation, because it will not open by entering the wrong password.
Приручение черного дракона. Этичный хакинг с Kali Linux. Часть 1. Подготовка рабочего стенда
Приветствую тебя, дорогой читатель в самой первой вводной части серии статей «Приручение черного дракона. Этичный хакинг с Kali Linux».
Полный список статей прилагается ниже, и будет дополняться по мере появления новых.
Приручение черного дракона. Этичный хакинг с Kali Linux:
Идеей, побудившей меня к написанию данной серии статей является мое желание поделиться собственным опытом в области тестирования на проникновение в рамках проводимых мной аудитов информационной безопасности финансовых организаций, и попытаться осветить важные, на мой взгляд, ключевые моменты касаемо подхода, инструментов, приемов и методов. Конечно же в сети очень много статей и книг посвященных данной теме (например, замечательная книга Дениела Г. Грэма «Этичный хакинг. Практическое руководство по взлому» или «Kali Linux. Тестирование на проникновение и безопасность» — труд целого коллектива высококлассных специалистов), программы курсов от Offensive Security, EC-Council, но далеко не у всех есть материальные возможности оплачивать дорогостоящие курсы, а в дополнение к учебникам хотелось бы больше практических примеров основанных на чьем-то опыте.
Я искренне надеюсь, дорогой читатель, что в этой серии статей мне удастся охватить большую часть интересующих тебя тем, и ответить на большую часть вопросов возникающих у тебя по мере погружения в таинственный мир информационной безопасности и пентестинга в частности.
Мы будем использовать подход максимально приближенный к сценариям атак проводимых злоумышленниками, а также вдоволь попрактикуемся на отдельных примерах и разберем такие темы как разведка и сбор информации (footprinting), сканирование ресурсов с целью обнаружения известных уязвимостей, применение эксплоитов из базы Metasploit framework для получения доступа к системе, повышение привилегий до уровня root-пользователя за счет уязвимого ПО (privilege escalation), рассмотрим методы социальной инженерии, сетевые атаки канального уровня (MAC-spoofing, ARP-spoofing, DHCP starvation), способы атак на веб-сервера, перехват и анализ трафика с помощью сетевых снифферов и многое другое.
В качестве примеров я буду использовать атаки на специально подготовленные уязвимые машины. Мы рассмотрим и проанализируем в деталях каждый метод, а так же поговорим о том как защитить свои устройства и сетевую инфраструктуру, от подобного рода атак.
Во избежание нарушения каких-либо законов (ведь наша серия статей посвящена именно ЭТИЧНОМУ хакингу), все наши эксперименты мы будем проводить в специально подготовленной виртуальной лаборатории. Ниже я опишу пошагово все действия необходимые для подготовки этой самой лаборатории. Для комфортной работы нам понадобится ПК либо ноутбук с объемом оперативной памяти не менее 6-8 Гигабайтов и любым современным 2-х ядерным процессором с поддержкой технологии виртуализации.
И так, после недолгого вступления, перейдем к практической части и начнем собирать нашу лабораторию.
Первым делом, нам необходимо будет скачать гипервизор, на котором и будем в дальнейшем разворачивать нашу виртуальную лабораторию.
Если сильно не вдаваться в подробности виртуализации, то гипервизор — это специальная программа, которая позволяет нам параллельно запускать на нашем компьютере операционные системы/программы с различной архитектурой (Windows, Linux, FreeBSD).
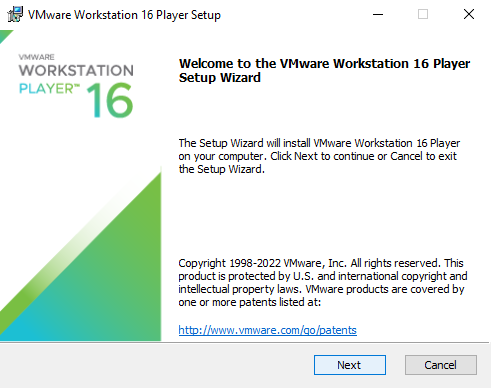
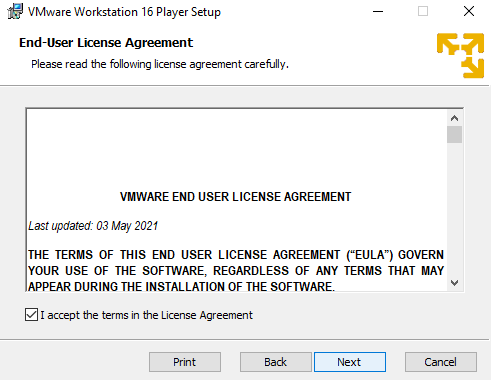
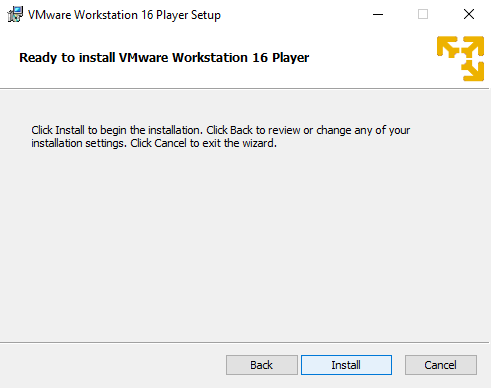
Для работы я буду использовать бесплатную версию гипервизора VMware Workstation Player, который доступен для скачивания на официальном сайте компании vmware по ссылке.
Гипервизор доступен для платформ Windows и Linux

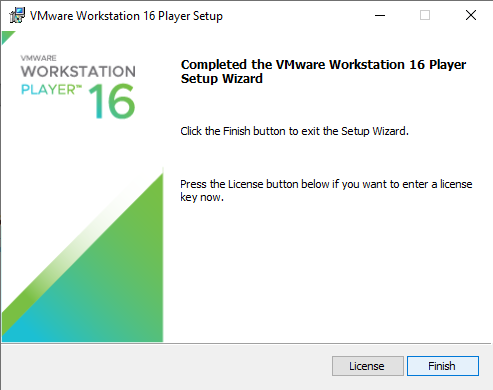
Процесс установки очень простой и быстрый. Несколько нажатий кнопки NEXT, принятие условий лицензионного соглашения и наш гипервизор готов к работе.


Следующим шагом, нам необходимо скачать виртуальную машину Kali Linux.
Это специально разработанная компанией Offensive Security операционная система для тестирования на взлом и проникновение, которая просто до отказа нафарширована различными инструментами под любые типы проверок и атак.
Скачать ее можно совершенно бесплатно c официального сайта по ссылке.
Версий дистрибутива несколько, нам нужна именно виртуальная машина (Virtual Machines) для платформы VMware.


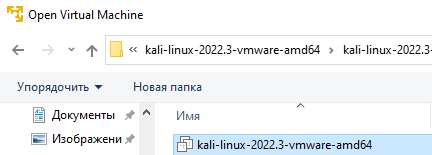
После того, как архив с образом системы скачается, разархивируем его в заранее подготовленную папку (например VMs).

После завершения распаковки папки с образом Kali Linux, запускаем VMware Workstation Player и открываем в нем существующую машину (при желании, можно скачать образ дистрибутива Kali и установить самому, однако, разворачивать готовый преднастроенный образ куда быстрее).
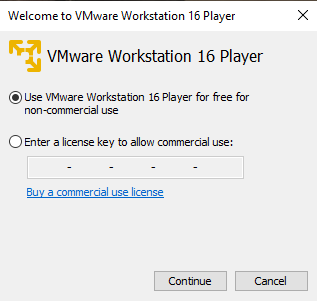
При первом запуске наш гипервизор выдаст окно с предложением продолжить использовать бесплатную версию, либо ввести лицензионный ключ. Оставляем первый вариант
После чего уже откроется основное окно программы, где мы открываем нашу машину

Заходим в папку VMs – kali-linux-2022.3-vmware-amd64 и открываем файл образа (он единственный отобразится в списке)
Буквально через несколько секунд, в списке у нас появится готовая к работе машина Kali Linux. Но прежде чем ее запустить, зайдем в настройки и кое-что изменим

Здесь мы видим настройки касающиеся самой виртуальной машины и ее виртуальных устройств (сетевые адаптеры, жесткие диски, выделенный объем ОЗУ и т. д.)
Для улучшения производительности добавим ей оперативной памяти (опять же, если на нашей физической машине ее достаточно), а также убедимся, что тип адаптера стоит NAT (такой же тип будет настроен на наших уязвимых машинах, которые желательно изолировать за NAT-ом от вашей физической сети).
Запускаем виртуальную машину Kali и, при открытии окна с запросом ввода логина и пароля вводим kali/kali.

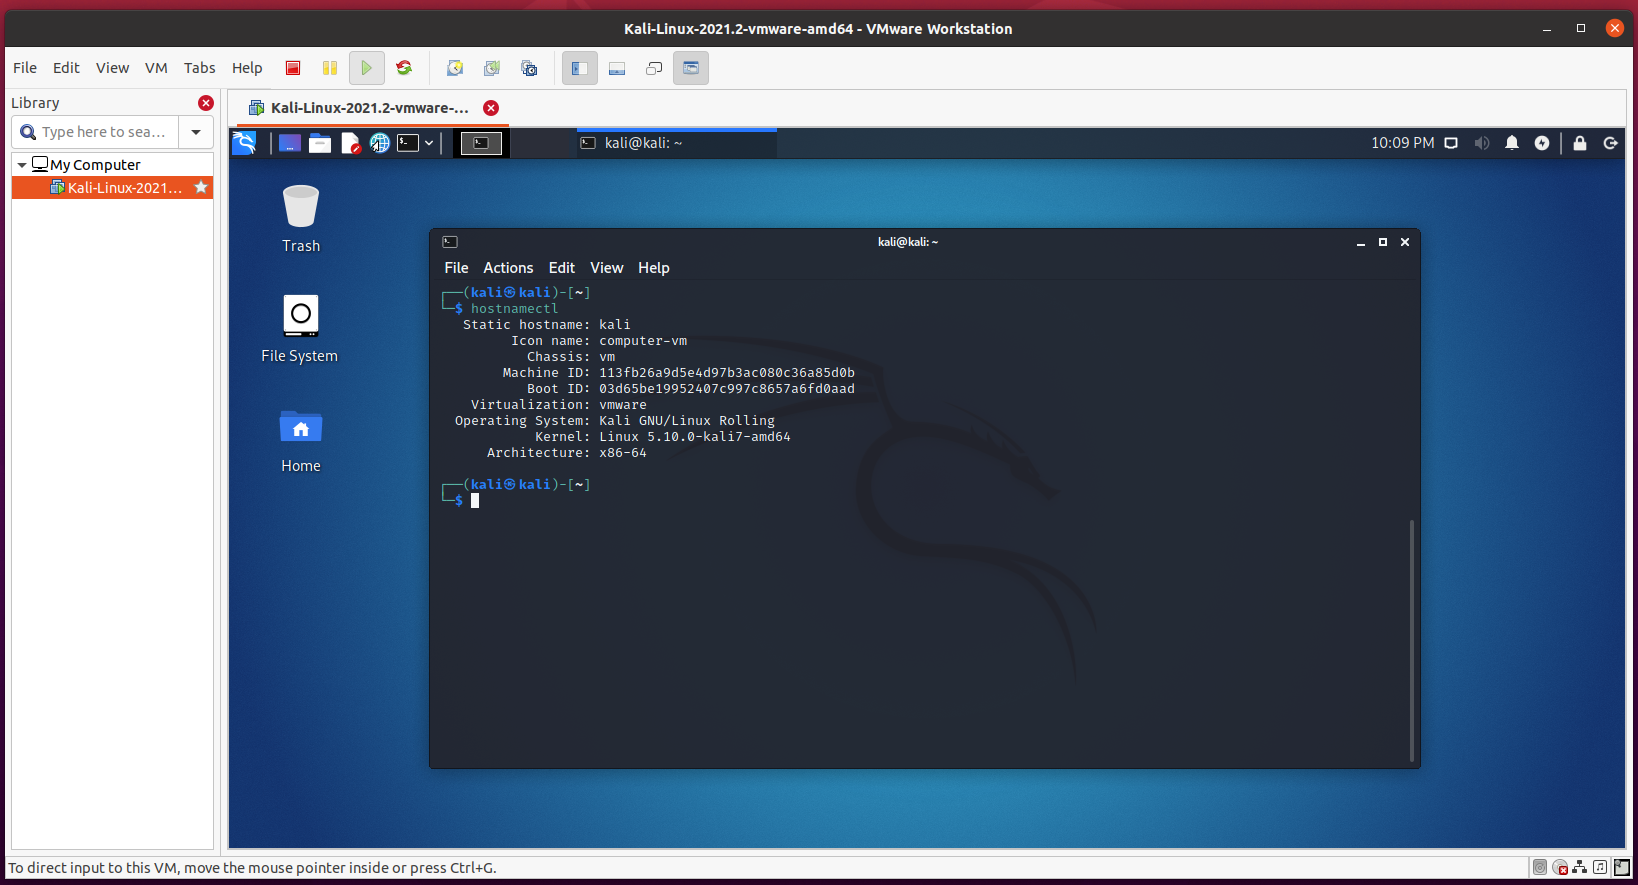
После успешного входа нас приветствует стильный рабочий стол Kali Linux с черным драконом в центре. Заострять внимание на интерфейсе рабочего стола мы сейчас не будем, поскольку большую часть времени нам придется работать в терминале.
Его и откроем для начала.
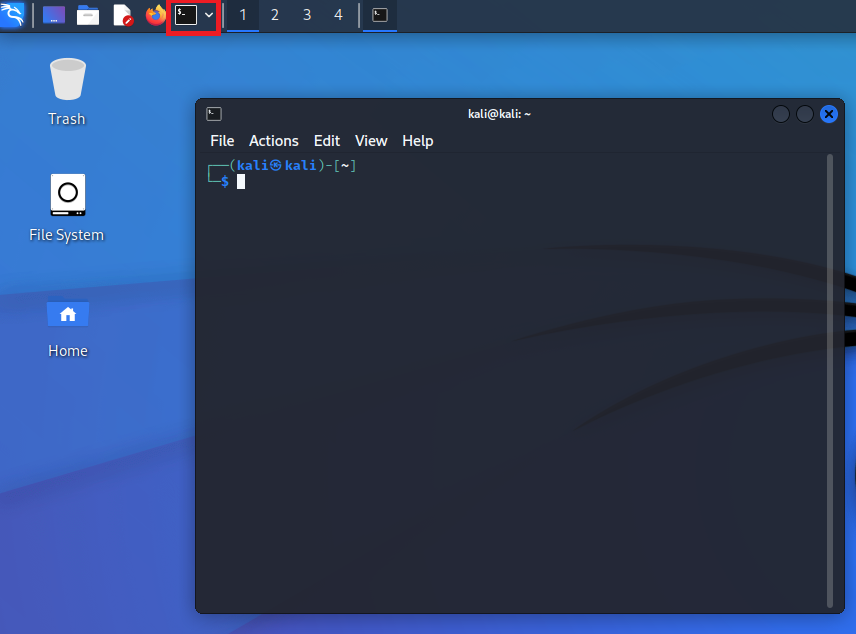
С учетом того, что все операции в большинстве своем требуют для выполнения наличия прав суперпользователя, введем команду sudo -s пароль kali и перейдем в режим с правами root.

Далее, первым делом, синхронизируем все списки пакетов в системе, а также обновим их следующей командой:
apt update -y && apt upgrade -y

По завершению выполнения всех обновлений пакетов можно перейти к загрузке уязвимых машин для нашего киберполигона.
Для дальнейшей работы нам понадобятся:
1) Машина Metasploitable2 на базе Linux, представляющая собой уязвимую машину специально подготовленную для обучения этичному хакингу.
2) Несколько машин с ресурса Vulnhub подготовленных для соревнований типа CaptureTheFlag (CTF). Ими будут: HappyCorp1, CyberSploit1, CyberSploit2, Mr-Robot.
Прямые ссылки для скачивания:
Процедура скачивания и установки машин из образов не отличается от вышеописанной и не должна вызвать сложностей.
ВАЖНО! У всех установленных виртуальных машин в разделе интерфейсов должен стоять тот же тип, что и у машины Kali Linux (NAT).
На этом первая вводная часть подошла к концу, и мы полностью готовы к тому, чтобы начать постигать тайны этичного хакинга. В следующей части мы рассмотрим такую важную тему, как фазы атаки. Спасибо за внимание и до новых встреч! 🙂
How to Install Kali Linux In VMware Workstation Pro 16
To learn and do penetration testing, you may want to run Kali Linux as a virtual machine. This way, you can do everything in an isolated environment, take snapshots of your virtual machine and get back to an earlier state if anything goes wrong within a few seconds. It will give you a lot of flexibility that you will not get if you run it directly on your computer.
This article will show you how to run Kali Linux on a VMware Workstation Pro 16 virtual machine. So, let’s get started.
Table of Contents:
Downloading the Kali Linux VMware Image:
You can download the VMware image of the latest version of Kali Linux from the official website of Kali Linux and import it on VMware Workstation Pro 16 very easily. This way, you can get a Kali Linux VMware virtual machine up and running within a few seconds and with much less effort than installing it manually using an ISO image of Kali Linux.
To download the VMware Image of the latest version of Kali Linux, visit the official website of Kali Linux from your favorite web browser.
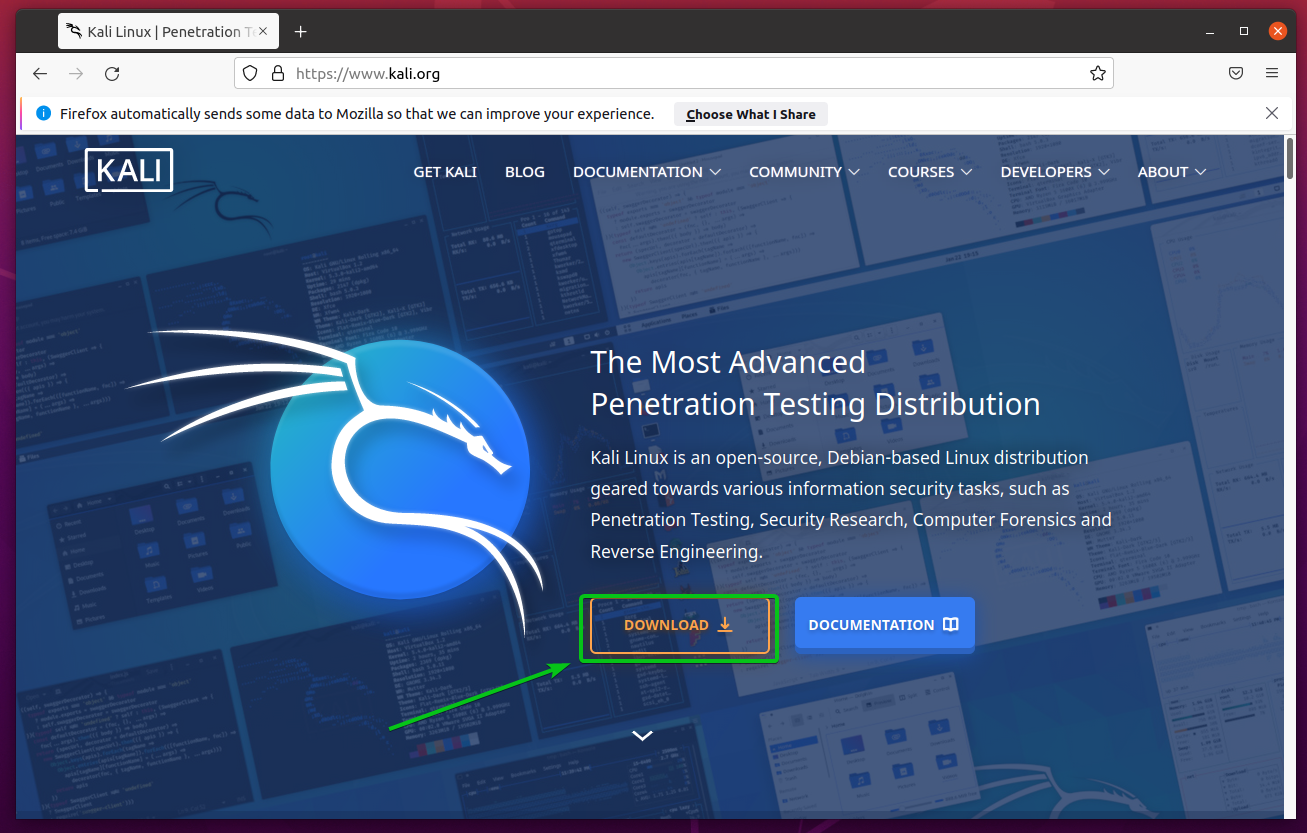
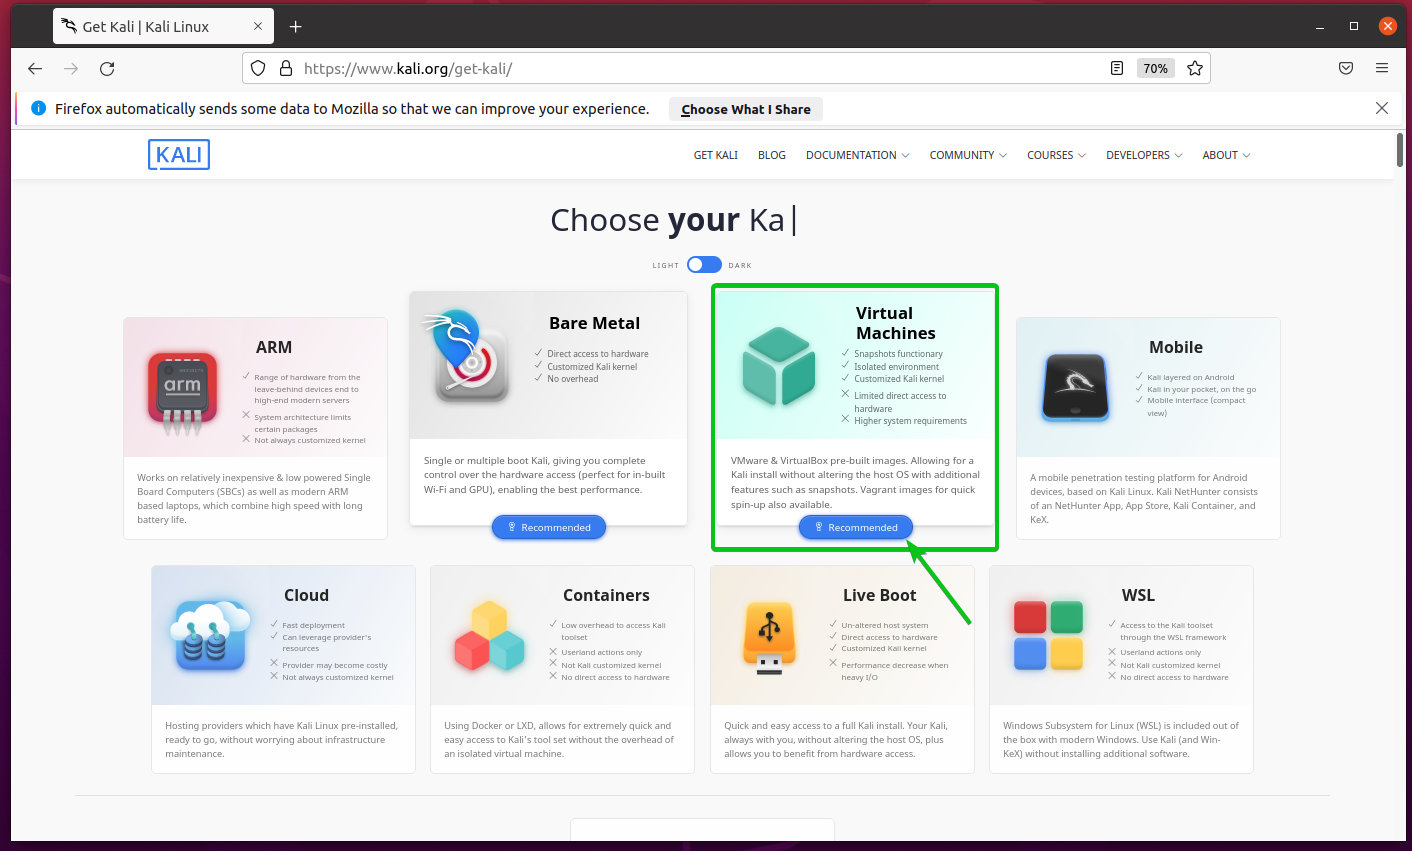
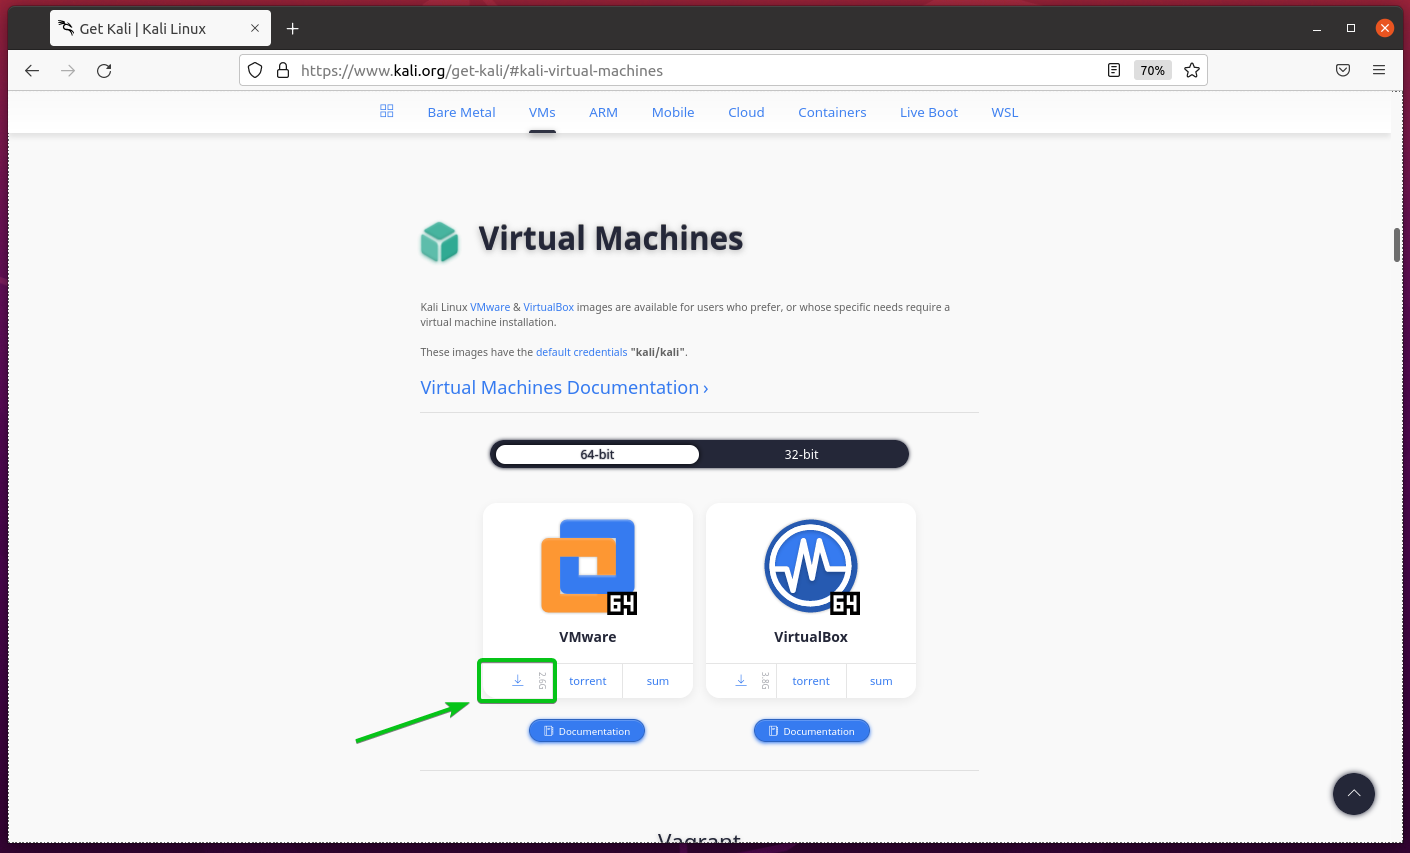
Click on the Recommended button from the Virtual Machines section as marked in the screenshot below.
Click on the Download button from the VMware section as marked in the screenshot below.
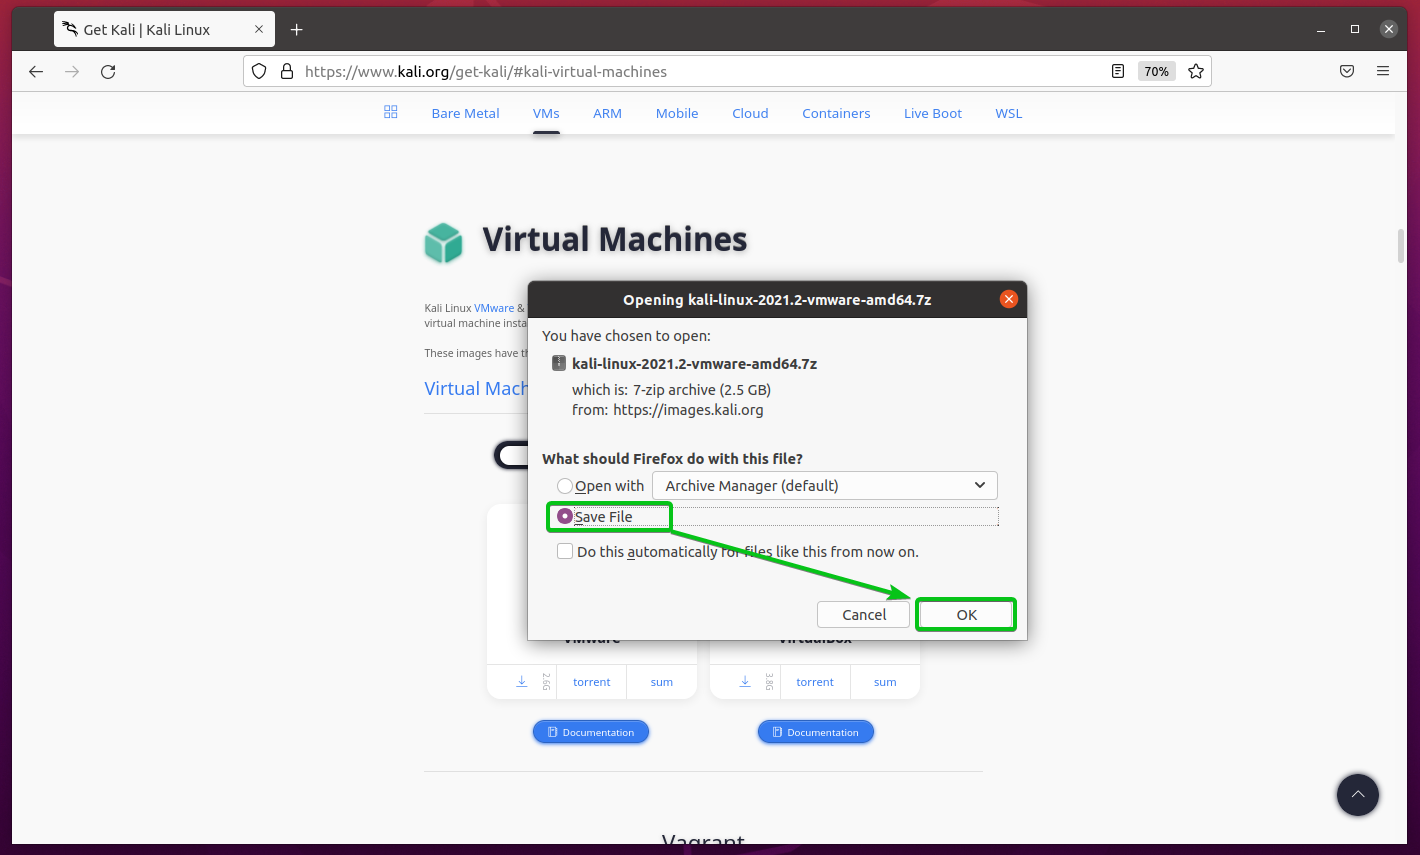
Your browser should prompt you to save the Kali Linux VMware Image archive.
Select Save File and click on OK as marked in the screenshot below.
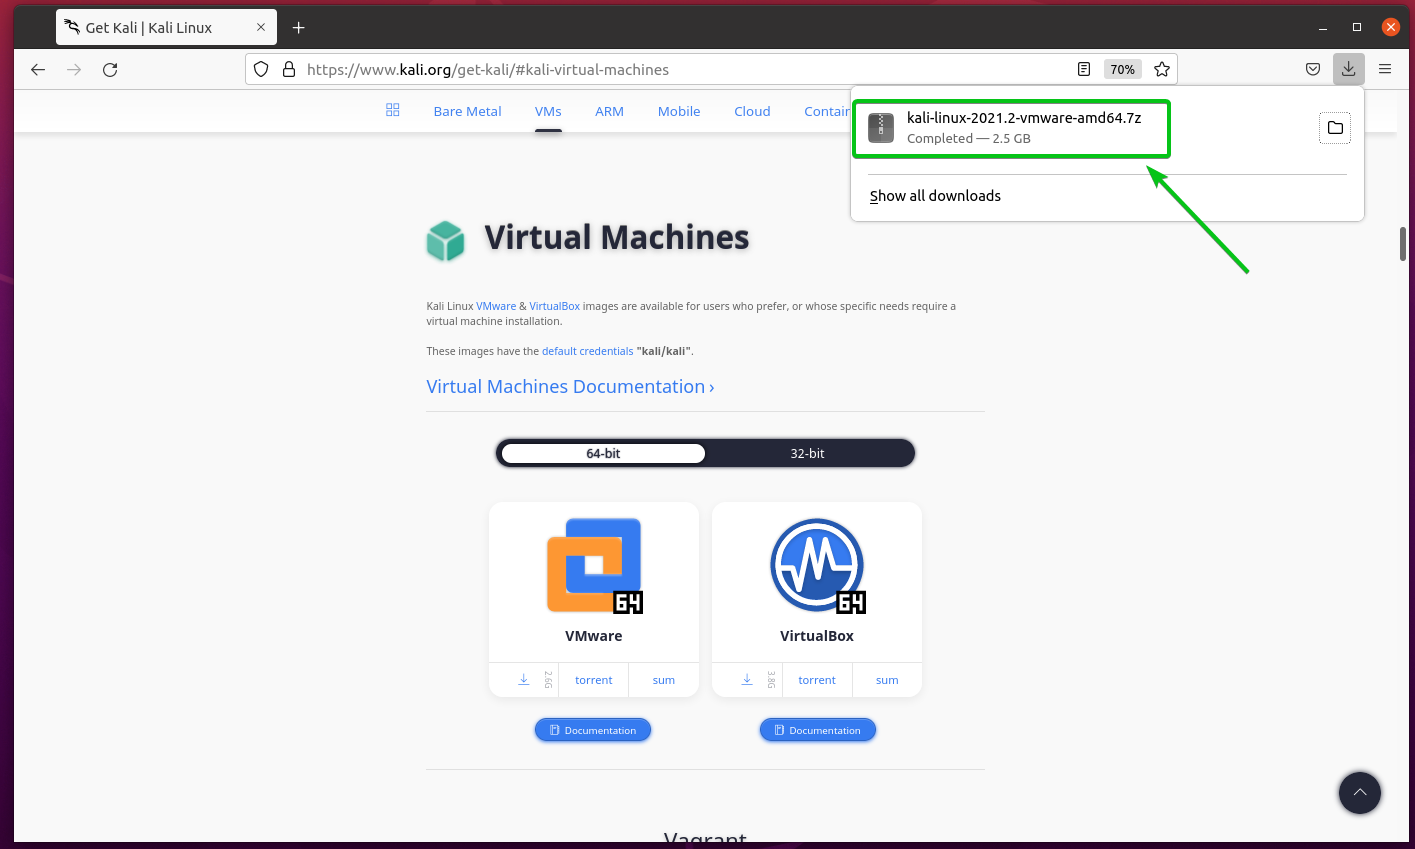
Your browser should start downloading the Kali Linux VMware Image archive, as shown in the screenshot below. It may take a while to complete.

At this point, the Kali Linux VMware Image archive should be downloaded.
Importing the Kali Linux VMware Image to VMware Workstation Pro 16:
To import the Kali Linux VMware Image to VMware Workstation Pro 16, you must know the filesystem location where VMware Workstation Pro 16 saves virtual machine data on your computer.
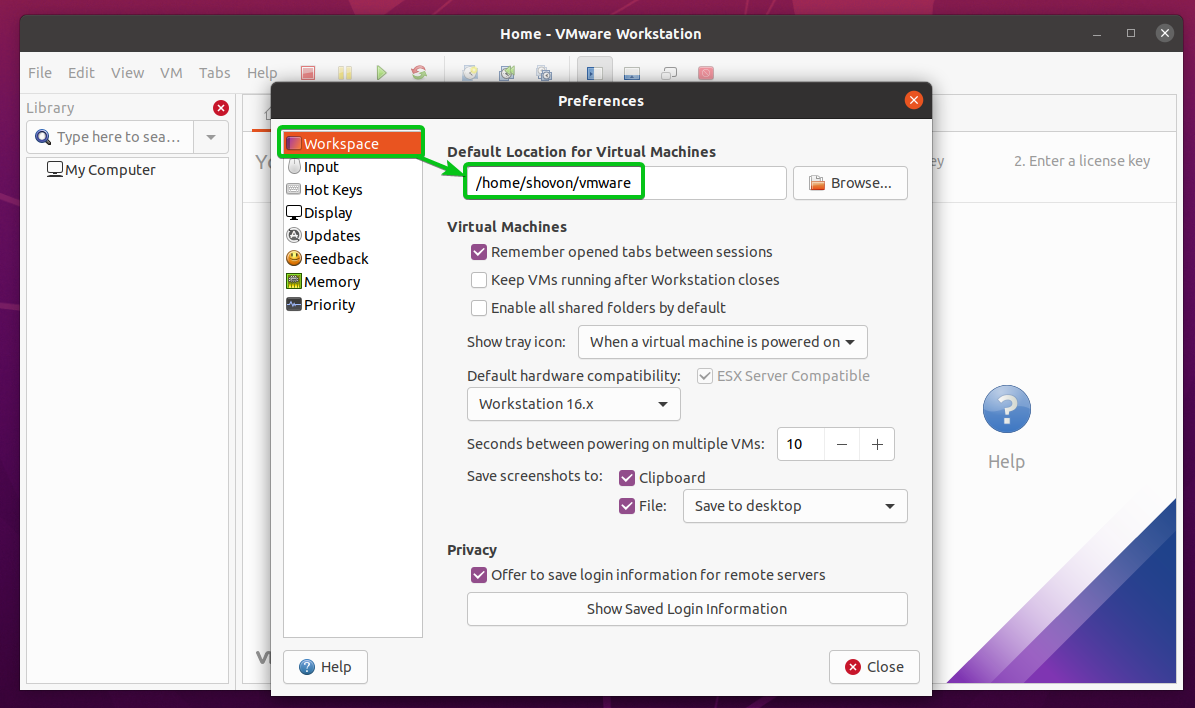
If you don’t know the filesystem location where VMware Workstation Pro 16 saves the virtual machine data on your computer, open VMware Workstation Pro 16 and click on Edit > Preferences as marked in the screenshot below.
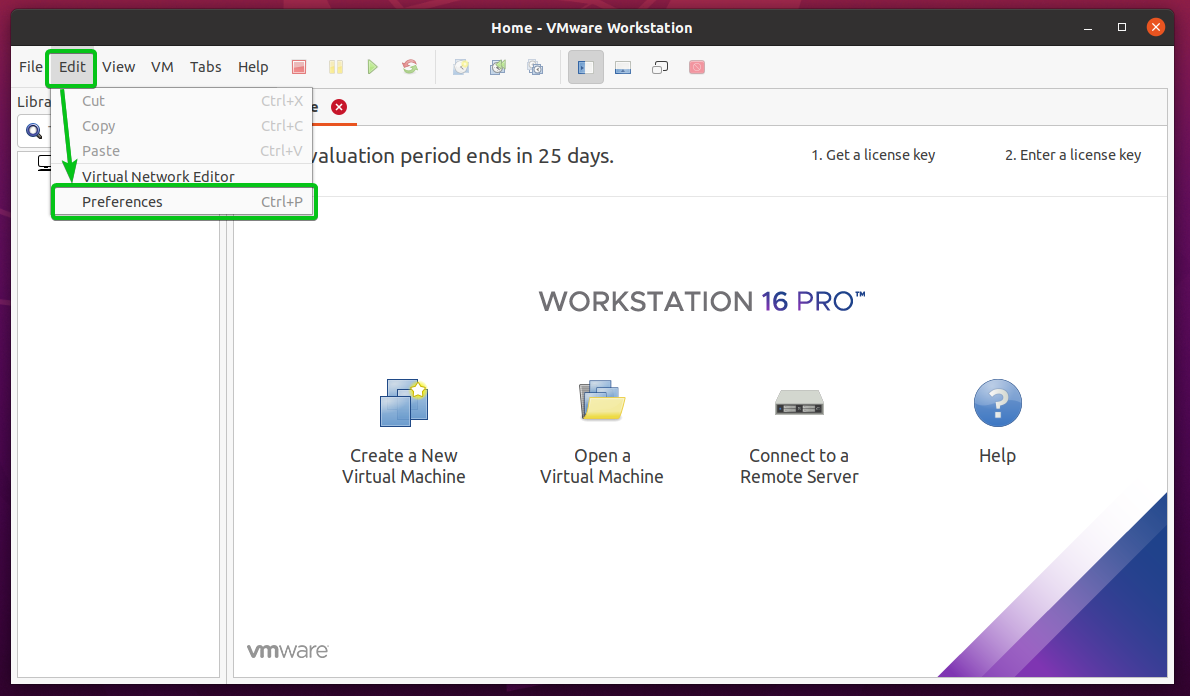
In the Workspace > Default Location for Virtual Machines section, as marked in the screenshot below, you should find the filesystem path where VMware Workstation Pro 16 stores the virtual machine data on your computer.
In my case, it is in the vmware/ directory in my user’s HOME directory.
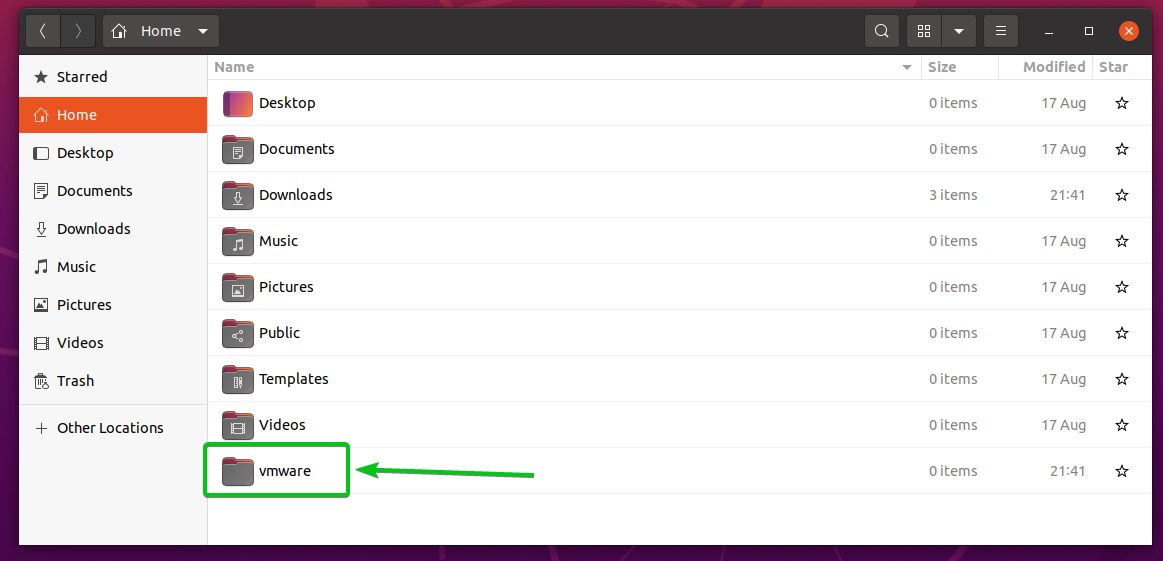
If you have just installed VMware Workstation Pro 16 on your computer and haven’t created any virtual machines, the vmware/ directory may not be available where it should be. In that case, you can simply create a vmware/ directory in your user’s HOME directory as marked in the screenshot below.
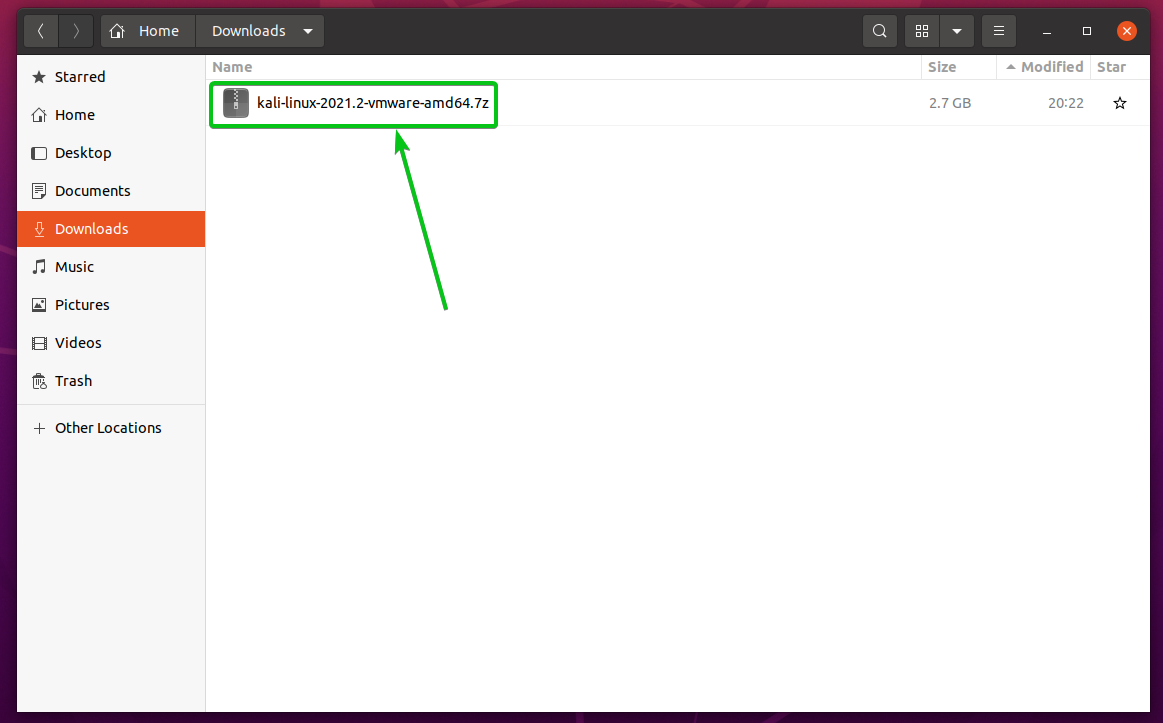
The Kali Linux VMware Image archive kali-linux-2021.2-vmware-amd64.7z should be in the Downloads/ directory of your computer, as you can see in the screenshot below.
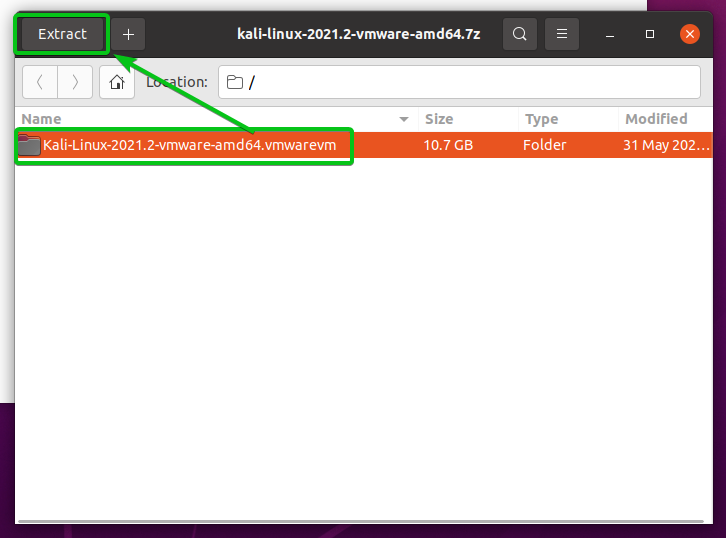
Double-click on the Kali Linux VMware Image archive to open it, and you should find a directory inside the archive, as you can see in the screenshot below.
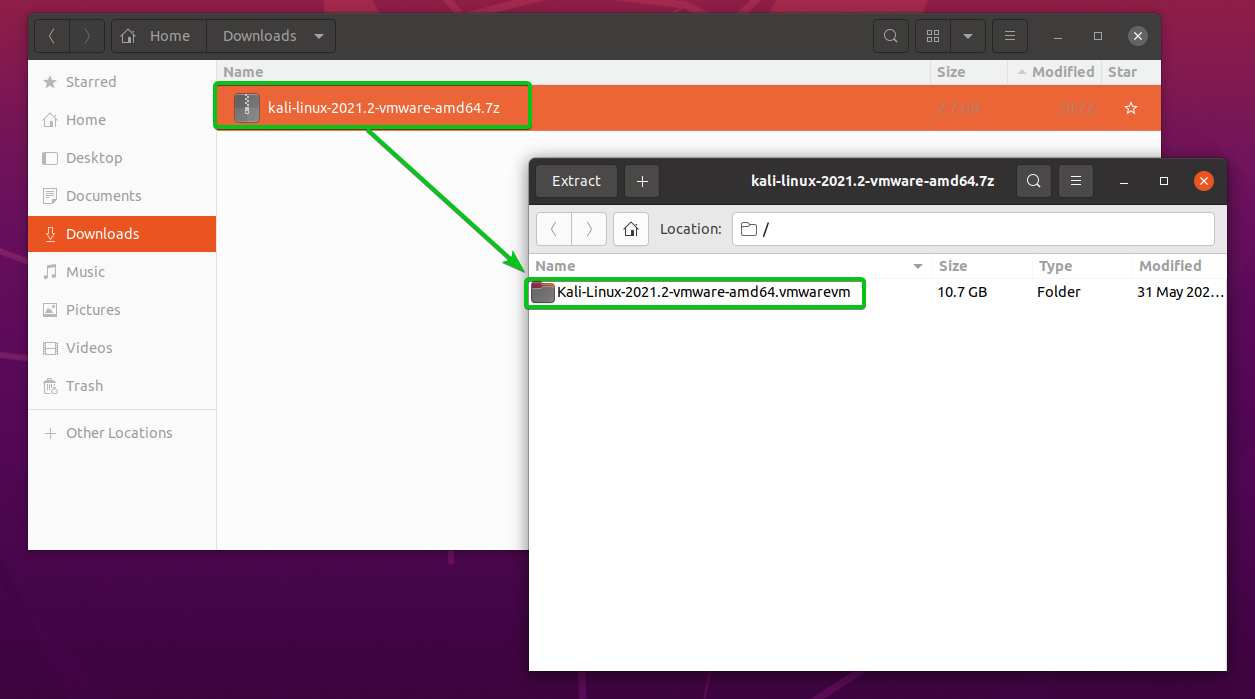
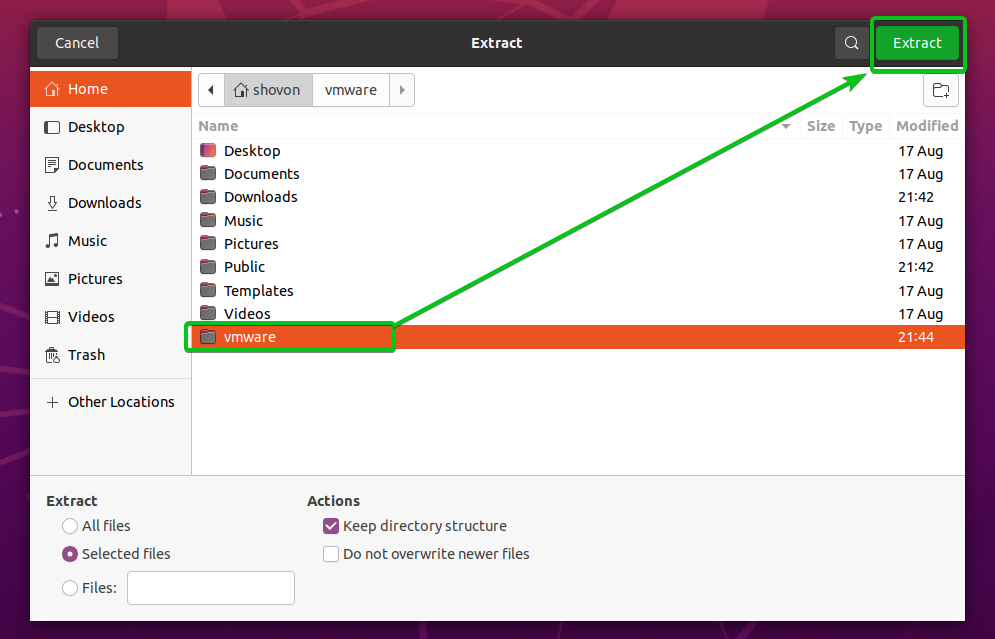
Select the directory and click on Extract as marked in the screenshot below.
/vmware/ directory and click on Extract as marked in the screenshot below.
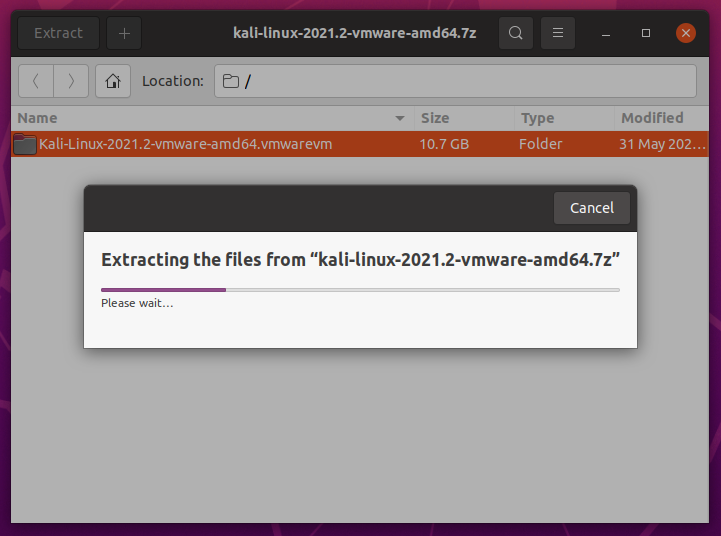
The Kali Linux VMware Image directory is being extracted to your computer’s
/vmware/ directory, as you can see in the screenshot below. It may take a while to complete.
Once the Kali Linux VMware Image directory is extracted, click on Close.
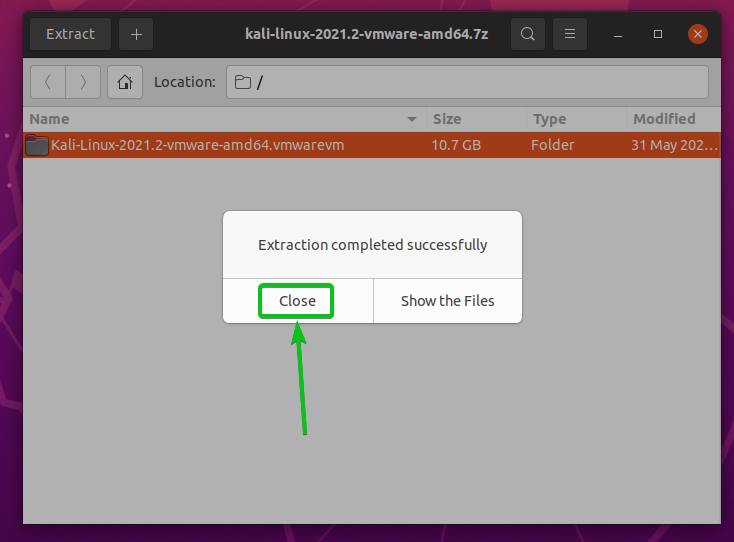
Also, close the Archive Manager app.
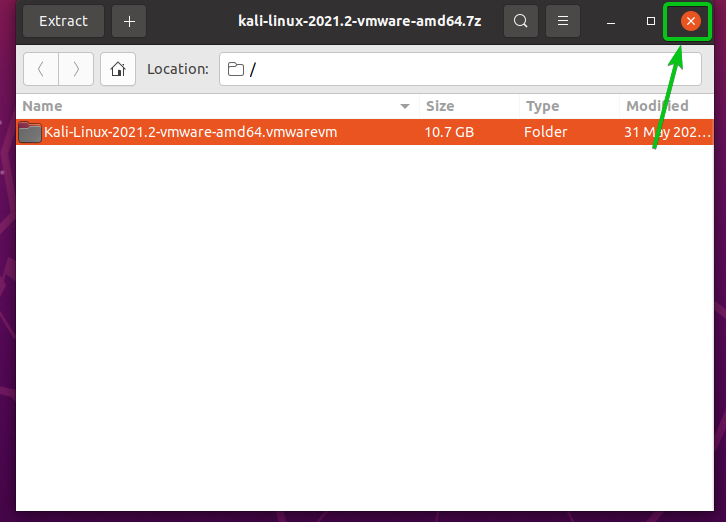
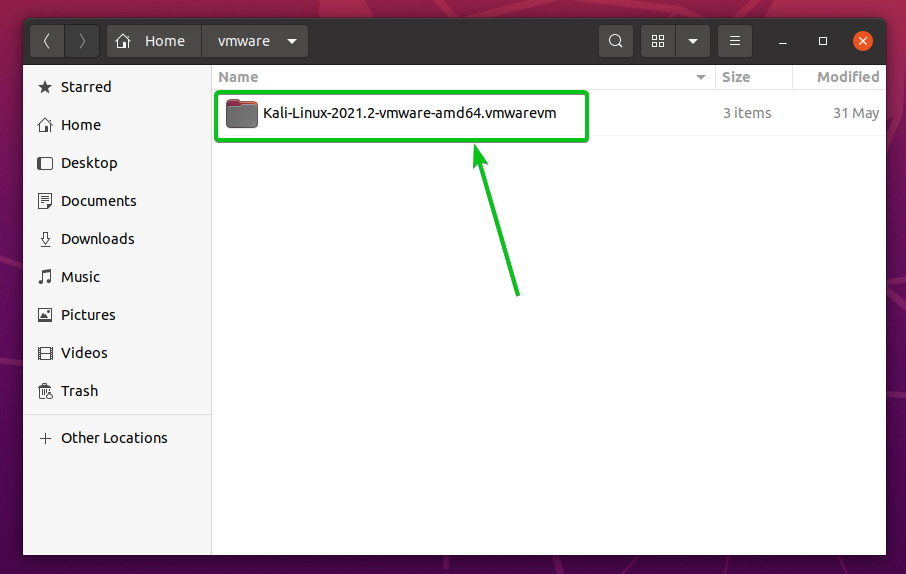
The Kali Linux VMware Image should be extracted in the
/vmware/ directory of your computer, as you can see in the screenshot below.
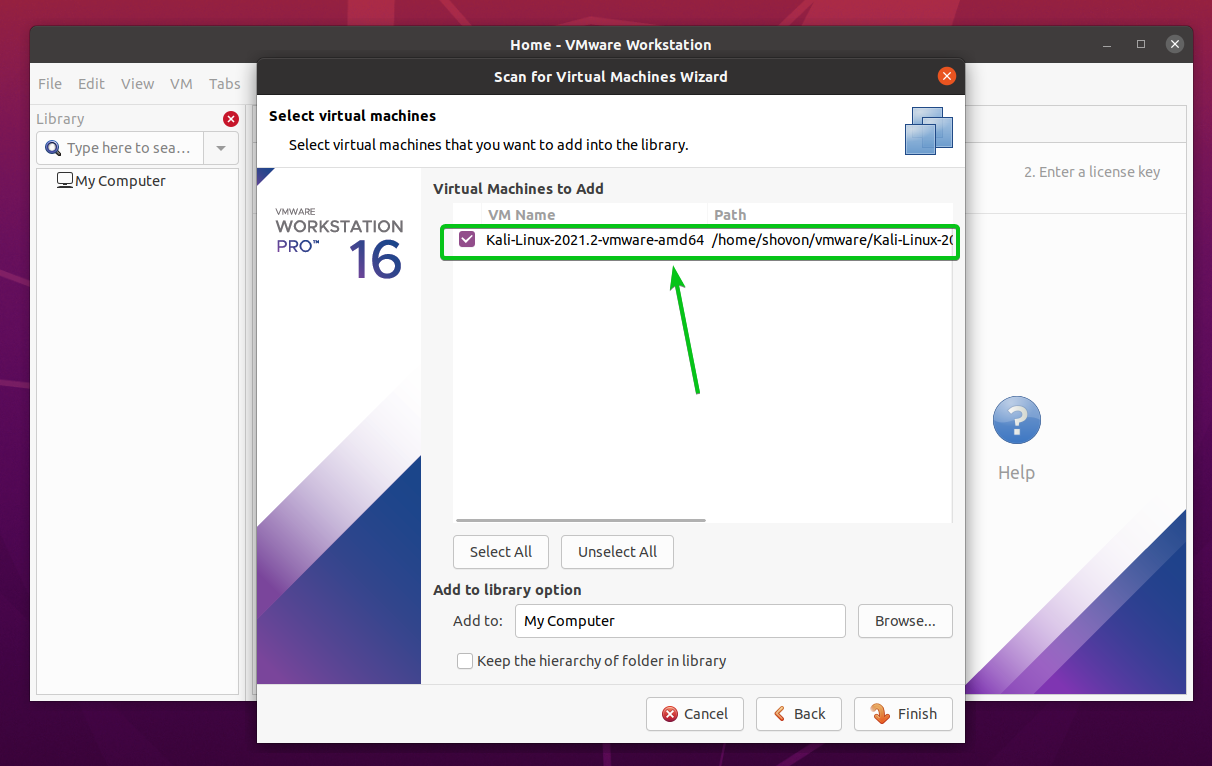
Open VMware Workstation Pro 16 and click on File > Scan for Virtual Machines… as marked in the screenshot below.

Click on Next.

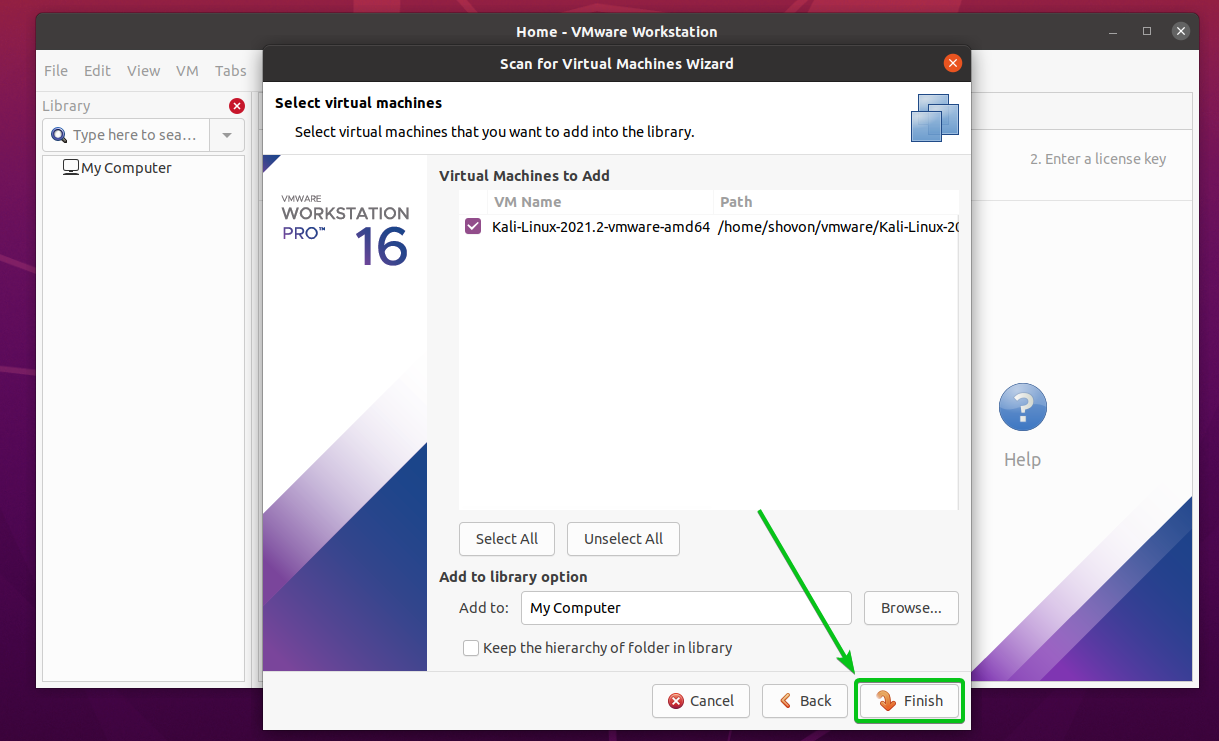
The Kali Linux VMware Image should be listed in the Virtual Machines to Add section, as shown in the screenshot below. Make sure that it is checked.
Click on Finish.
Click on Close.
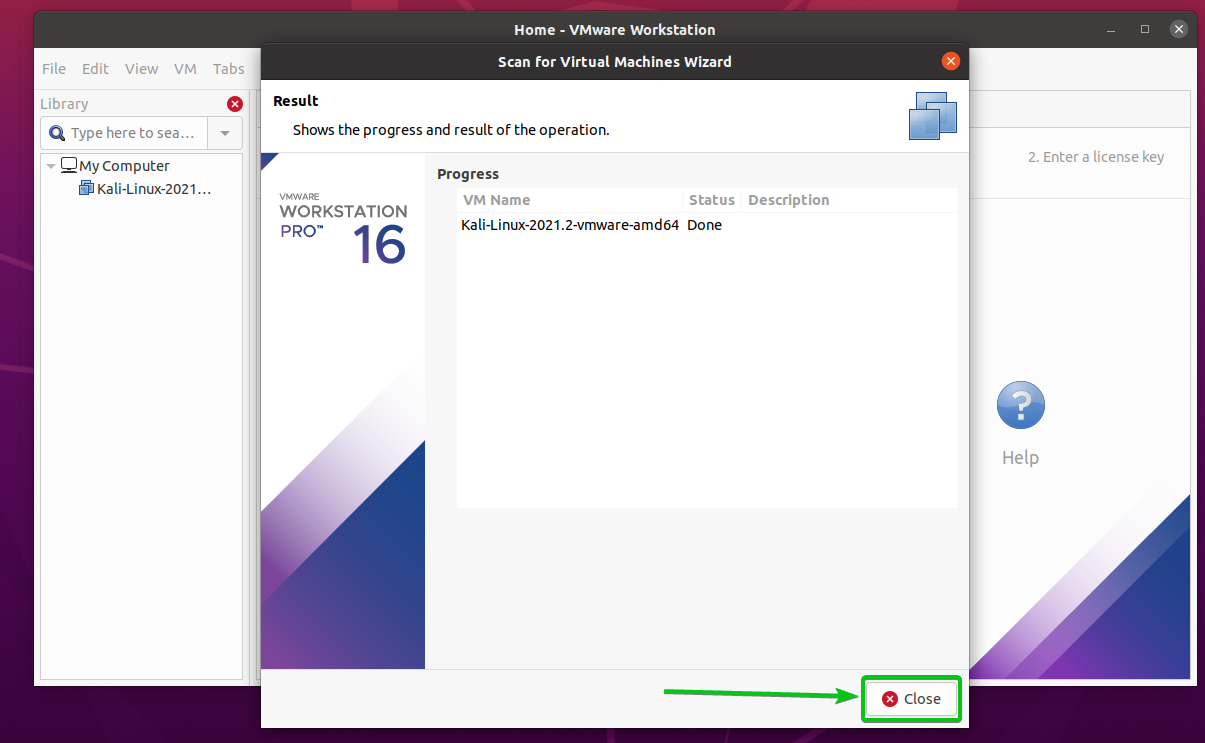
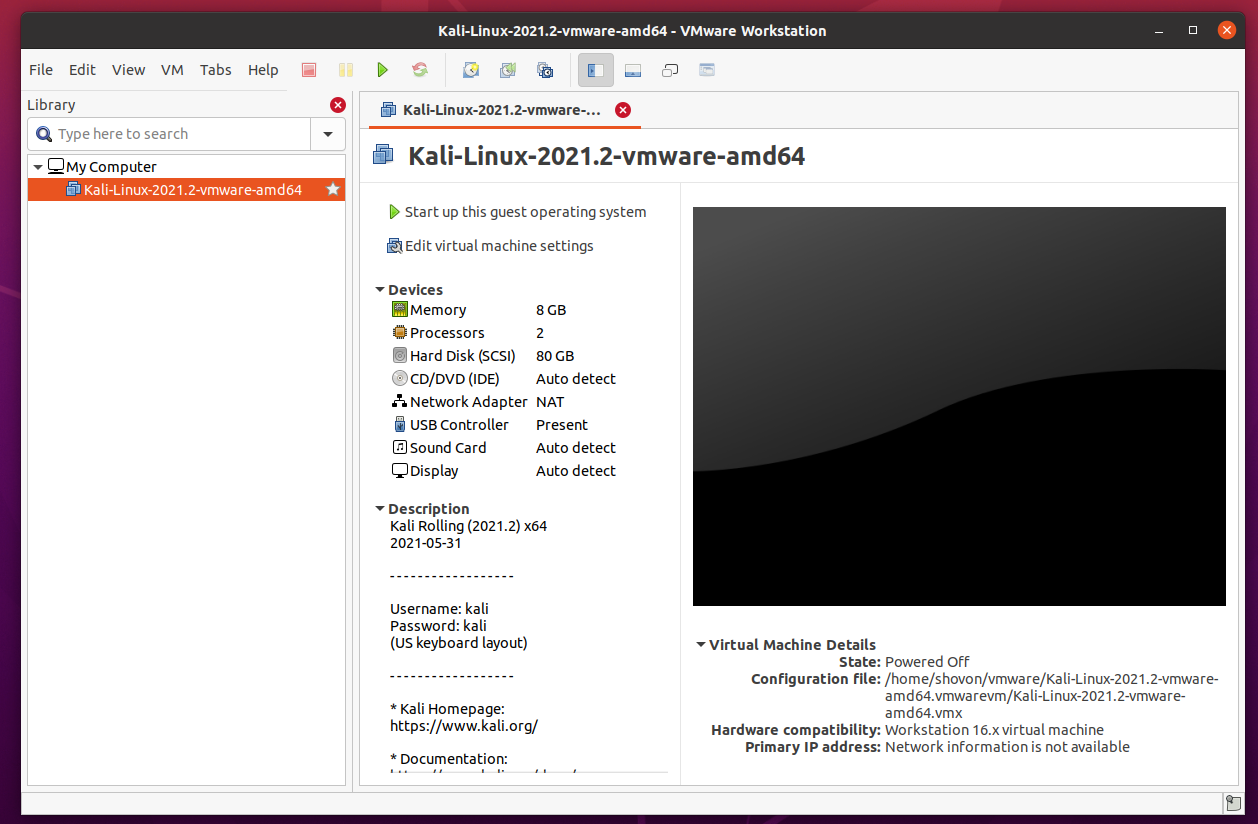
The Kali Linux VMware Image should be imported to VMware Workstation Pro 16 as a virtual machine, as shown in the screenshot below.
Configuring the Kali Linux Virtual Machine:
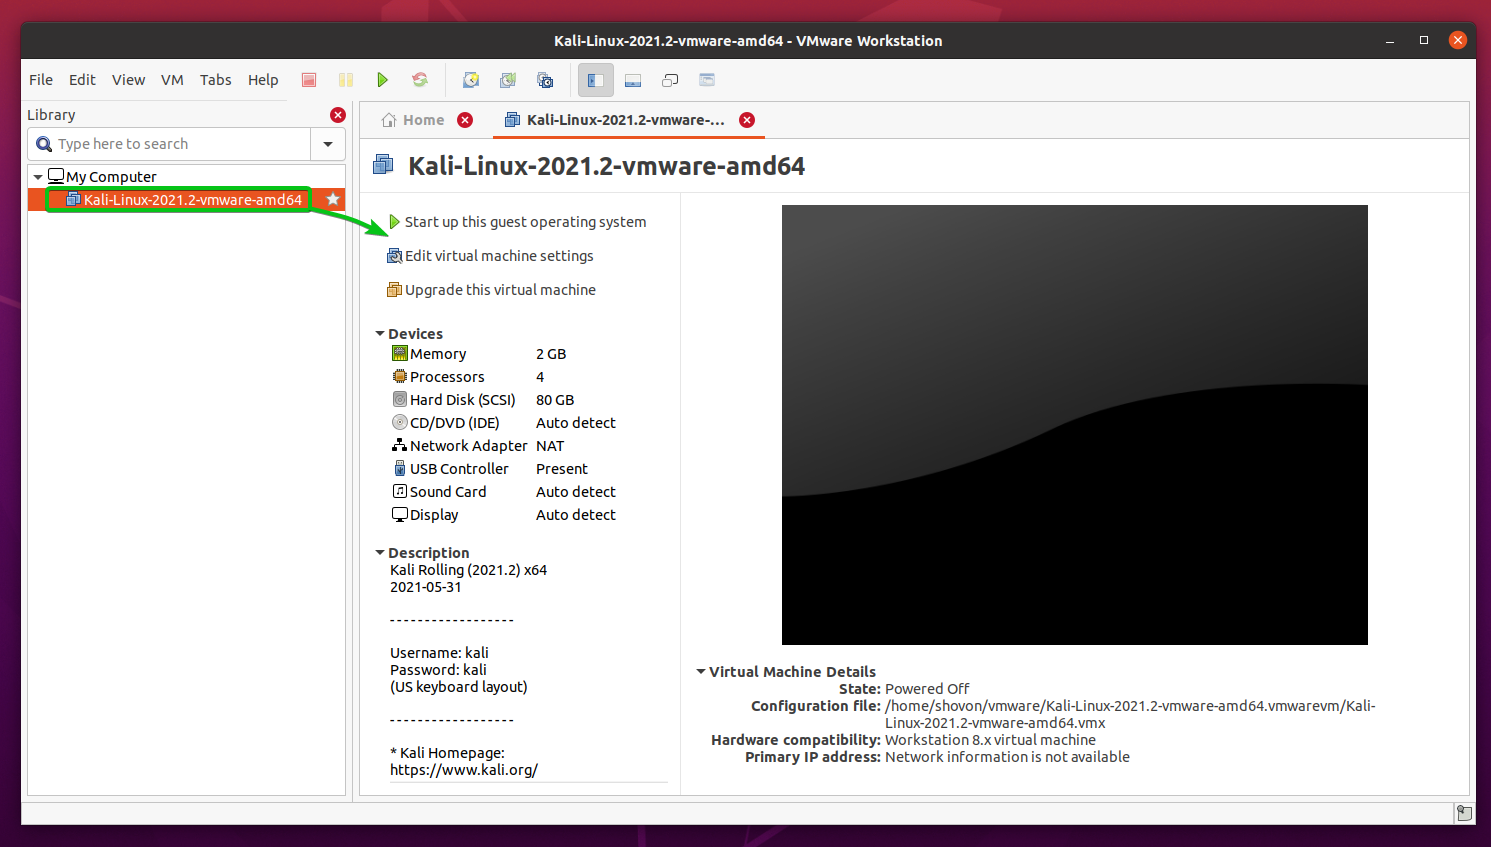
Before starting the Kali Linux virtual machine, you should update the virtual machine and change some settings depending on your requirements.
VMware Workstation Pro 16 supports OpenGL 4.1 3D acceleration for Linux virtual machines. To get the best performance and improve the Graphical User Interface (GUI) responsiveness, you should upgrade the Kali Linux virtual machine to the latest VMware Workstation Pro compatibility mode.
To do that, open the Kali Linux virtual machine you’ve just imported and click on Upgrade this virtual machine, as shown in the screenshot below.
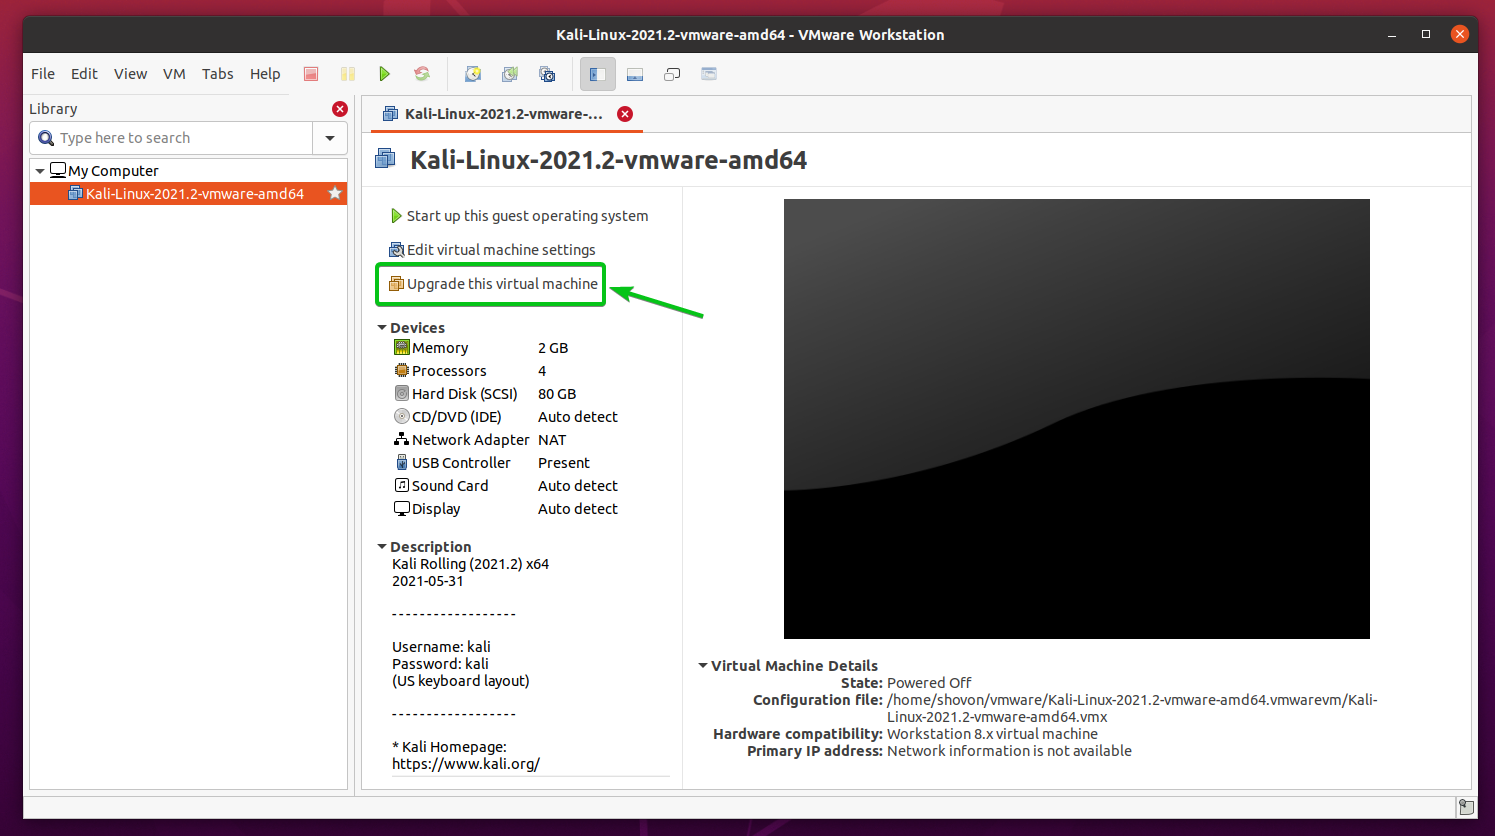
Click on Next.

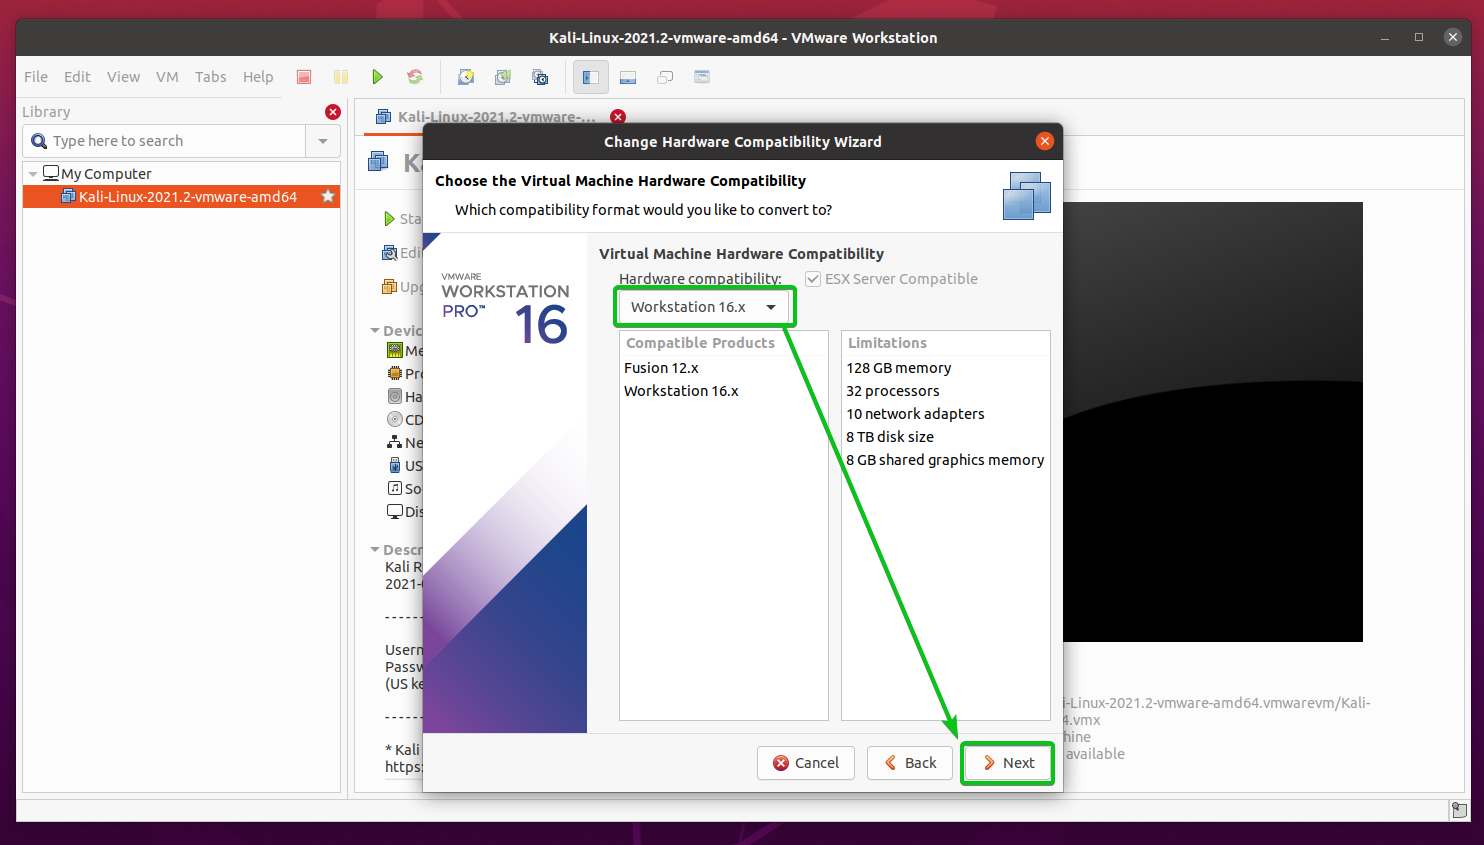
Select Workstation 16.x from the Hardware compatibility dropdown menu and click on Next as marked in the screenshot below.
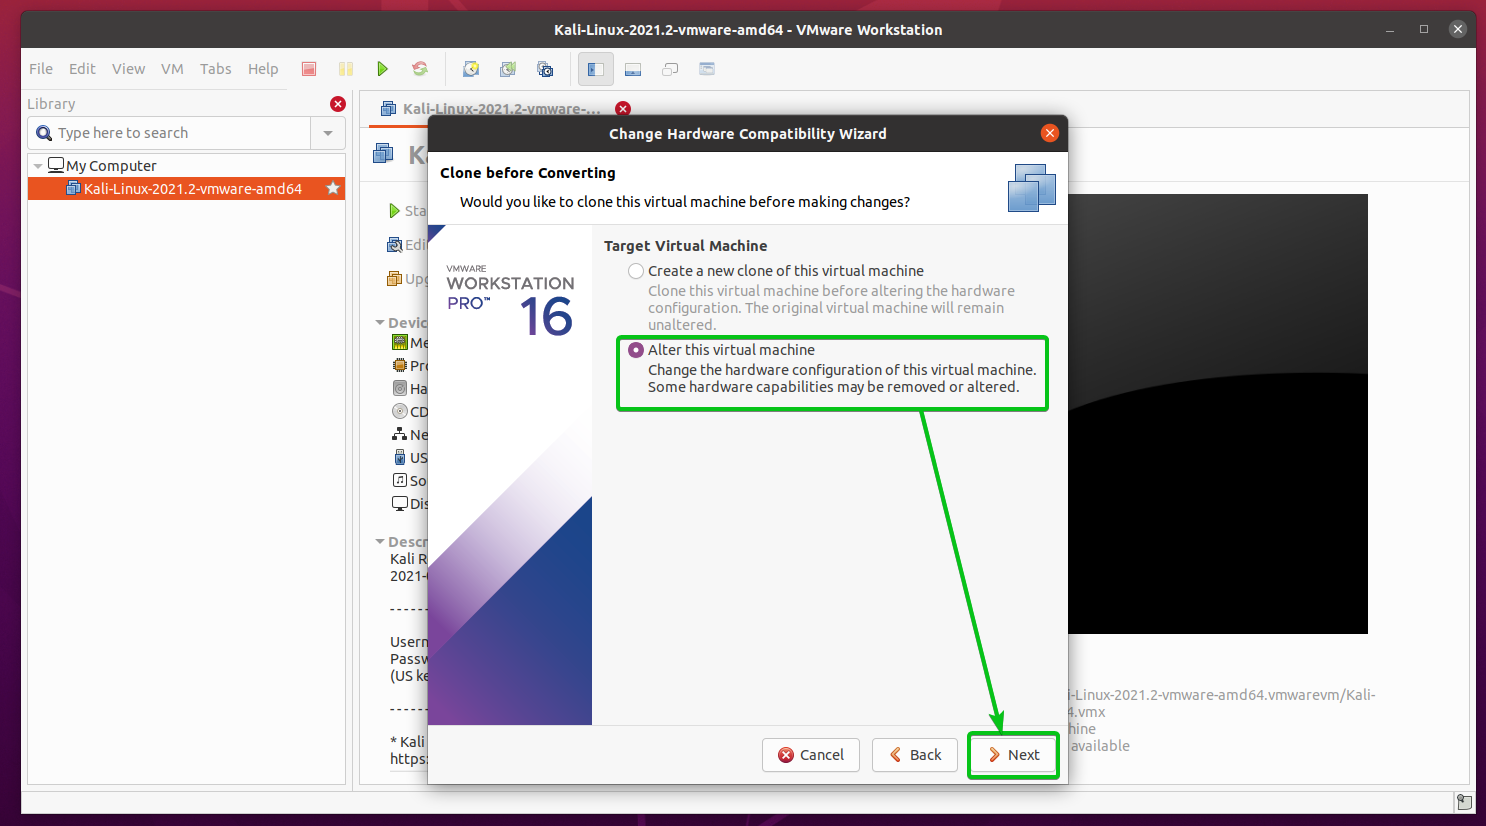
Select Alter this virtual machine and click on Next.
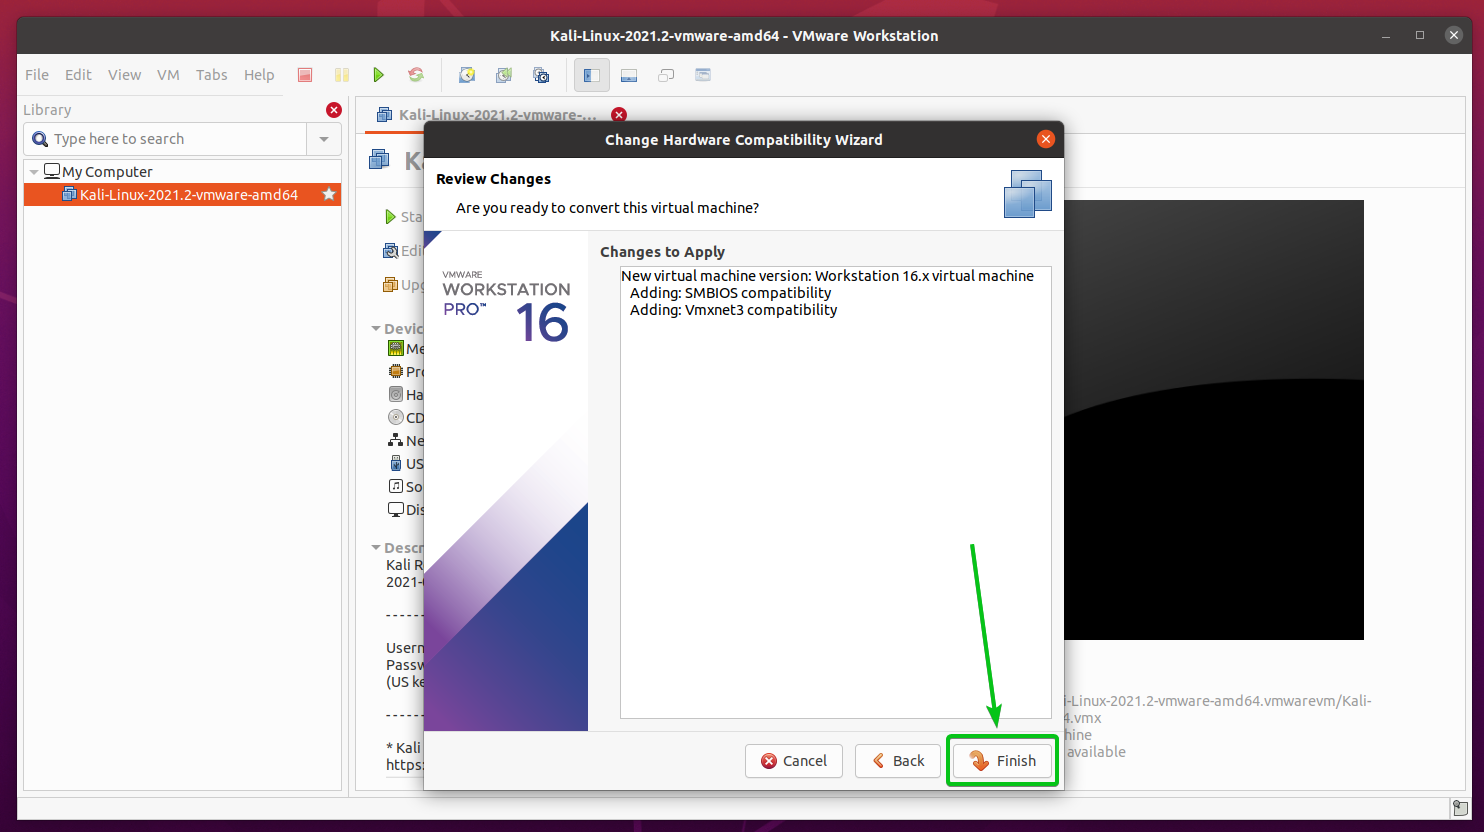
Click on Finish.
Click on Close.
The Kali Linux virtual machine should be upgraded to the latest VMware Workstation Pro 16 compatibility mode.

To change the hardware of the Kali Linux virtual machine, click on Edit virtual machine settings as marked in the screenshot below.

The Virtual Machine Settings window should be opened. You can configure the hardware of the Kali Linux virtual machine from here.
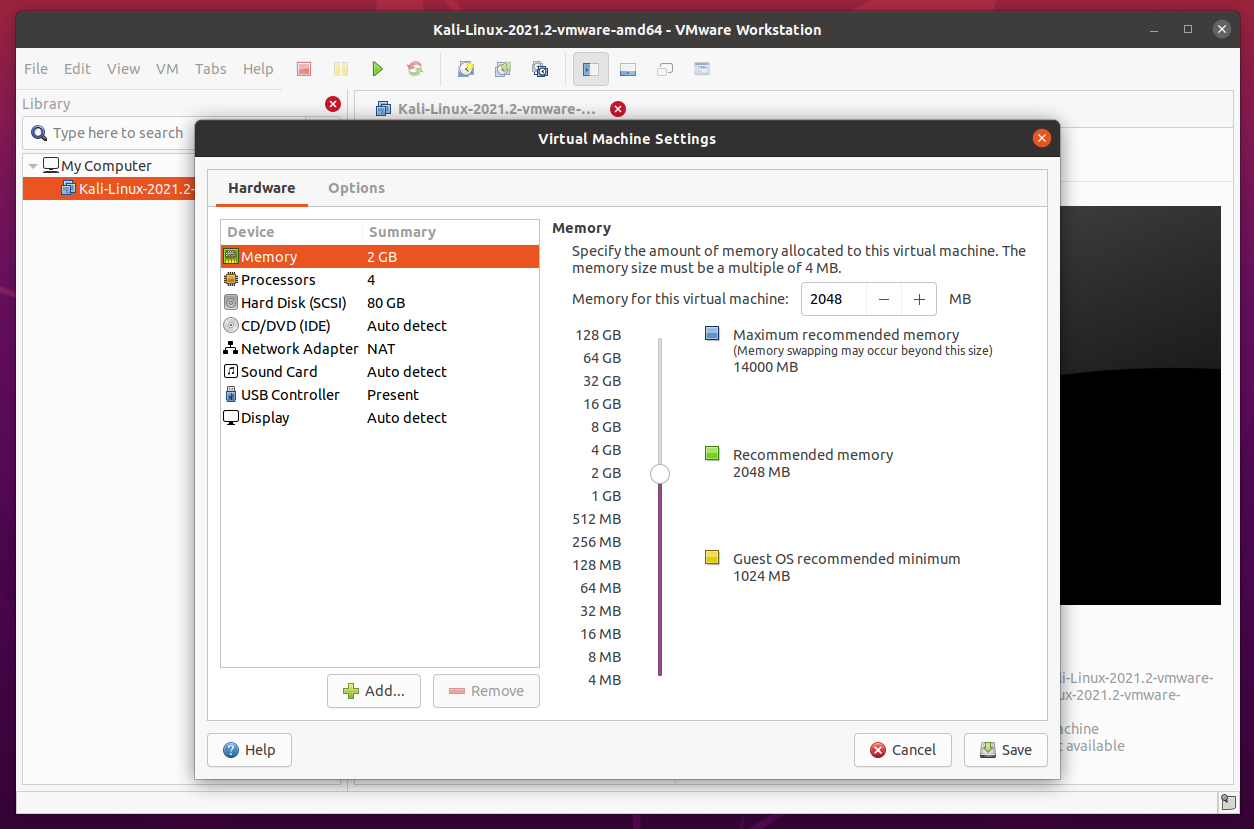
From the Hardware > Memory section, you can increase/decrease the amount of memory/RAM you want to allocate for the Kali Linux virtual machine.

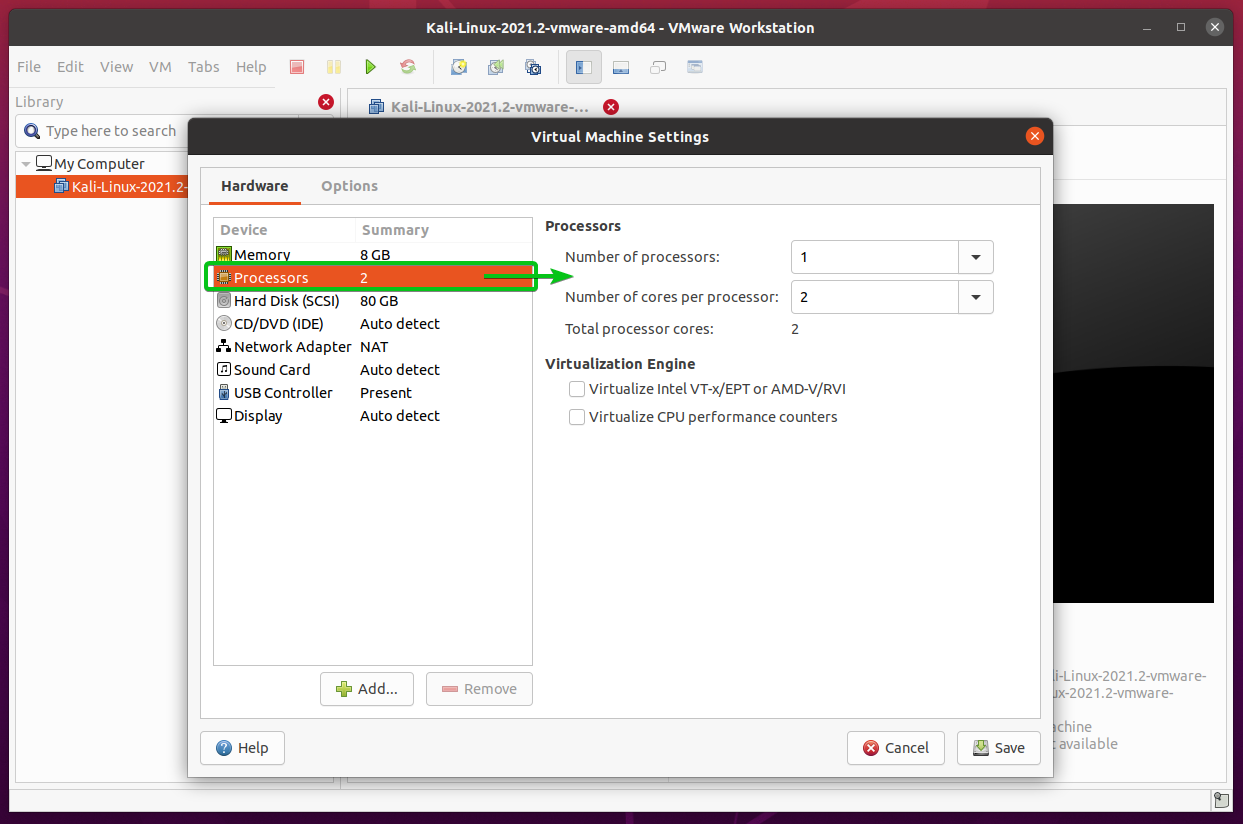
From the Hardware > Processors section, you can configure the number of processors and the number of cores to allocate for each of the processors for the Kali Linux virtual machine.
You can also check the Virtualize Intel VT-x/EPT or AMD-v/RVI checkbox to enable nested virtualization for the Kali Linux virtual machine. If you enable nested virtualization, you will be able to install VMware Workstation Pro, VirtualBox, or any other hypervisor of your choice in your Kali Linux virtual machine. You may need it for penetration testing.
From the Hardware > Display section, check the Accelerate 3D graphics checkbox as marked in the screenshot below to enable 3D acceleration for the Kali Linux virtual machine.
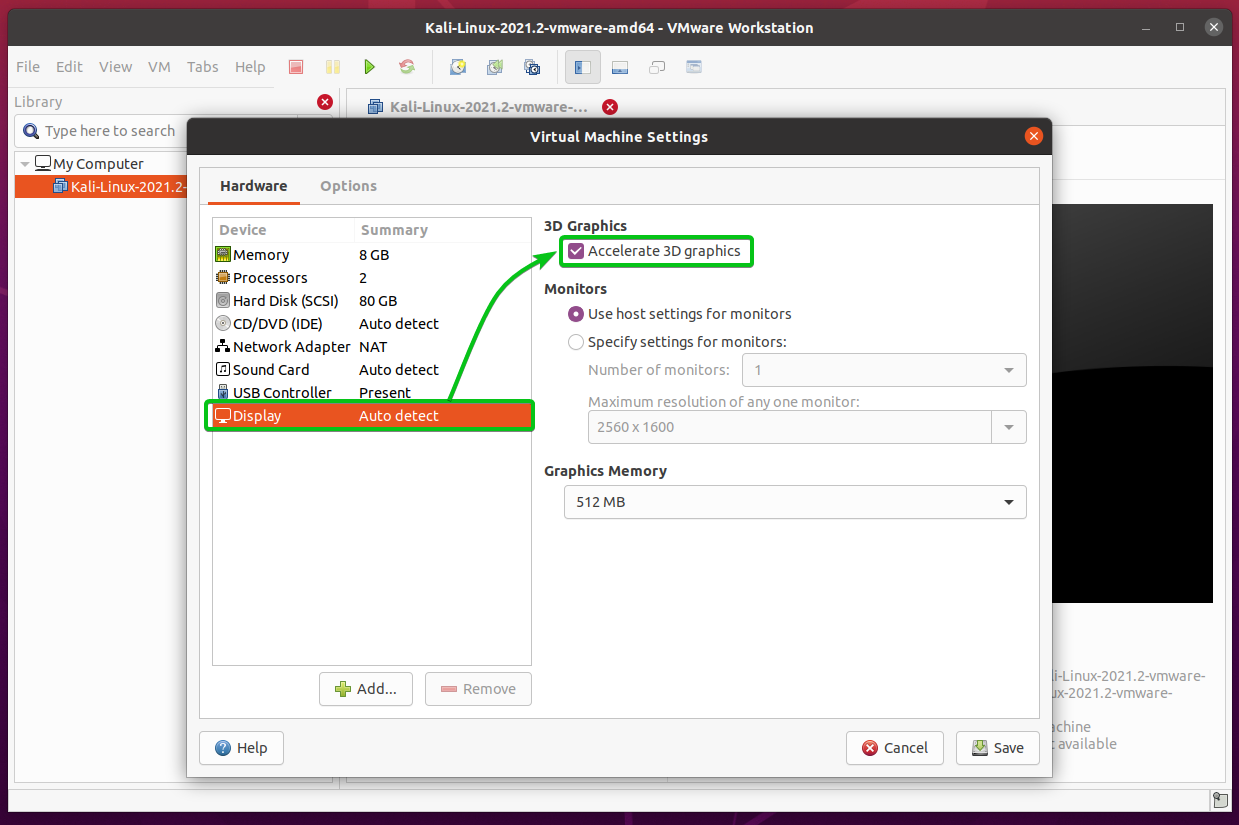
You can also select the amount of Graphics Memory you want for the Kali Linux virtual machine from the Graphics Memory dropdown menu as marked in the screenshot below.

Once you’re done, click on Save.

The hardware changes should be applied to the Kali Linux virtual machine, as shown in the screenshot below. Now, the Kali Linux virtual machine should be ready to start.
Starting Kali Linux Virtual Machine:
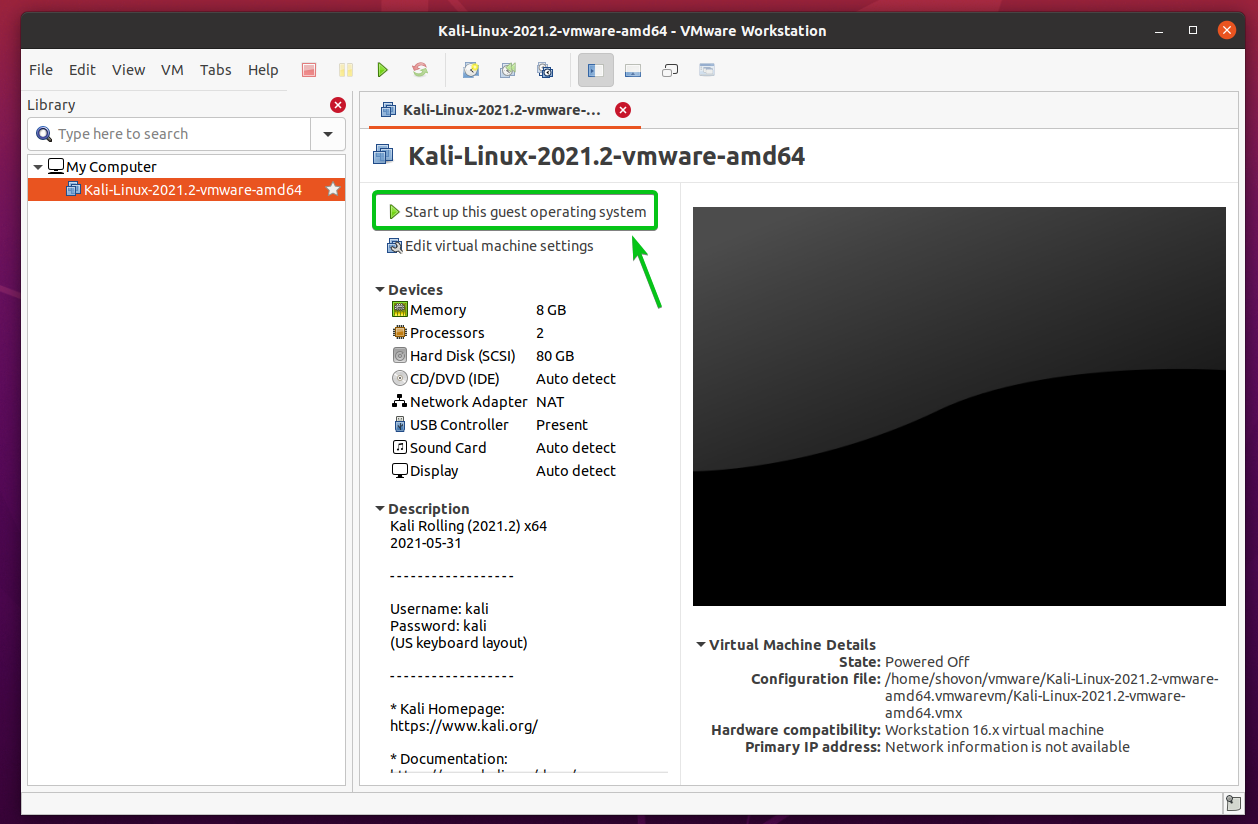
To start the Kali Linux virtual machine, click on Start up this guest operating system or click on the play ( ) button as marked in the screenshot below.
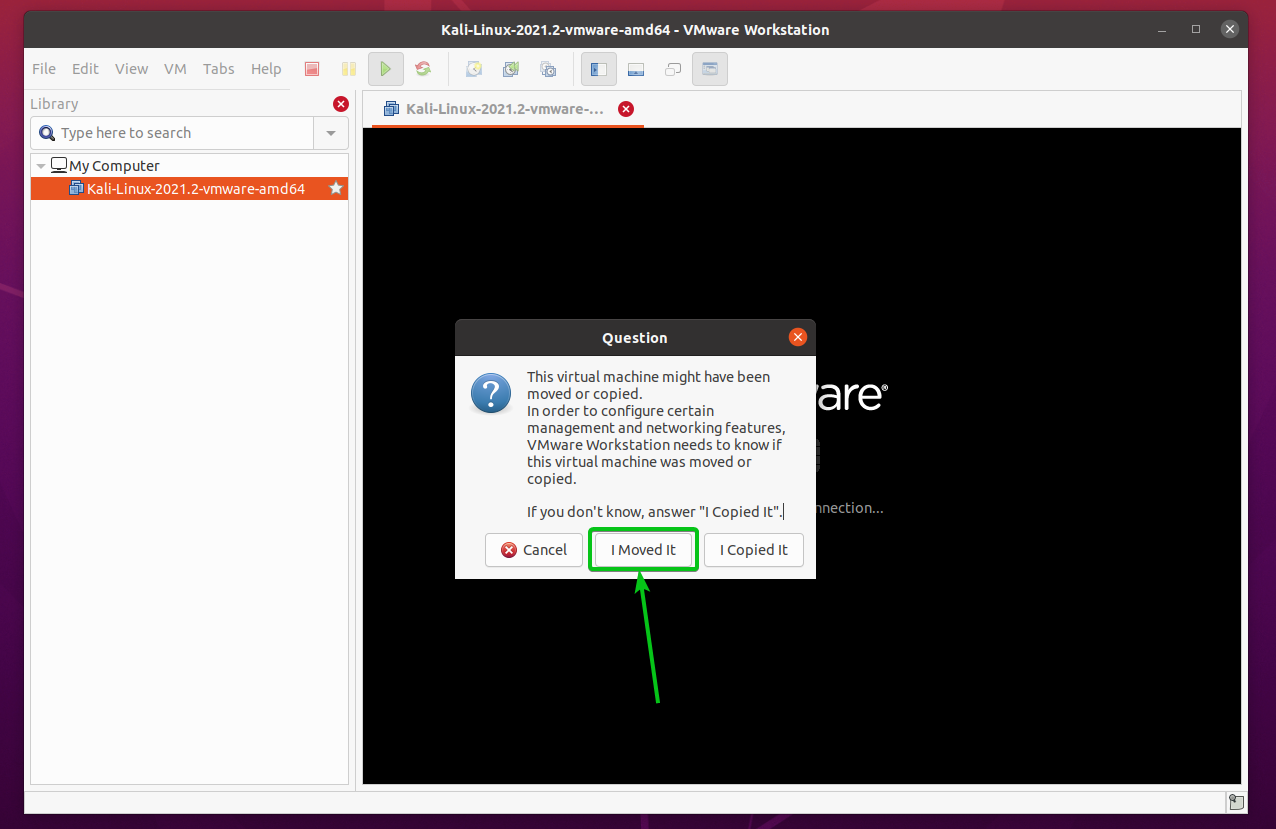
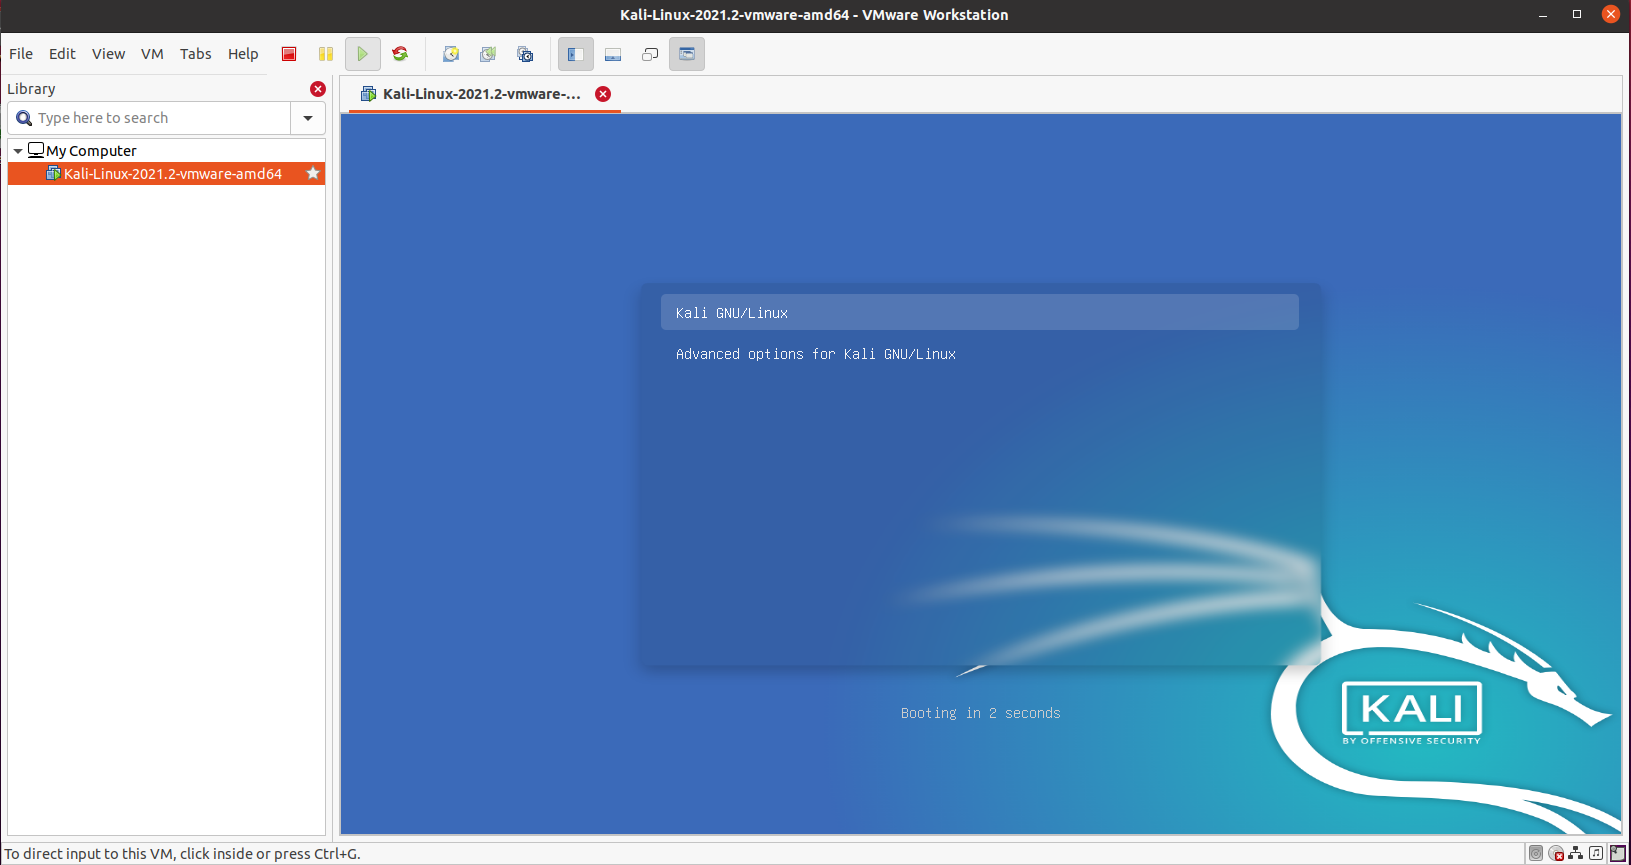
Click on I Moved It as marked in the screenshot below.
You should see the GRUB boot menu of Kali Linux in the virtual machine. It means that the virtual machine is correctly booting Kali Linux.
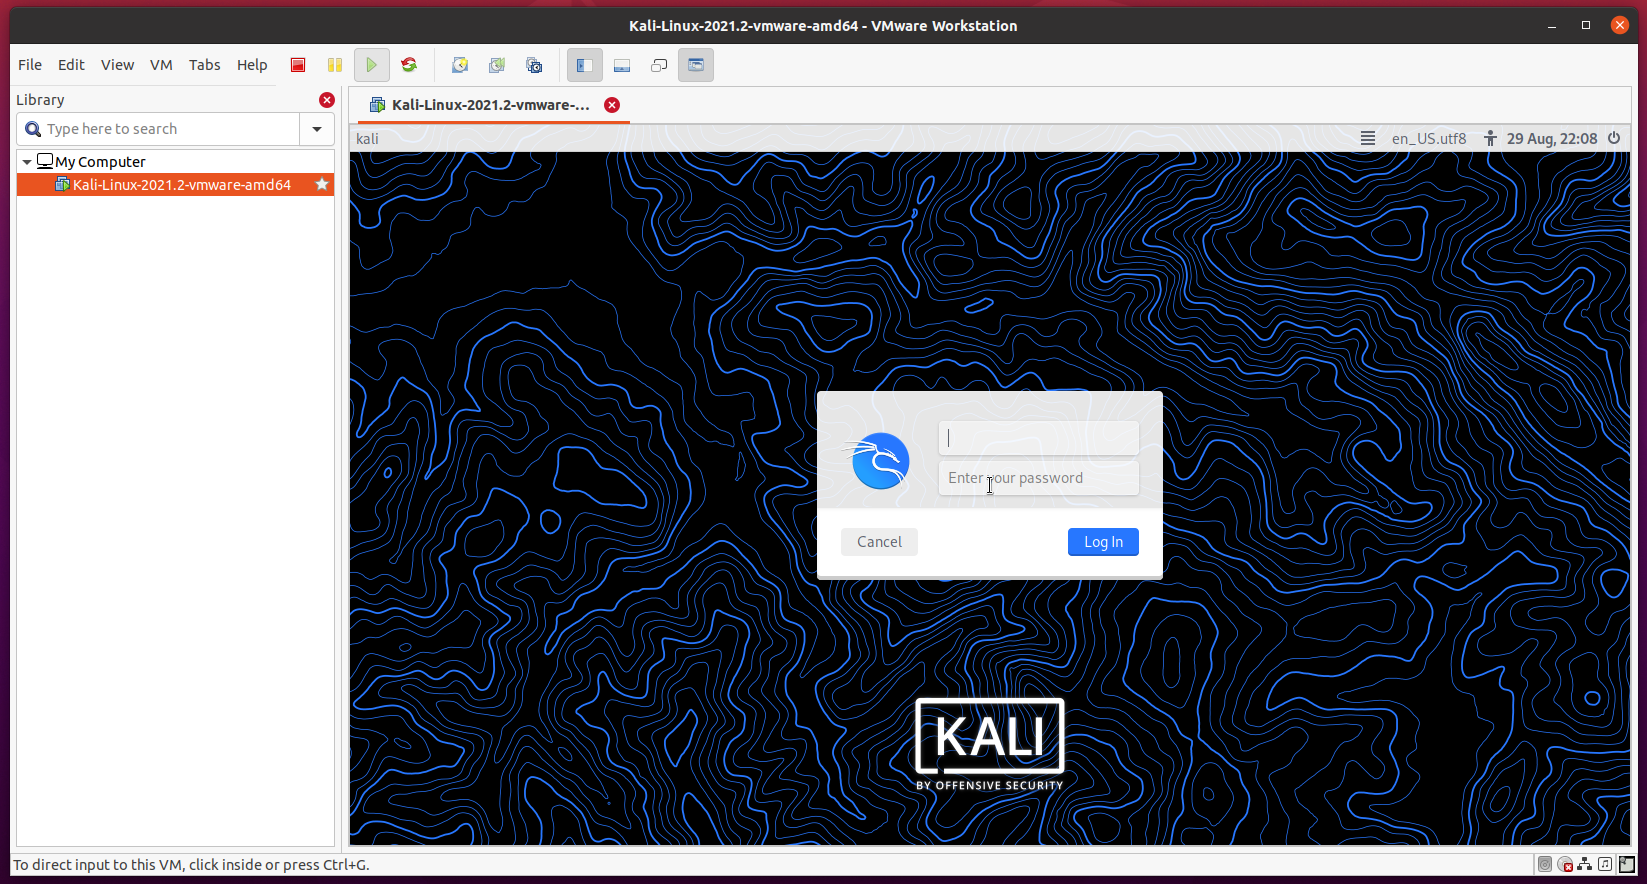
Shortly, you will be prompted for the login username and password. The default login username is kali, and the password is also kali.
Type in the default login username and password and click on Log In.
You should be logged in to the Kali Linux virtual machine, and the Kali Linux desktop environment should be loaded, as you can see in the screenshot below.
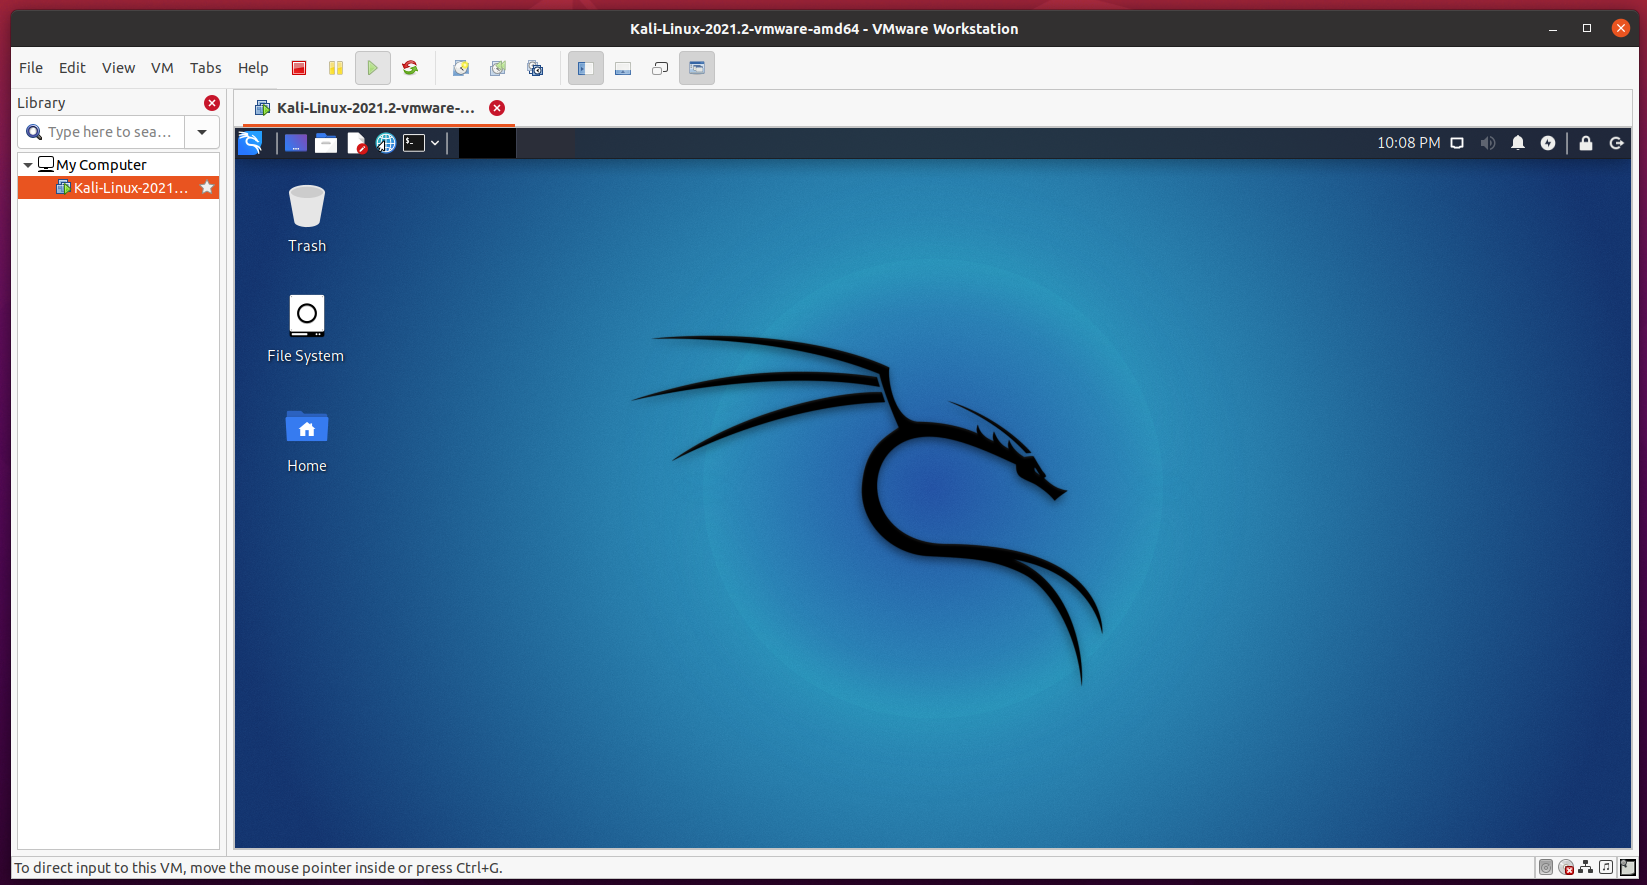
Kali Linux should run just fine on VMware Workstation Pro 16.
Conclusion:
In this article, I have shown you how to download the latest version of the Kali Linux VMware Image and import it as a VMware Workstation Pro 16 virtual machine. I have also shown you how to upgrade the compatibility mode of the Kali Linux virtual machine to the latest version of VMware Workstation Pro to enable the best 3D acceleration performance. I have shown you how to configure the hardware of the Kali Linux virtual machine and start the Kali Linux virtual machine as well.