How To Run Tails Linux Inside Virtualbox
Tails Linux, or just Tails, is a live operating system based on Debian designed to protect your privacy and anonymity. You can boot it from your DVD and USB thumb drive or run it inside a virtual machine. It routes all your data through the Tor Network. In this tutorial, I’m going to show you how to run the Tails live image inside Virtualbox. Tails is an abbreviation of The Amnesic Incognito Live System.
The benefit of using a live operating system such as Tails is that they are preconfigured to make sure that there is no trace left on your device.
Download Tails ISO Image
To get the Tails live image, go to https://tails.boum.org. There will be a link to download Tails. You should verify the ISO image. There are a couple of ways you can do that.
Run Tails Linux Inside Virtualbox
To install VirtualBox in Debian or Ubuntu, run the following command:
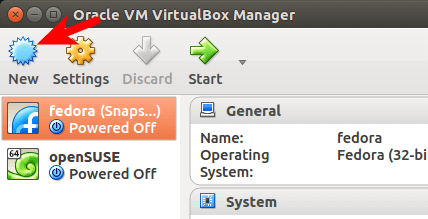
Now fire up VirtualBox. To create a new virtual machine, click the New button.
Give the virtual machine a name. Select Linux as the type and in Version field select 32-bit Linux.
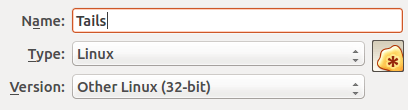
The resizable display and shared clipboard only work in Tails if the virtual machine is configured to have a 32-bit CPU.
In the next window, allocate at least 1024 MB of RAM.

Select Do not add a virtual hard disk in the next screen because Tails is a live OS and it does not need a hard disk to run.
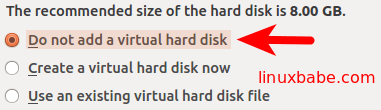
A warning message will appear saying you are creating a virtual machine without a hard disk. Click Continue.
Now a virtual machine for Tails is created, we need to attach the Tails ISO image with this virtual machine. Right click on the newly-created virtual machine and select Settings.
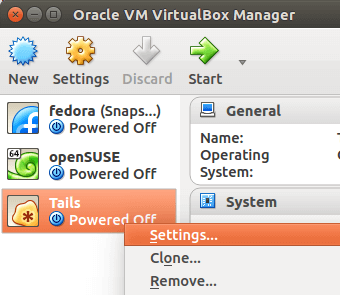
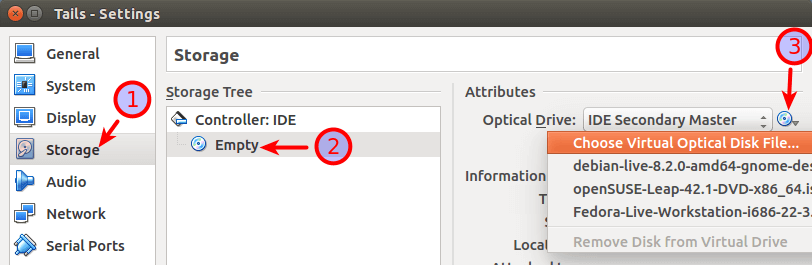
Select Storage in the left pane. Then click Empty under Storage Tree. Next, click the optical drive icon to choose your donwloaded Tails ISO image.
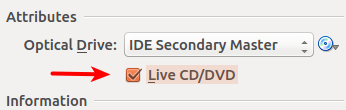
Once you selected Tails ISO image file, check the Live CD/DVD option. This option will prevent Tails from rejecting itself from your virtual machine when you shutdown your virtual machine later on. Click OK.
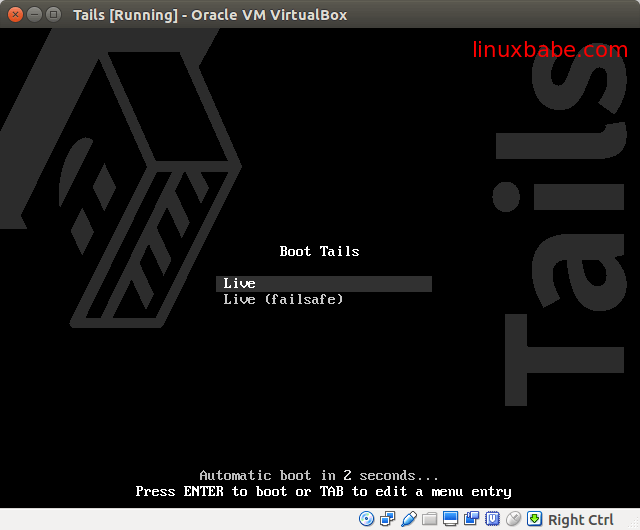
Now Tails can be started by double-clicking your newly-created virtual machine. When Tails starts, choose Live and press Enter.
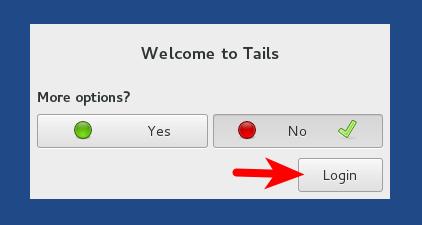
Click the Login button.
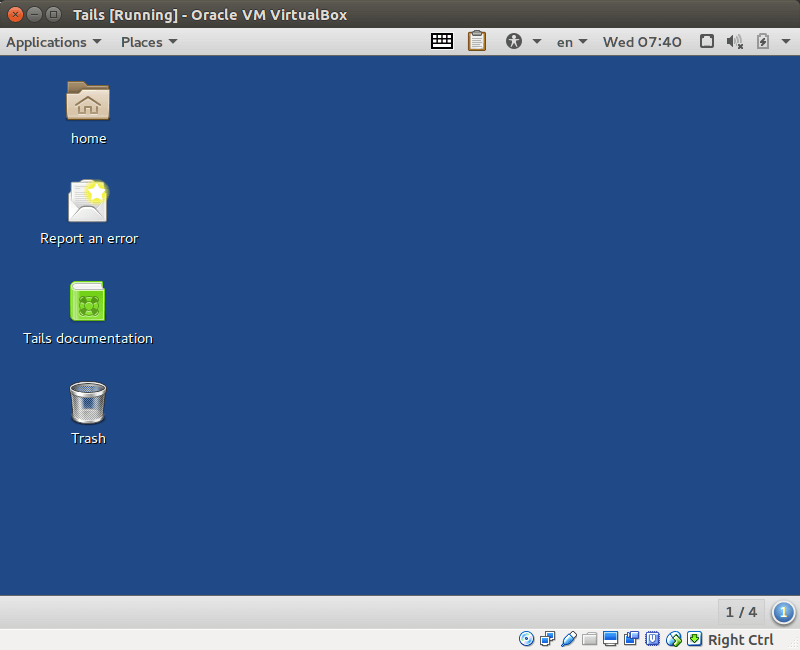
Now Tails desktop appears.
I hope this tutorial helped you use Tails Linux inside Virtualbox. You may also want to use other tools to further protect your privacy.
Требования безопасности для Windows и macOS
Microsoft Windows and macOS being proprietary software, they cannot be considered trustworthy. Only run Tails in a virtual machine on Windows or macOS for testing purposes and do not rely on it for security.
Запуск Tails из ISO-образа
Choose Machine ▸New. .
In the Name and operating system screen:
- A name of your choice
- Type: Linux
- Version: Other Linux (64 bit)
Click Next.
In the Memory size screen:
Allocate at least 2048 MB of RAM.
Click Next.
In the Hard drive screen:
Choose Do not add a virtual hard drive.
Click Create.
Click Continue in the warning dialog about creating a virtual machine without a hard drive.
Choose Machine ▸ Settings. .
Click on the CD icon on the right of the window and select Choose a virtual CD/DVD disk file. to browse for the ISO image you want to start Tails from.
Check the Live CD/DVD option.
Click OK.
VirtualBox Guest Additions has been removed since Tails 4.27. As a result:
The shared clipboard feature of VirtualBox is unavailable.
The screen resolution of Tails can't be changed by resizing the virtual machine window in the host OS. The screen resolution must be changed from inside Tails.
To change the screen resolution from inside Tails, choose Applications ▸ System Tools ▸ Settings ▸ Displays ▸ Resolution.
You might also need to adjust the virtual machine window in the host OS to fit the new screen resolution.
We plan to add back VirtualBox Guest Additions in a future version of Tails. See #18728.
How to install Tails OS on VirtualBox
It is pretty easy to install a Debian-based Linux distro like the Tails OS. Though it can be installed similar to windows, there is an easier and recommended method. That is to use it in a plug-and-play sandbox environment. We can set up a live environment with DVD, USB flash drive, and VirtualBox.
VirtualBox makes it most easier to try out any operating system within another one. And it doesn’t cause security issues.
Follow this guide for proper protocols for installing Tails OS on Virtualbox. If we are not careful on the internet, we may leave traces of sensitive information or even tracker.
For this reason, cybersecurity specialists, journalists, and many others use Linux-based distribution systems like Tails OS on VirtualBox.
Why install Tails OS on VirtualBox?
Tails OS comes from The Tails Project and is a flexible Linux distribution system. It is security and Tor-focused. Tor stands for The Onion Router which enables anonymity over the world wide web.
Tails OS uses Tor networking to rely on every tool the distro offers. And in a VirtualBox environment, the Tails OS makes more sense because its incoming and outgoing connection will be filtered. And the best thing is, once we are done with whatever purpose Tails was installed, it will ensure no footprint or tracker remains.
How to install Tails OS on VirtualBox
Downloading and installing Tails OS on VirtualBox is pretty simple. We’re going to be liberal on the process with 4 easy steps.
Step 1: Downloading and installing VirtualBox
This step is pretty straight forward and we are pretty sure many of you already have VirtualBox installed. For them, please proceed to the second step. If not, download your desired version of VirtualBox and install it. It’s like any other application installed. Choose a drive and go through the initial setup
Step 2: Downloading and installing Tails OS on VirtualBox
This is where things get interesting as we do the initial setup to run the sandbox environment and make our workstation.
The initial procedure here is to download the disk image of Tails OS. Which is fairly easy. Just go to tails.boum.org or search for Tails OS in Google.
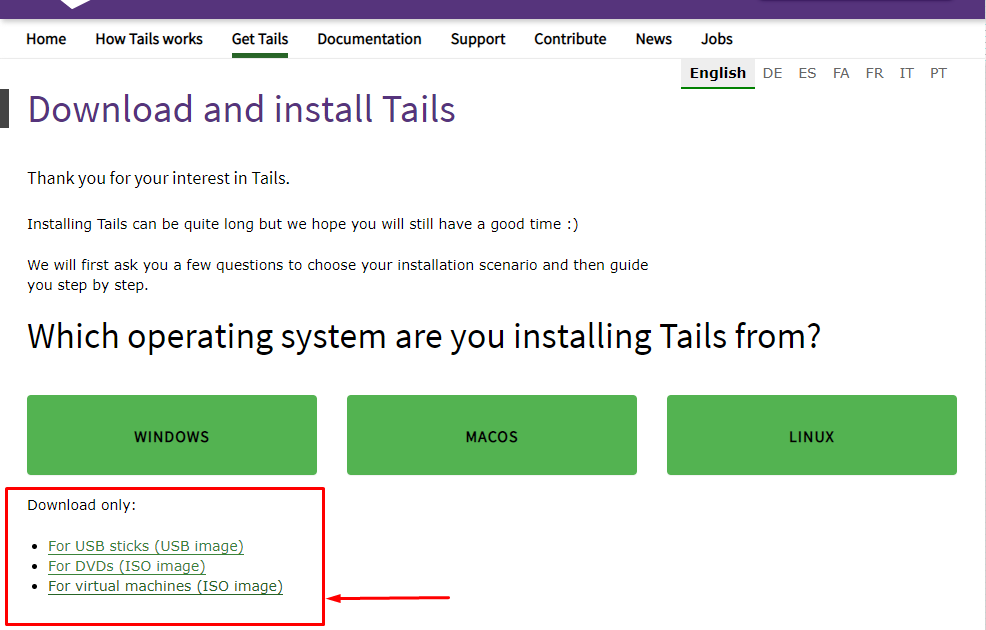
We’ll be greeted with a purple website with supporting adequacies.
Click on “For virtual machines (ISO image)” and it will navigate to the download page.
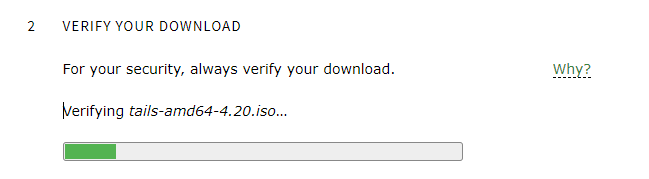
Once downloaded we can verify the download via verify Tails. After completing verification, we can be assured the file we downloaded is safe and is ready for use.
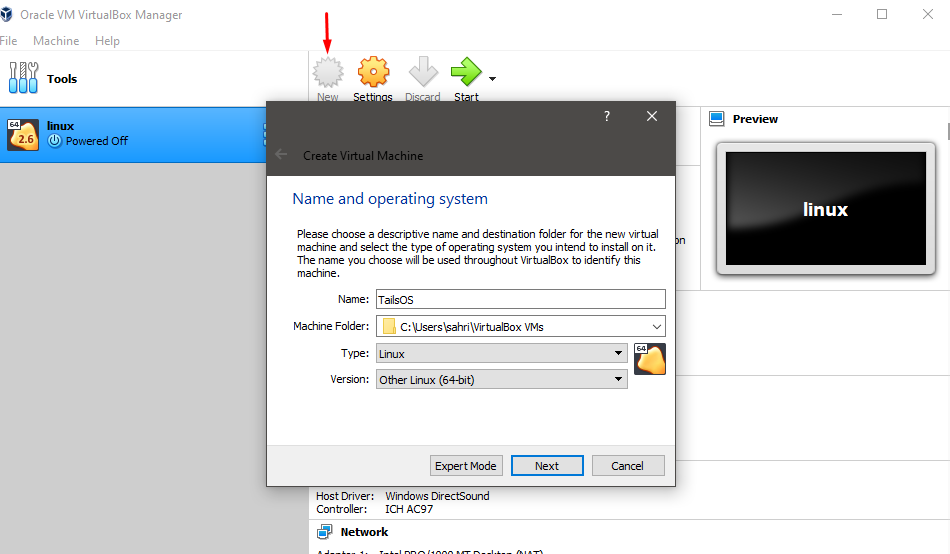
Now let’s fire up VirtualBox and add the Tails OS. Clicks the blue-colored “New” button inside the Oracle VM VirtualBox Manager.
We have the option to set up a name for the OS. For “Type” we are going to select “Linux” as it is a Linux-based distro. In version, select another Linux (64-bit). As 64-bit has great compatibility on a modern computer than 32-bit.
But if you choose to use the 32-bit version, then from setting select the Enable PAE/NX
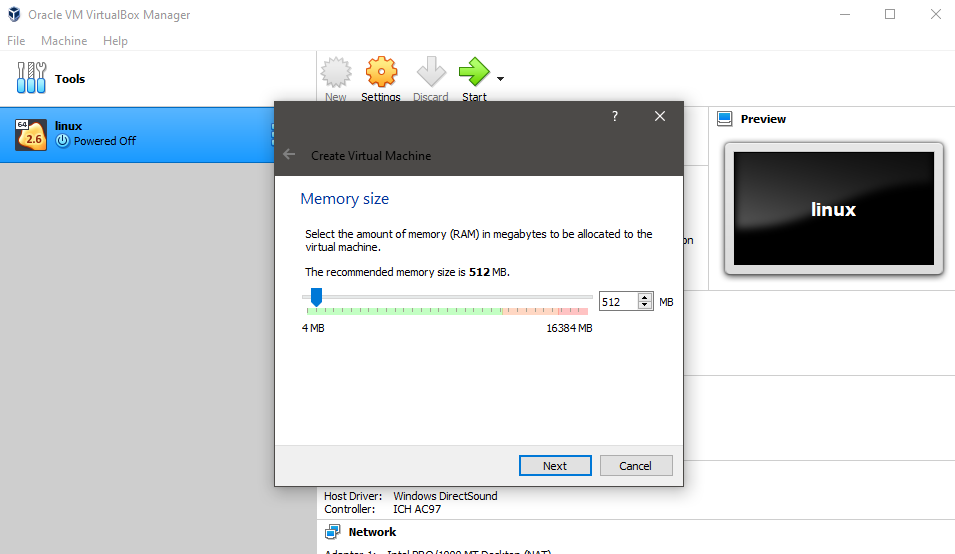
Next, an option for RAM size will pop up. Tails OS doesn’t require many resources so the default 512 MB of RAM is enough to get our job done. We’ll give it a bit more space and set it up with 1 GB (1024 MB) of RAM.
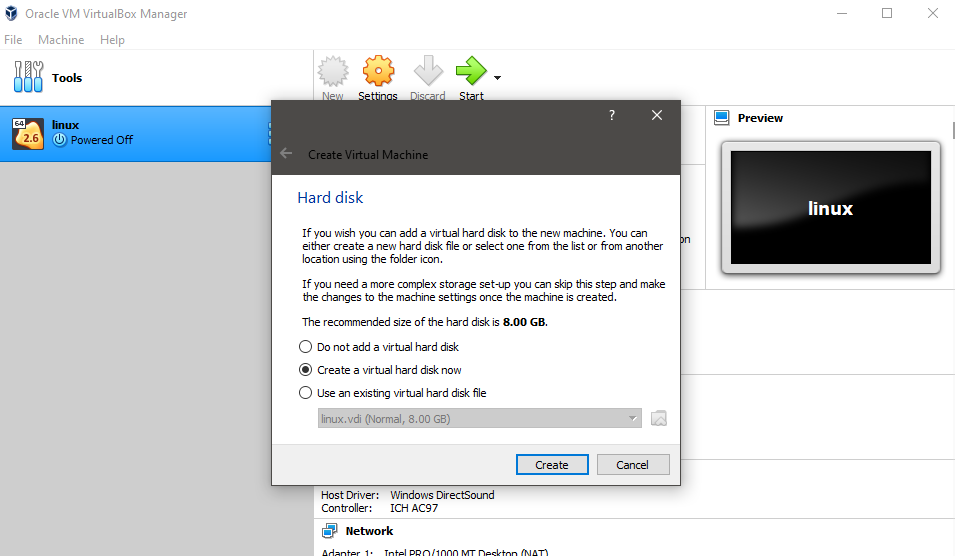
For hard disk, “Create a virtual hard disk now” and hit Next.
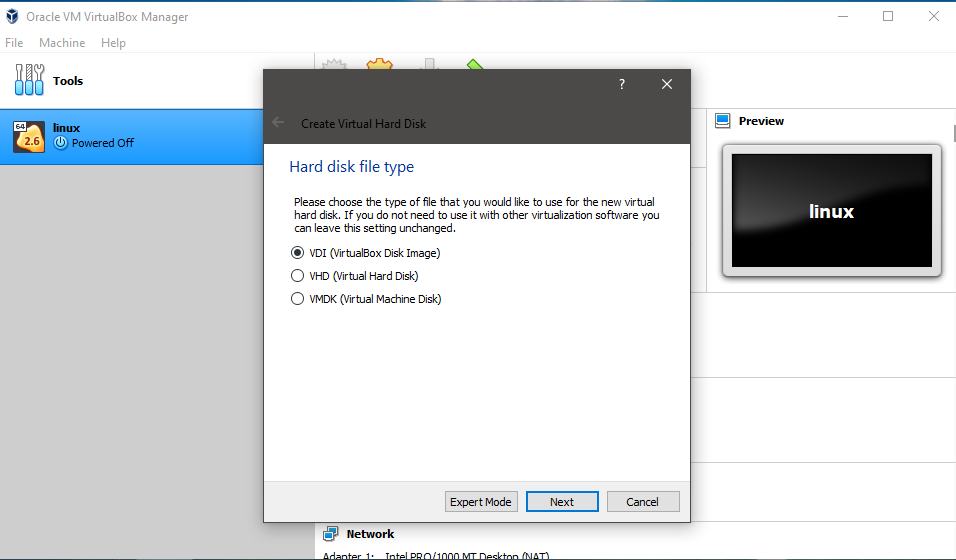
The hard disk file type should be “VDI (Virtual Disk Image)”.
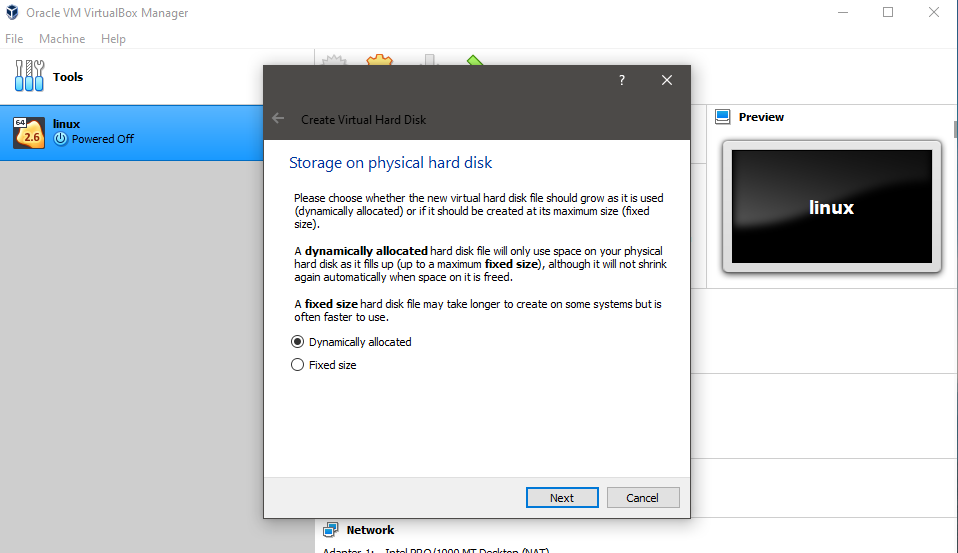
Storage on physical hard disk, select “Dynamically allocated”. If not, there may be some issues if not handled properly. We are just giving it the best default settings so other tweaks can be done later down the road.
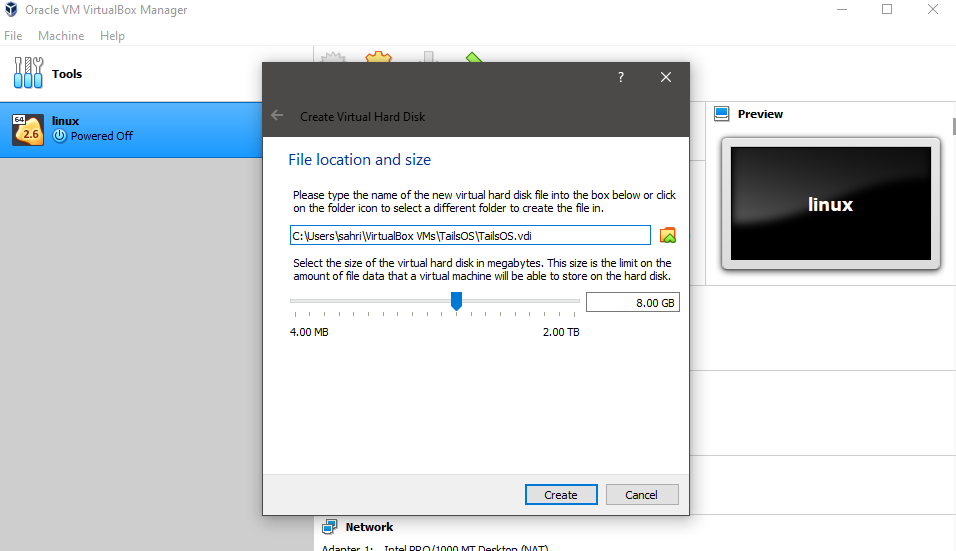
The file location and size tab gives the option to choose space for the OS. Again, we are keeping it default. Tweaking with that has no known issues. If you have room for more and are sure you’re going to need that space, then go ahead bump up those settings.
Step 3: Settings for Tails OS on VirtualBox
Now we are done setting our VirtualBox with Tails OS. But before booting up, some optimization settings may go a long way.
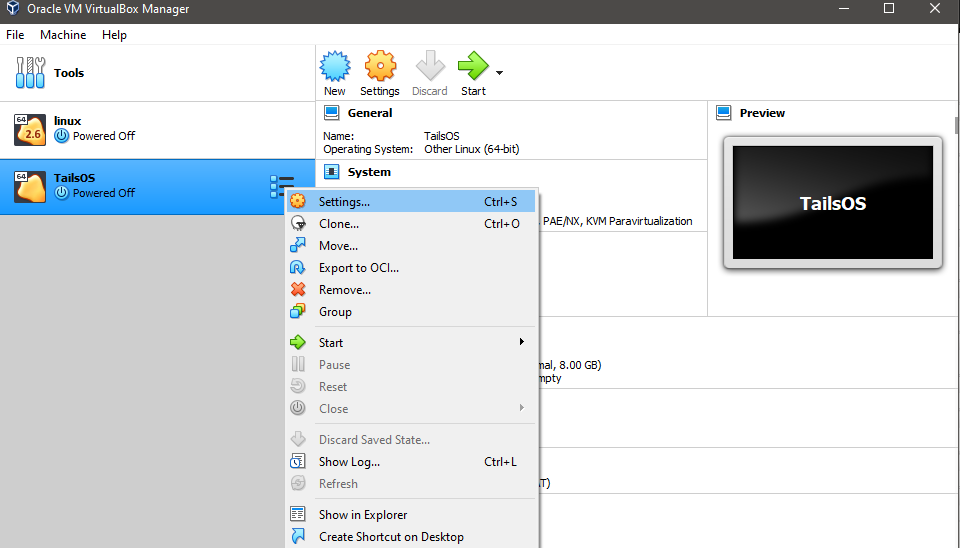
Right-click on our OS, will bring up a bunch of options and setting is the first one. Let’s hit that and optimize it properly. This is the machine setting for the OS.
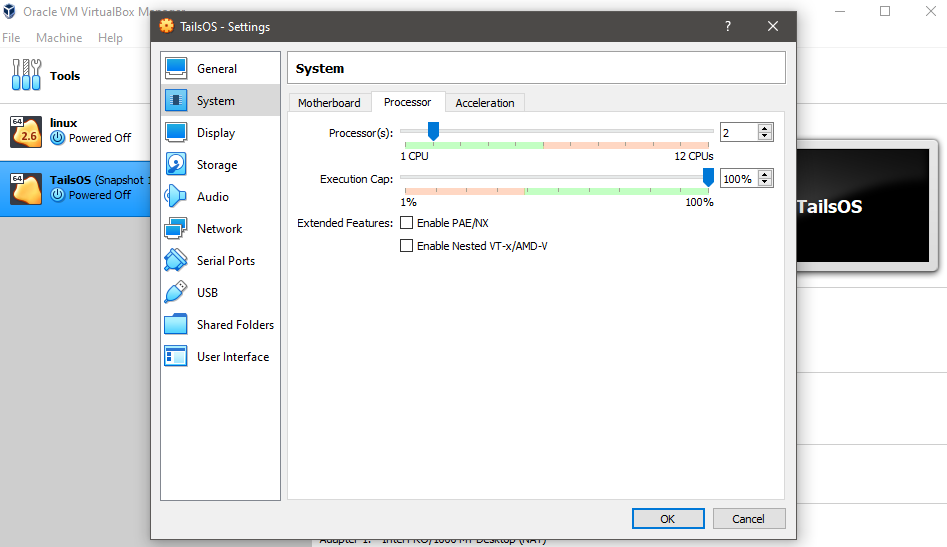
From the system and Processor, we’ll give it one more CPU and Disable the PAE. Use it if 4 GB or above memory is used in the system.
Now let’s go-to storage and direct our file. Click on Empty and from the right-dick icon we can navigate to the iso. We downloaded that previously and should be in the default download folder.
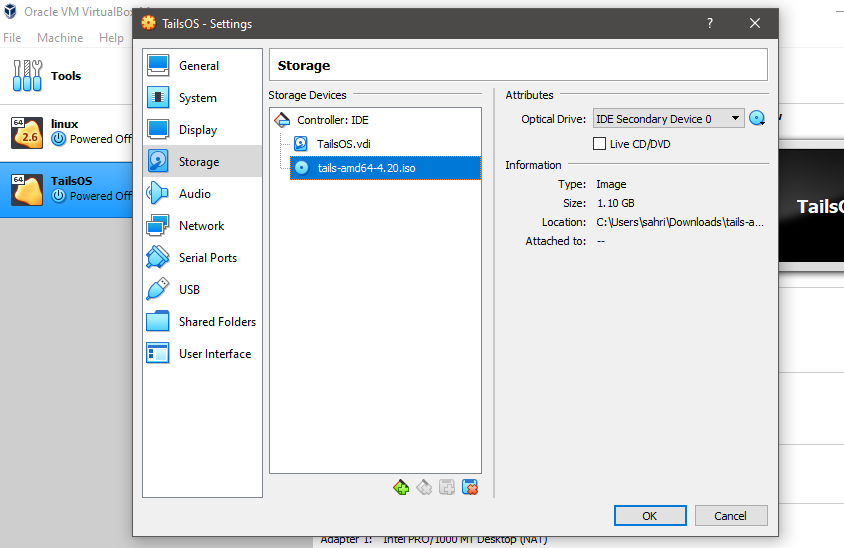
Sometimes the iso file may not show up. In this case, we manually have to select iso in the explorer window that pops up after clicking the disk icon.
And we are done setting up the environment and first run of our newly installed Tails OS on VirtualBox.
Step 4: Starting up Tails OS on VirtualBox
We are glad that you’ve come this far and gone through the procedure of installation. Now is the time for the final result and to start our new OS. Let’s hit the start button.
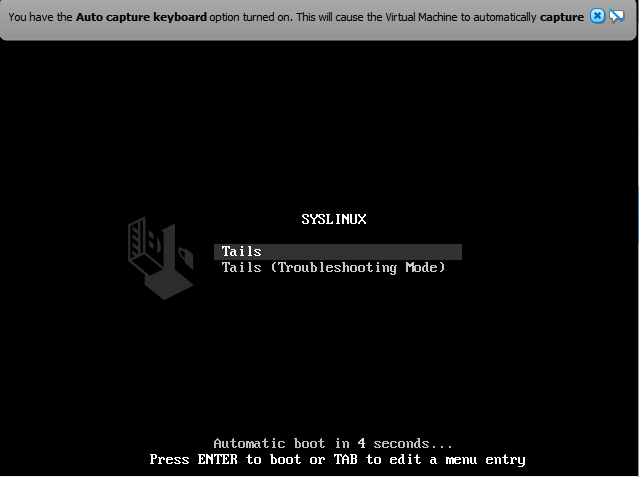
This window is our first boot of Tails OS. It will automatically pick up Default Tails. No button clicking is required.
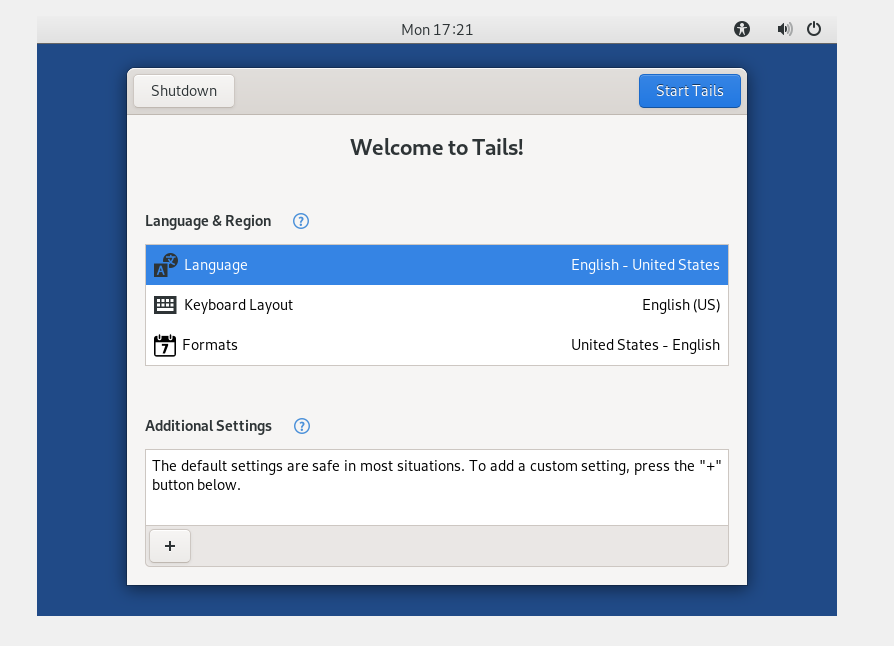
The Next popped up window is where we see Tails OS for the first time in our newly set up environment. Click on Start Tails if you want default settings.
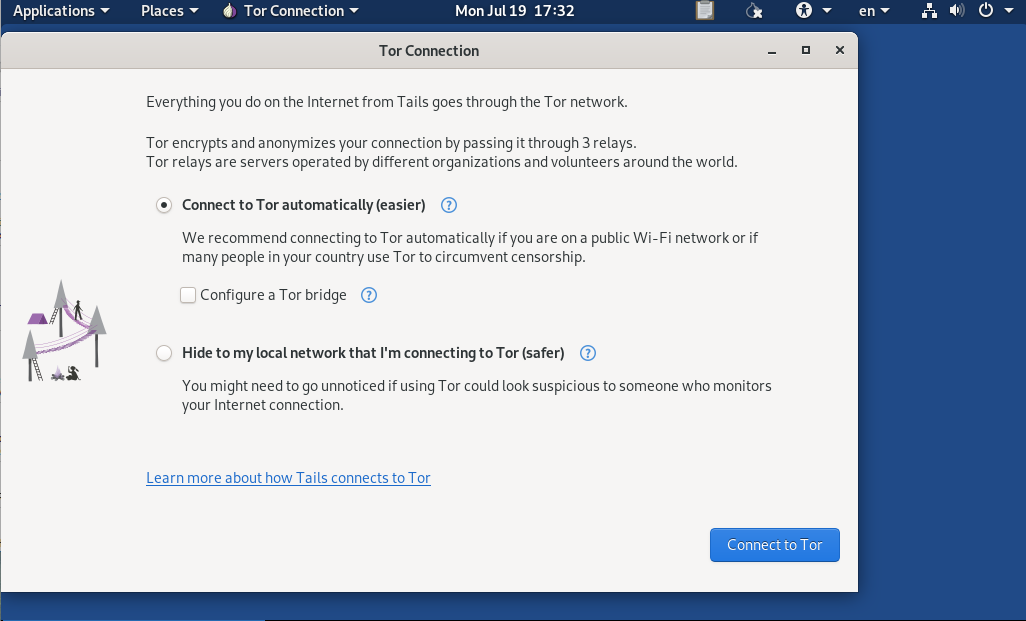
Previous versions of Tails OS just took a click on Login and we were ready to go. Updated versions ask if we want the safest method or the easiest method to connect to the Tor network as Tails rely on Tor. For this demo, we’ll just click connect automatically “easier” and connect.
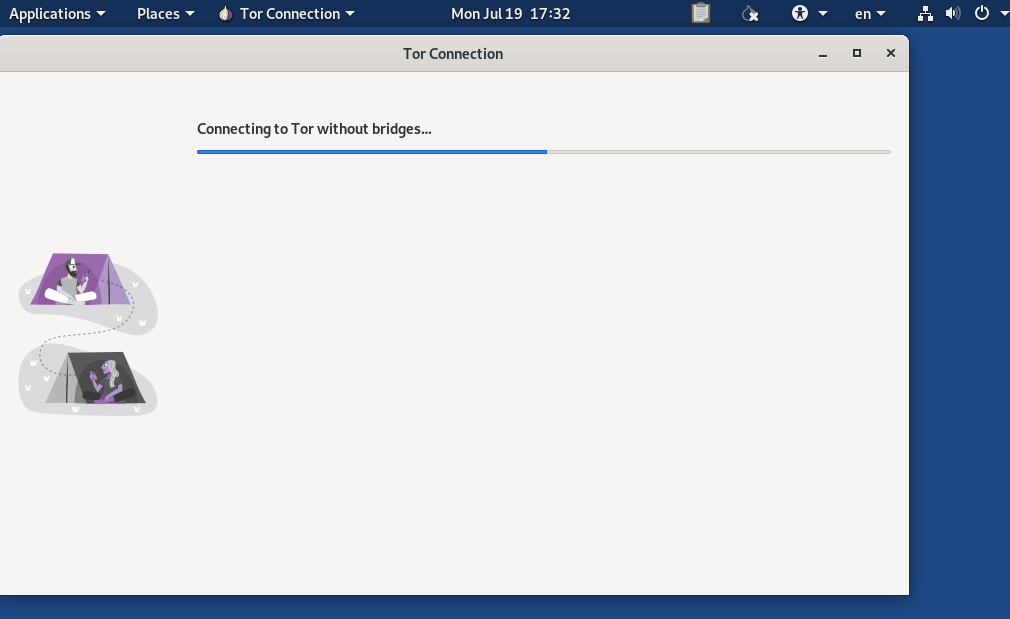
It will start a connection with the Tor network without bridges and may take some time.
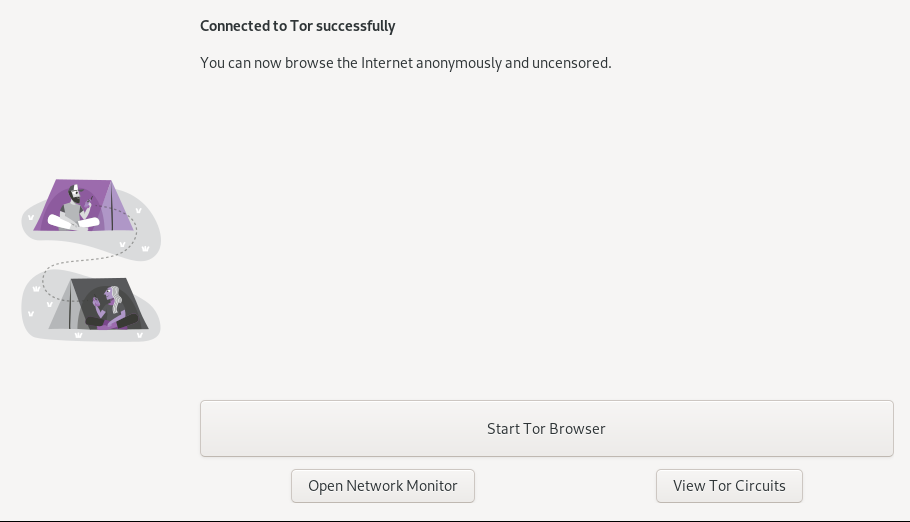
Since we are going under a lot of tunnels and identify securing protocols, it will be slower than our regular network connection.
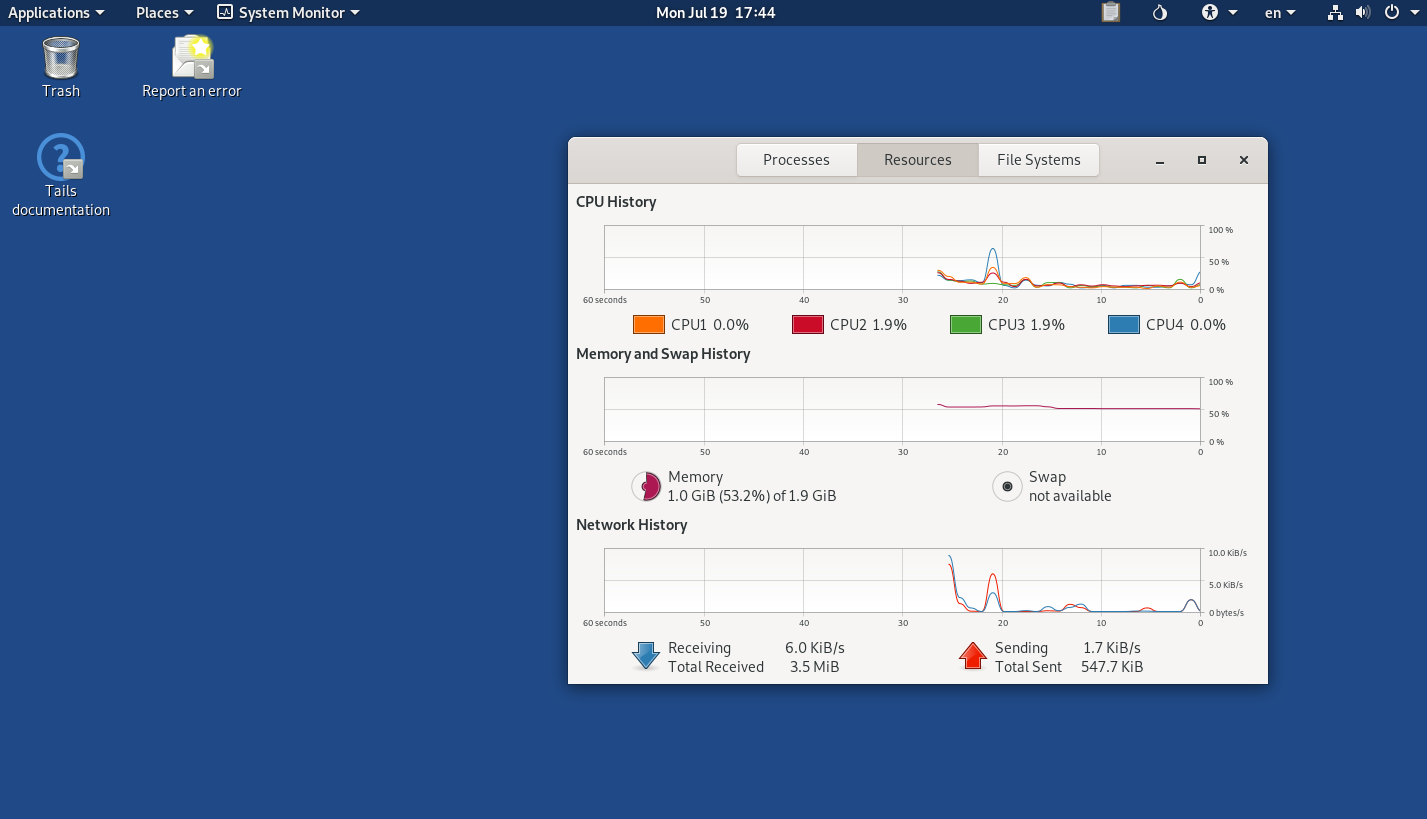
We will be greeted by “Connected to Tor successfully” and it’s a relief. And now we have anonymity over the internet and are free to do our own research with the Tails OS on VirtualBox.
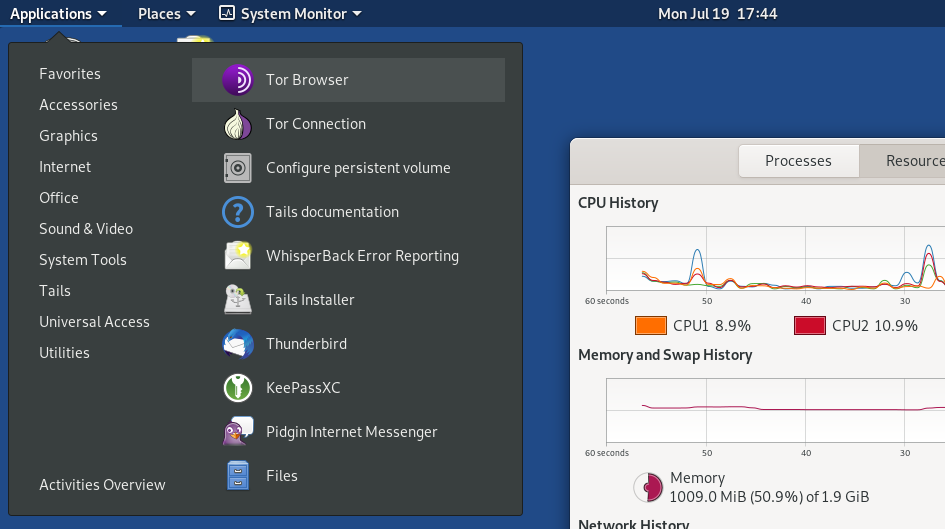
Going to Google.com, with Tor browser from Application, it seems like our language is not English and the browser is confused. Searching for “my location” or “whatsmyip.org” shows we’re in locations that are different from real ones.
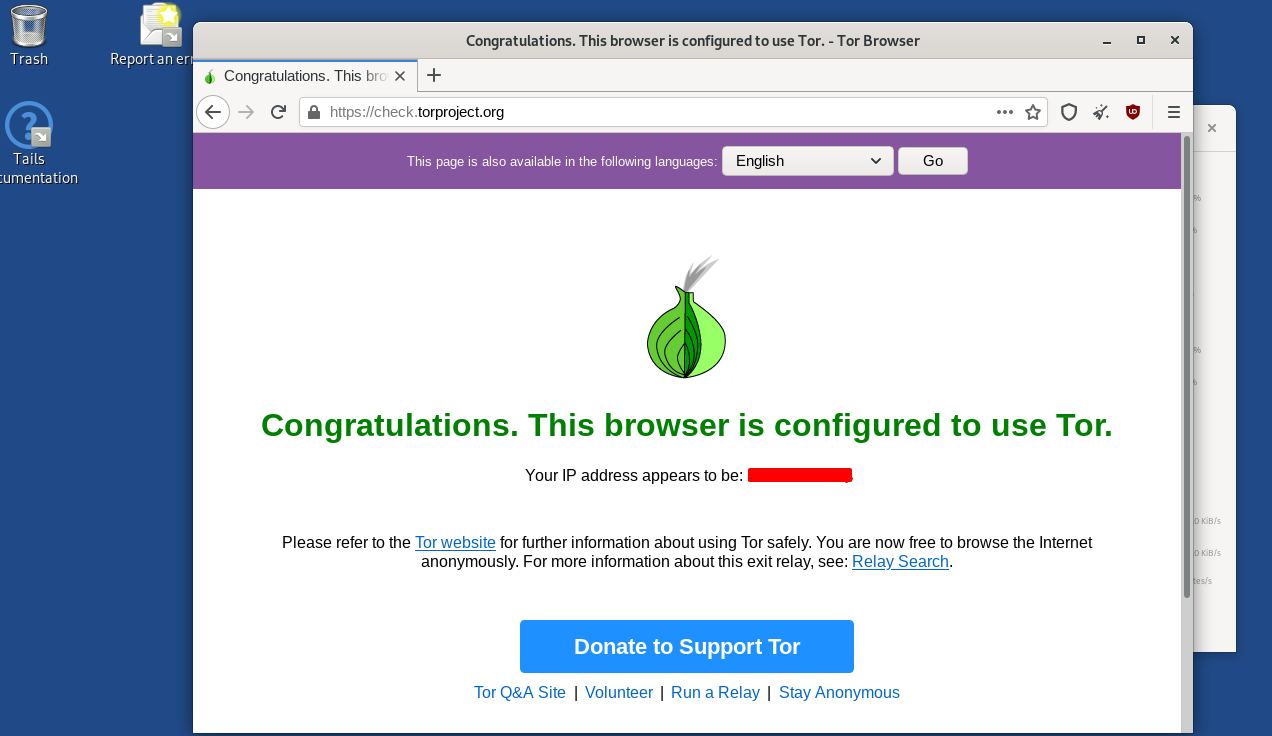
Here’s a screenshot of when the Tor browser opens for the first time. We covered the IP even though it’s created randomly.
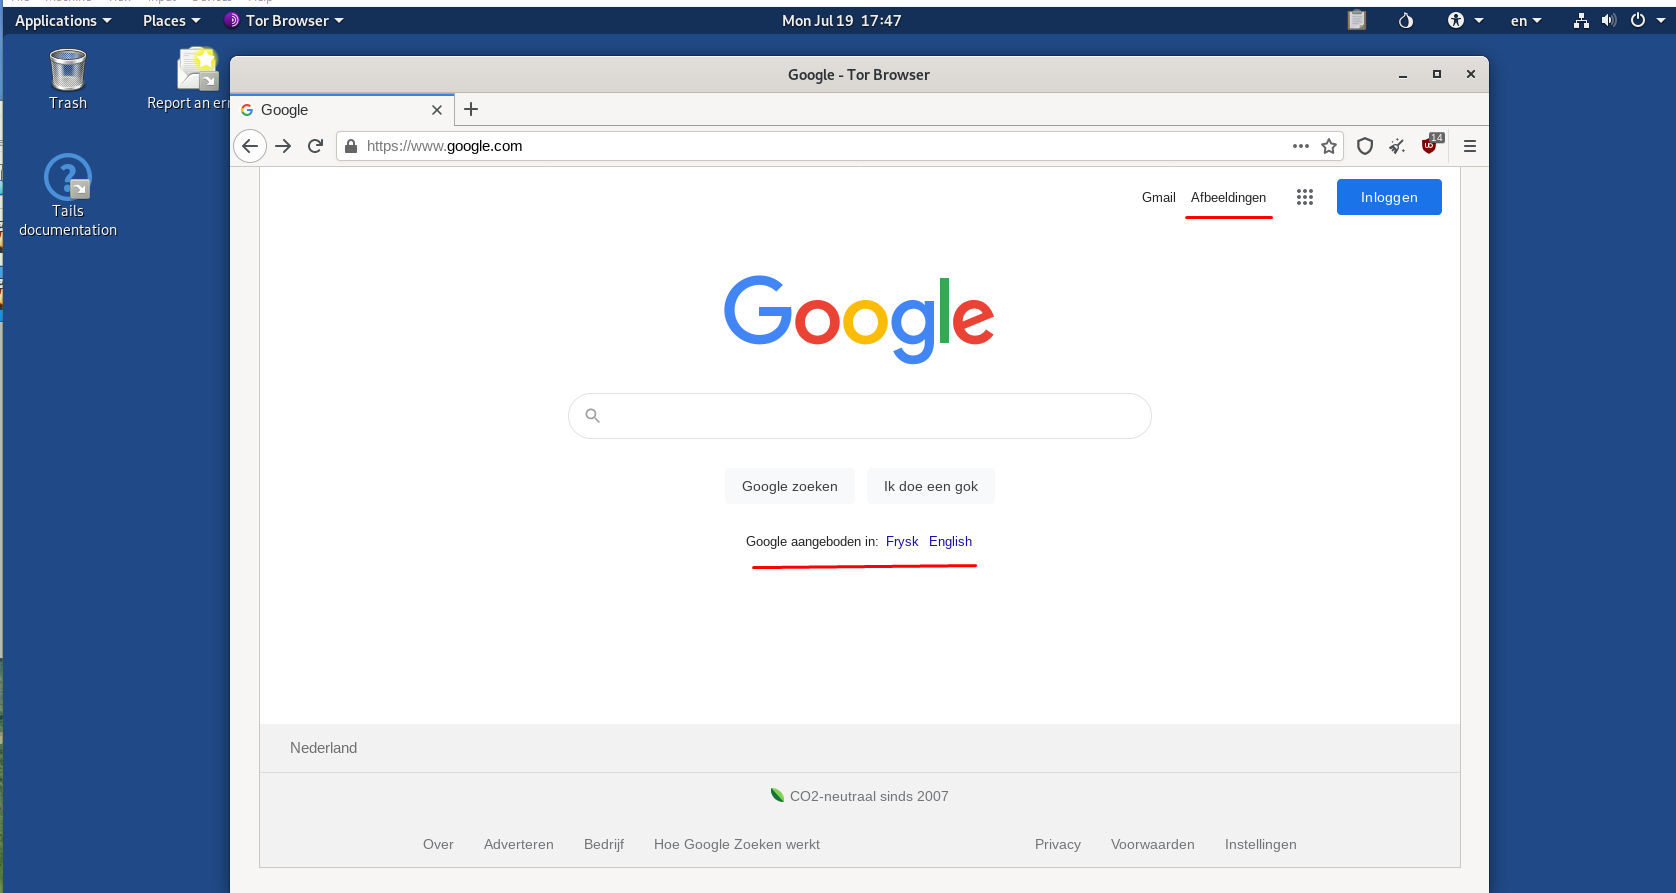
And this is how to install Tails OS on VirtualBox.
Summary:
Tails OS on VirtualBox is recommended by many professionals. Though nothing is totally secure and it only stays secure depending on what users do. We can further customize the OS according to our liking. Eg changing resolution from the display setting that suits our demand. Setting up a user account is a good practice. File explorer functions have GUI systems so looks kind of similar to Windows OS. If users leave intentional information that can be tracked, it ruins the purpose of Tails. Though Tails OS is pretty safe itself and covers up most of the flaws, we should always respect online privacy and not get into malicious activities.
How to Use Tails Linux OS in VirtualBox Virtual Machine
Well, Debian-based Tails is not the Linux system that we can install on our PC like Windows or other Linux distros. Instead, it is a hardened Linux system meant to run in a Live environment via DVD or USB stick. So it offers extensive security. Here we learn the steps to set up, run and use Tails in VirtualBox Virtual Machine to learn and get familiar with it.
The Tails Linux distribution is designed as a live system particular for data protection and anonymity on the Internet. We can easily write in on a USB drive using software such as Rufus or Etcher; or else burn it on a DVD. This makes it a portable Linux OS that a user can use on any system without leaving a trace behind or storing any data on the computer’s hard drive.
Tails uses a hardened Debian Linux and comes with a good set of pre-installed tools. For example, you can only surf the Internet via the Tor network, e-mails can be encrypted with PGP and the system even encrypts the clipboard. Of course, to achieve security and anonymity when surfing the Internet, all Internet traffic under Tails is routed through the Tor network.
Furthermore, instead of regular browsers such as Google Chrome, Mozilla Firefox, and Opera, it comes with Tor Browser pre-installed.
Other programs that are already preinstalled in Tails are an instant messaging client, a picture editor, an audio editor, an office suite, and many more. All these programs are also designed for maximum security, for example, the clipboard is encrypted.
Let’s see the method to run Tails on VirtualBox Virtual Machine to get familiar with it and its tools. The steps given here are applicable for Windows, Linux, FreeBSD, and macOS.