bp2008 / HyperVServer2019_GUI_Installation.md
Hyper-V Server does not include much in the way of graphical tools, but third-party alternatives can be installed.
I found a disturbing lack of basic instructions for using Hyper-V Server 2019, so it is my hope that this guide is useful to somebody.
Before starting this guide, enable Remote Desktop support in Hyper-V Server using the built-in configuration menu. If you connect to the Hyper-V Server with Remote Desktop, it will make it easy to copy and paste text (and later, files) from a normal Windows desktop machine.
Step 1) Install Chrome
In the command prompt on the Hyper-V server, run this command:
This loads Powershell which gives us many additional capabilities, including the ability to download files.
Find a current Chrome setup URL by downloading it in the web browser on a «normal» computer, and looking in your browser’s download history. Then, back on the Hyper-V server, run this command, replacing YOUR_CHROME_SETUP_URL with the URL you found.
(hint: to paste text in a command/powershell window, right-click)
Now exit Powershell
Complete the installation using the setup GUI.
Step 2) Install Cairo (3rd-party desktop environment)
In Chrome, open https://cairoshell.com/ , and download the latest 64 bit Cairo installer from GitHub. When the download completes, use Chrome to launch the Cairo setup executable. I don’t know if it matters, but in Cairo setup, I checked the box to Replace Explorer.
Proceed through Cairo’s welcome tour. When it asks which apps you want to include in the Programs menu, make sure you add Chrome and PowerShell.
If you ever find that the Cairo shell isn’t running when you log in, you can launch it with the command:
Step 3) Install 7-Zip
In Chrome, open https://www.7-zip.org , then download and install 7-Zip 64-bit. I used the .exe installer.
Back in Cairo, click your Programs menu, and choose App Grabber. Add 7-Zip to your programs menu.
Run 7-Zip from the Programs menu, and in 7-Zip‘s options, click the plus button to associate 7-Zip with all supported file types.
Step 4) Install Explorer++ (3rd-party file explorer)
In Chrome, open https://explorerplusplus.com/
Download the 64 bit version.
In 7-Zip, extract Explorer++.exe to C:\Explorer++\Explorer++.exe .
In Cairo Settings (Menu button in upper-left corner), Advanced, set the File manager path to C:\Explorer++\Explorer++.exe .
Add Explorer++ to Cairo’s Programs menu, similar to how you added 7-Zip earlier. You’ll notice that Explorer++ does not appear as an installed application in App Grabber. Instead, you must click the Browse… button to locate Explorer++ where you extracted it.
Step 5) Install Windows Admin Center (WAC)
In Chrome, open https://aka.ms/windowsadmincenter
Download the latest stable release (I wouldn’t recommend a preview version unless you have a specific reason).
Run the installer.
When you get to the part about SSL and a certificate, you can either use the self-signed option or add your own. I prefer to add my own so I can have my desktop PC trust it and no longer get browser warnings when accessing the interface via HTTPS. Add your own certificate or not, then complete the installation.
How I added my own certificate
To generate certificates, I used this tool to create a HyperV1.pfx file with my server’s host name HyperV1 in the list of domain names. Then I copied and pasted the pfx file from my normal workstation, through remote desktop, to the C:\Users\Administrator\Documents folder on the Hyper-V server.
Next, I opened a PowerShell window on the Hyper-V Server, and navigated to the Documents folder.
Then I used Import-PfxCertificate to import the certificate into the server’s certificate store.
The output conveniently includes the certificate’s Thumbprint, which you can copy by selecting the thumbprint with the mouse and pressing enter. Back in the Windows Admin Center installer, I pasted this thumbprint in the appropriate text box, and proceeded with installation
Now that Windows Admin Center is installed, you can use it for most remote management tasks by navigating to your server’s IP or host name in a web browser. To authenticate, enter the user name Administrator and the password you used when you first set up the server.
Windows server 2019 core как включить gui
В прошлом нашем посте мы рассказали как готовим стандартные клиентские виртуальные машины и показали на примере нашего нового тарифа с Ultralight windows vds за 99 рублей, как мы создавали стандартный образ Windows Server 2019 Core.
В службу поддержки стали поступать заявки как работать с Server 2019 Core без привычной графической оболочки. Мы решили показать работу с Windows Server 2019 Core и как установить на него GUI.

Не повторяйте это на рабочих машинах, не используйте Server Core как рабочий стол, отключите RDP, обезопасьте свою информационную систему, именно безопасность — это главная фишка «Core» инсталляции.
В одной из следующих наших статей мы рассмотрим таблицу совместимости программ с Windows Server Core. В этой статье мы затронем то, как установить оболочку.
Оболочка сторонними средствами
1. Сложный, но наиболее экономичный способ
В Server Core из коробки нет привычного нам explorer.exe, чтобы облегчить нам жизнь, мы скачаем explorer++. Он заменяет все, что умеет оригинальный explorer. Рассматривался только explorer++, но подойдет почти любой файловый менеджер, в том числе Total Commander, FAR Manager и другие.
Скачиваем файлы.
Сначала нам нужно скачать файл на сервер. Это можно сделать через SMB (общую папку), Windows Admin Center и Invoke-WebRequest, он работает с параметром -UseBasicParsing.
Где -uri это URL файла, а -OutFile полный путь куда его скачивать, указывая расширение файла и
C помощью Powershell:
На сервере создаём новую папку:
Расшариваем общую папку:
На вашем ПК папка подключается как сетевой диск.

Через Windows Admin Center создаем новую папку выбрав пункт в меню.
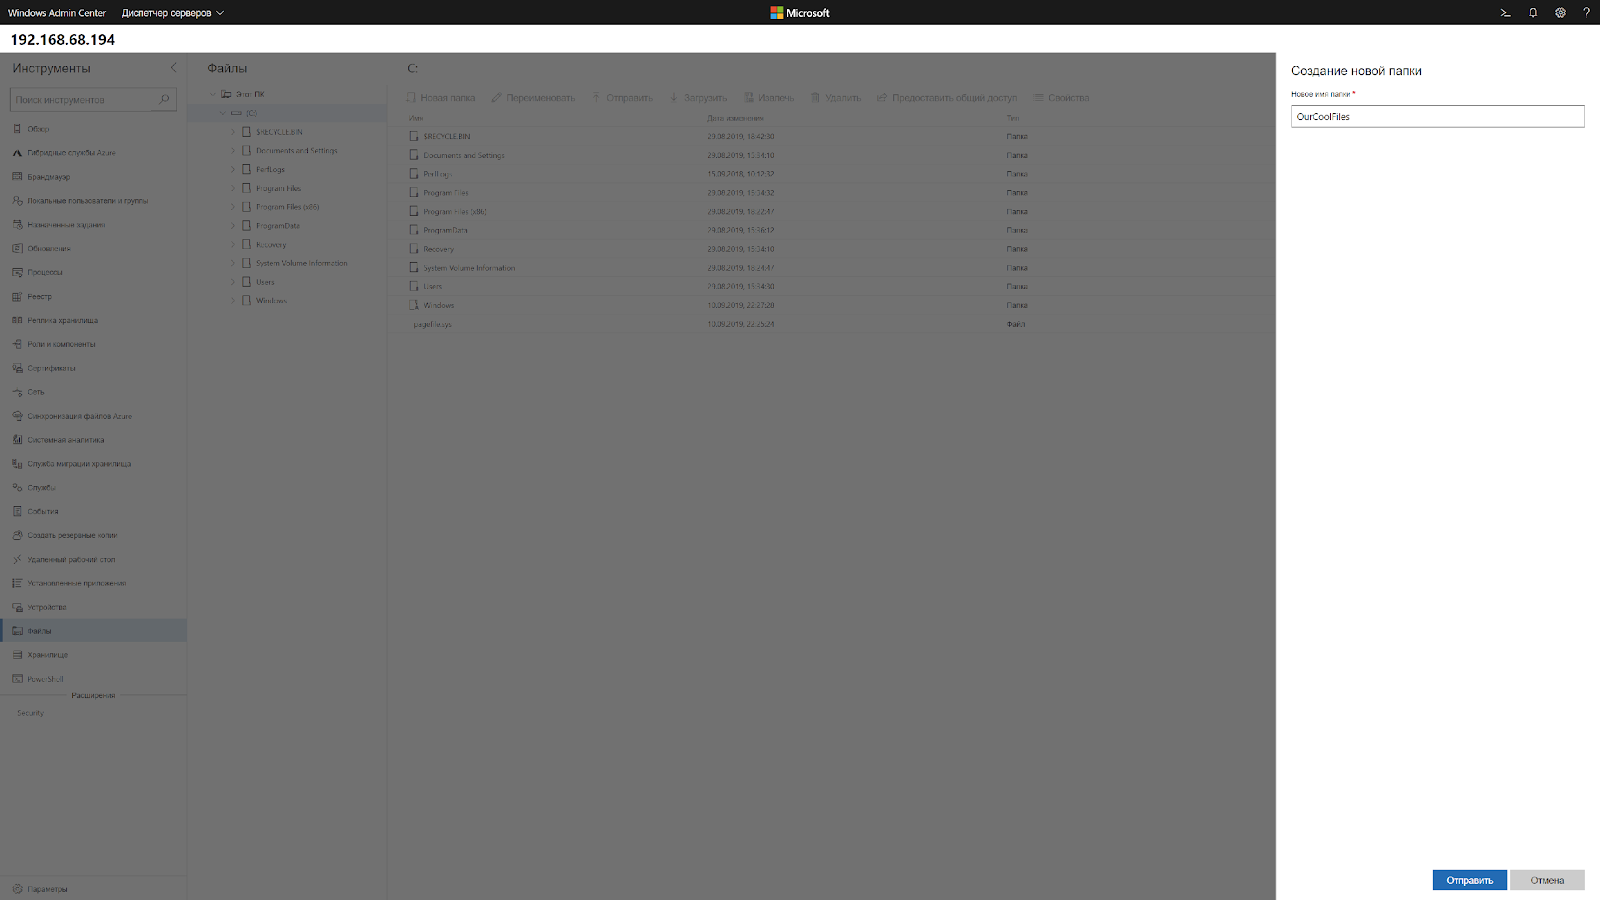
Переходим в общую папку и жмем кнопку отправить, выбираем файл.

Добавляем оболочку в планировщик.
Если вы не хотите запускать оболочку вручную при каждом входе в систему, то нужно добавить её в планировщик задач.
Без планировщика можно запустить через CMD:
Способ 2. Запускаем родной Explorer
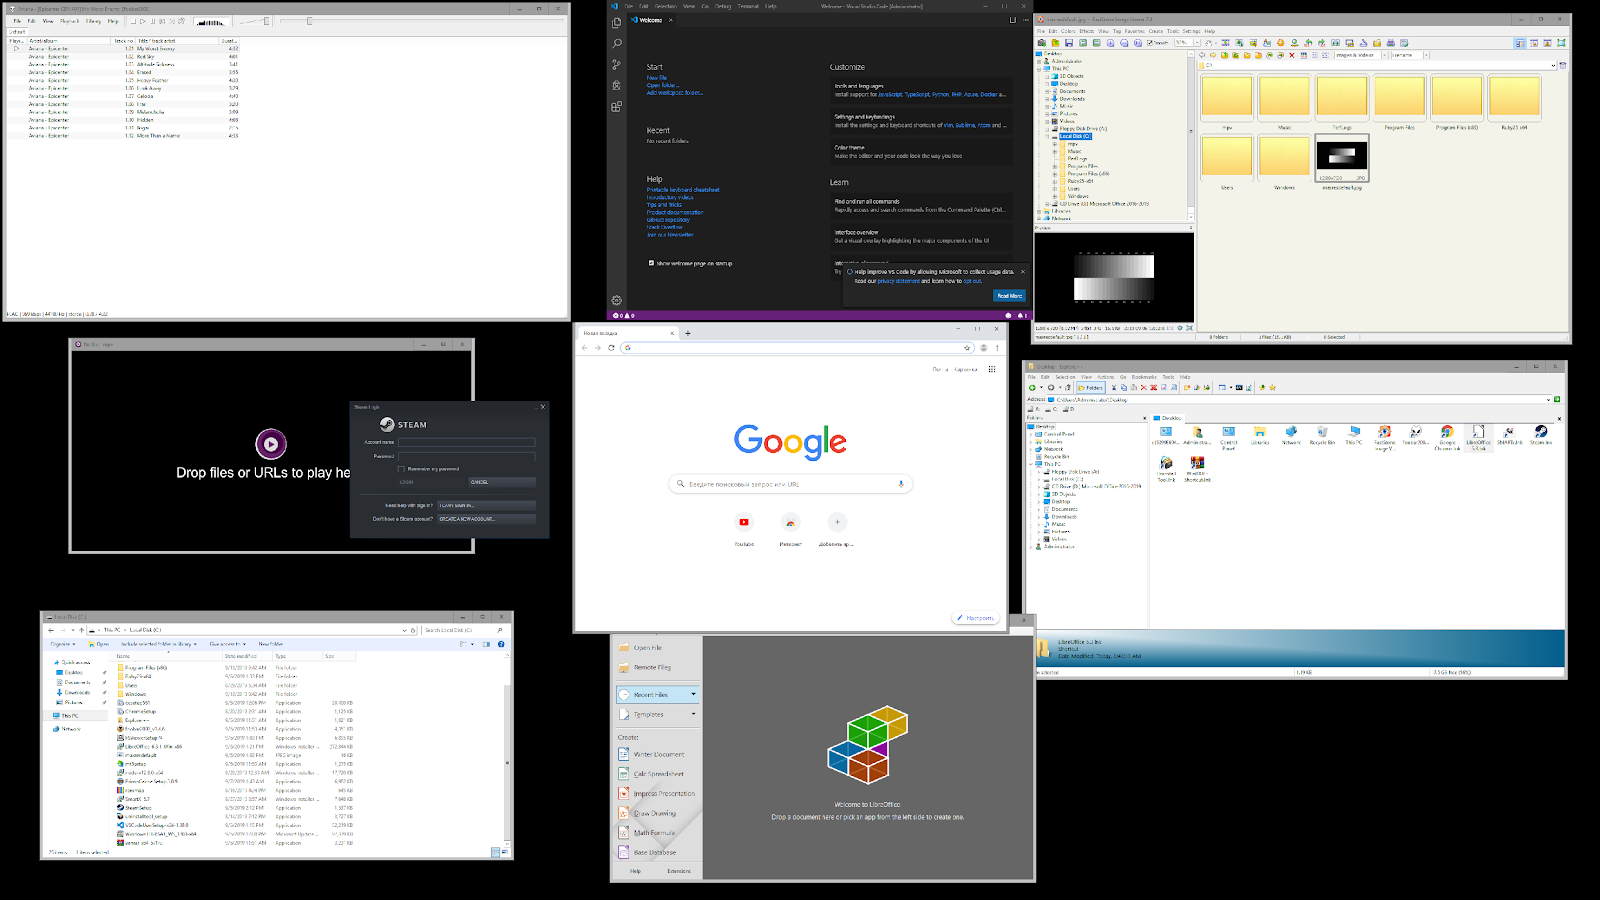
Remember, no GUI
Server Core App Compatibility Feature on Demand (FOD), вернет в систему: MMC, Eventvwr, PerfMon, Resmon, Explorer.exe и даже Powershell ISE. Подробнее можете ознакомиться на MSDN. Существующий набор ролей и компонентов он не расширяет.
Запустите Powershell и введите следующую команду:
Затем перезагрузите сервер:
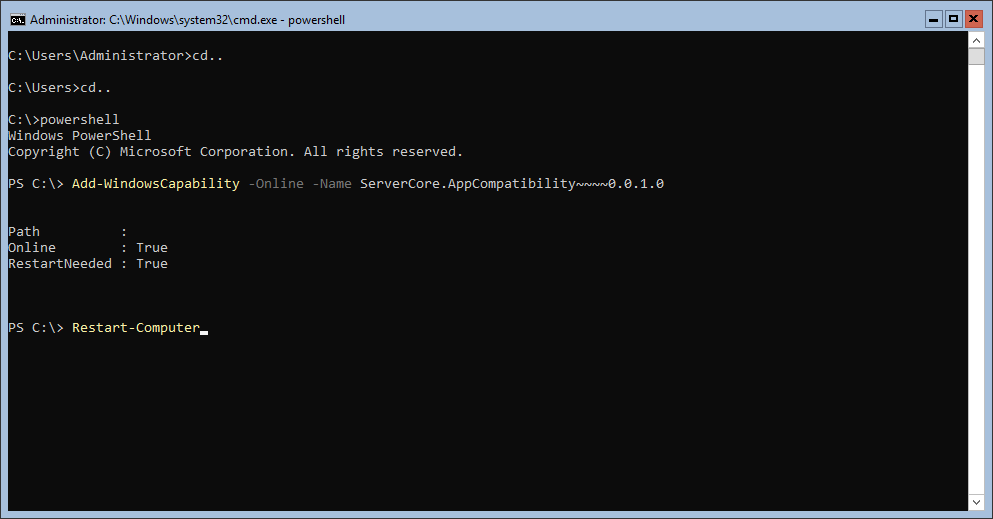
После этого вы сможете запускать даже Microsoft Office, но потеряете примерно 200 мегабайт ОЗУ навсегда, даже если в системе нет активных пользователей.
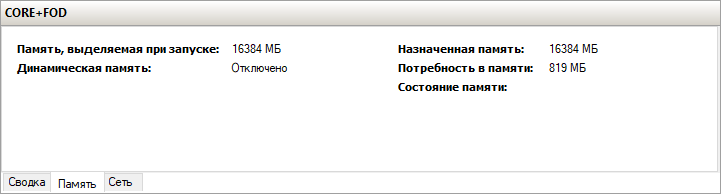
Windows Server 2019 c установленным Features on Demand

Windows Server 2019 CORE
На этом всё. В следующей статье мы рассмотрим таблицу совместимости программ с Windows Server Core.
Предлагаем обновлённый тариф UltraLite Windows VDS за 99 рублей с установленной Windows Server 2019 Core. 
Adding GUI-Based Capabilities to Windows Server Core. Transformation to a Full-Scale GUI-Based Workstation! For Windows Server Standard, Datacenter & Hyper-V. MiniShell, SysInternals, 5Nine, WinRar & More
This article is about pushing the limits of Server Core a little. Pushing it right beyond it’s comfort zone…: Transforming Windows Server 2019 Standard or Datacenter Server Core edition into a full-scale GUI-based workstation.
Obtaining GUI capabilities for Server Core is not limited to copying files, changing resolution or similar basic tasks. Our transformed Server Core is also capable of performing complex tasks such as full-scale management of virtual machines (in similar with Hyper-V Manager), Active Directory Management, port querying and much more. All via locally executed GUI-based tools.
In the case of Hyper-V Server 2019, this also means that virtual machines can rather be managed locally , thus dismissing the need for another machine and a windows license to manage VMs remotely.
“It’s about how to use the best server, in the best manner, to better accomplish the the server’s tasks and our goals.”
Windows Server 2019 with Desktop Experience (GUI) is designed to be user-friendly, but does it mean Server Core cannot enjoy both worlds by being both human-friendly and resource friendly? Can Windows Server Core not be a better fit to a human’s instinct and skills, such as working with visual triggers and tools?
Ultimately, this article is about the clarity and understanding of what “else” can Server Core do, and how can it be done via GUI-based environment and in a user-friendly manner. All of this without decreasing productivity while consuming negligible amount of resources. It’s about how to use the best server, in the best manner, to better accomplish the the server’s tasks and our goals.
In our previous blog from earlier this week, we discussed and compared Windows Server 2019 Datacenter with Standard. Then in our blog from just yesterday, we compared Server Core edition with Desktop Experience (GUI).
This article discusses Server Core of Windows Server 2019 product family, and applies just as well, and sometimes even moreover, to Windows Server 2016 and 2012 R2.
Too much talking!? Let’s Get Our Hands Dirty!
Preface
It is often perceived that Windows Server in its Server Core editions (Standard, Datacenter and Hyper-V Server), can only be managed locally, via command prompt or PowerShell. This is obviously proven wrong by the screenshot in the beginning of this article and the screenshots yet to come below. All of which demonstrate Windows Server 2019 Datacenter — Server Core with advanced capabilities via GUI-based solution..
So why is such a belief so abundant among industry professionals? Hmm… Well, this article is not about blaming or anything. But perhaps that has something to do with the statement “Manage with command prompt and PowerShell, or remotely with Windows Admin Center or other tools”. Yes, this exact and somewhat incorrect sentence appears upon the installation of Windows Server 2019 Server Core (with either Standard or Datacenter editions).
So How Does This Article Apply to Hyper-V?
Microsoft Hyper-V Server is a different product than Windows Server with Hyper-V role. How do they differ? well, for starters, Hyper-V Server is a free product for unlimited use, compared with Windows Server 2019 Datacenter running at $6,155 (MSRP).
Do they have anything in common? Yes they do. Hyper-V Server (free product) shares the exact same hypervisor as Windows Server Datacenter ($6,155). In other words, virtualization or running virtual machines will be nearly the same on either Hyper-V server or Windows Server Datacenter with Hyper-V role installed. This is true with a small objection: Datacenter contains advanced features which are not available in Hyper-V. However, the virtualization itself will be the same.
What else do the two servers share? Anything else which is major? Hmm… yes! their non-GUI experience called Server Core. Hyper-V Server 2019 and Windows Server 2019 Datacenter are both available in Server Core edition (though Datacenter may also be installed as a Desktop Experience). A comparison between Windows Server 2019 editions is available in our recent blog post, here.
Downloading Microsoft Server Core Products
One last thing before we dive in… Where can the Windows Server 2019 product family be downloaded from? As the photo on the left demonstrates, Windows Server 2019 Standard or Datacenter can be downloaded for free for a 180-day evaluation period, via Microsoft Evaluation Center.
However, this screenshot is not truly honest. No, it has not been manipulated in any way. But Microsoft recently removed their 1809 and 2019 products lines, shortly after releasing them due to supposedly critical issues.
So now what? Hmm… Either we use Windows Server 2016 product family, or we refer to this blog of ours which was published shortly after Windows Server 2019 product family was released. Direct download-links for the Windows Server evaluation products are available for free. For the last time we checked, those direct download links were still intact.
Server Core — Native GUI Tools
Server Core was first introduced with Windows 2008. Theoretically or perhaps even formally speaking, Server Core can be managed locally only via Command Line (or Powershell). Why? because it does not include integrated tools for local management via graphical user interface (GUI).
Why is that? why would Microsoft release a product without a GUI? Generally speaking Server Core comes from a breed of different discipline. It is rather designed to consume the least amount of resources, thus leave most resources for the system and user. As such, Server Core is designed to be managed remotely rather than locally.
However, saying that Server Core lacks GUI capabilities is far from true. As shown below, GUI tools are provided by default with Server Core. Task Manager would the most trivial to demonstrate. But bare with us, we are just warming up…
Following is a list of GUI-based programs, which are provided with Windows Server 2019 Core:
- Control.exe intl.cpl — sets up region information
- Control.exe timedate.cpl — sets up date & time
- Regedit — registry editor
- Notepad — hmm.. what would that be? <wink>
- Msinfo32.exe — displays comprehensive system information
- Taskmgr.exe — can also be executed via ctrl-alt-del
- Msiexec.exe — Windows Installer
- Cmd.exe and powershell.exe
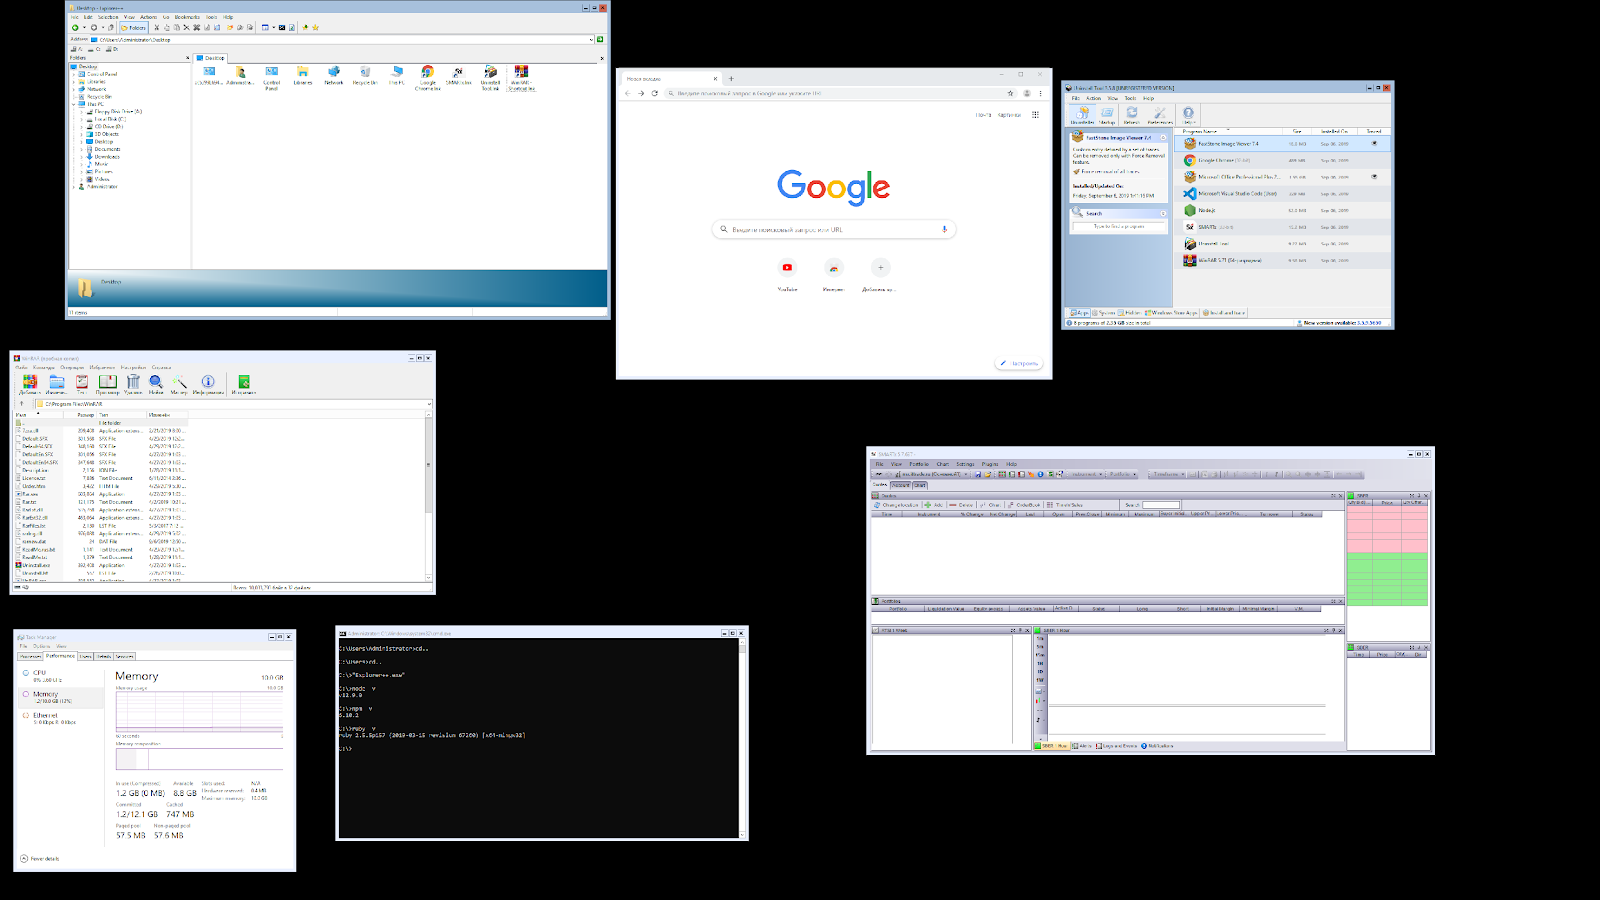
The screenshot below demonstrates all of the programs mentioned above, running simultaneously, on Windows Server 2019 Datacenter Core edition:
Sconfig does not really deserve to be included in our list of native GUI apps. It is actually not a GUI-based app but rather a text-based configuration tool. White text on blue background is not exactly GUI in the year of 2018, right? Though it is somewhat refreshing to see such an old-school menu side by side with the most cutting edge technologies…
Sconfig obtains its pretty colors via a “color scheme” provided by the Color command, with the argument 17. Wish to try for yourself? at the command prompt simply type Color 17, and a white text on blue with join you for your next of your CMD journey.
C:\> color 17 [ENTER]
The menu of Sconfig is provided by a VBScript called sconfig.vbs which is executed via cscript, as shown in the script below. Just to be playful, we ran Sconfig in couple of other “color schemes”.
SysInternals Utilities for Server Core
Additional GUI-based tools are provided-by Microsoft, and can be downloaded for free here, straight from the Sysinternals “repository”. Following is a partial list of GUI-based Sysinternals utilities which are compatible with Core. The tools are formally or semi-formally supported by Windows 2016 Server Core, which means that they are also compatible with v2019:
- Adexplorer.exe — active directory explorer
- Procexp.exe — process explorer
- Procmon.exe — a well established and capable process monitor
- Tcpview.exe — shows detailed listings of all TCP and UDP endpoints
- Vmmap.exe — virtual & physical memory analysis tool, by process
- Rammap 1.50 — physical memory usage analysis utility
- Protqueryui.exe — port scanning, UI for PortQry command line; not available with SysInternals but can be download here (direct download)
The following screenshot demonstrates how can Windows Server Core perform multiple tasks via the GUI-based utilities of SysInternals. Earlier we’ve acknowledged the integrated GUI-based tools which are preinstalled with Server Core. In contrast, the SysInternals set of tools is by far more impressive as it provides powerful capabilities.
Additional GUI-Based “Add-On ” by Microsoft
Other options for GUI-based applications from Micrsoft can be installed via the Powershell Install-WindowsFeature command. The screenshot below (thank you Ber Herila for this Technet article) demonstrates how to setup the GUI-based application Minishell on Windows Server 2012 Core.
We are unsure whether those instructions are compatible with Windows Server 2019, though it is important for us to convey that Server Core is not only a command-prompt or PowerShell based product, thus it can be managed locally rather than only from remote. This is also true considering only Microsoft Add-ons.
Server Core — 3rd Party GUI Tools
Have we pushed Core to the max yet? Hell no! Other than what Microsoft provides, there are plenty of 3rd party GUI-based tools, which can be successfully installed on Server Core, to provide a broad range of functionalities. For instance, we installed WinRar by RarLab.com on Server Core. It seems to work just fine. Not perfectly, but fine, plus we got a limited file management capability ��
Server Core — Full Scale GUI-Based Management Capabilities
It ain’t over till the fat lady sings, right? so we’d try to finish on a major chord: Can Windows Server 2019 Core (or 2016 or 2012 R2) be transformed into a full-scale GUI-based workstation?
We added to our environment few 3rd party (non-Microsoft) tools including: Explorer++ as a file manager, 5Nine Manager as a Hyper-V manager and even an alternate shell startup to simulate the Windows desktop experience (to a degree). To make it look even more alike, we loaded the default Windows background image onto our newly Server Core GUI-transformed environment.
As seen in the screenshot below: Windows Server 2019 Core can be converted into a user-friendly GUI-based workstation, capable of performing a broad range of functions, locally, which can be done using free “GUI forming” tools.
Reservations and Balance…
By showing the graphical and local management capabilities available with Server Core, we do not mean that Core should be transformed into a Desktop Experience workstation. Yes, Server Core can be used to easily manage Hyper-V machines locally; Or to perform file management activities via tools such as WinRar and Explorer++, or to perform other tasks as demonstrated above.
We’ve tested multiple application with Server Core, and indeed the vast majority would not install / run. For example, when we tried to install an older version of Adobe Acrobat Reader, we learned it has a prerequisite of preinstalled Internet Explorer 6.0 or newer. Consequentially it would fail to install on Server Core. This is interesting, as the installation may not fail on a Windows computer with Internet Explorer removed from Windows Features:
In summary, Server Core can be stretched a little, in order to find a better middle-ground, somewhere between plain PowerShell and a complete “Desktop Experience”. The right balance might vary from one person to another and according to the needs and policies of different organizations. It is not to be expected from Core to be compatible with all Windows Desktop Experience applications. However, few goodies can go a long way when the starting point is so minimal to begin with. Major enhancements and capabilities can be obtained with ease, via the installation of few tools.
GUI-Based Hyper-V Server
All of which was discussed above regarding the Server Core GUI capabilities, should apply to Hyper-V Server 2016 or 2019, just as well. Hyper-V Server is a strapped-down version of Windows Server, in a Server Core form.
Applying such techniques and capabilities on Hyper-V Server might provide with one another added value. Hyper-V Server is a free product, though as a Server Core, it is designed to be managed only remotely, i.e. from another machine consuming a Windows license. For example, the remote administration tool RSAT requires Windows 10 or Windows Server to remotely manage Windows 2016 Server.
Our suggested settings allow the local management of VMs via GUI-based solution, from within Hyper-V Server, rather than only from remote.
Eliminating the dependency on another machine which requires another Windows license, to manage virtual machines on Hyper-V Server, might help reducing complexity and costs.
Since Hyper-V Server is a free product, then some of its user-base might be more cost-conscious, whereas simplicity is always welcome, right?
Hyper-V is Free but…
We believe that Hyper-V Server could be used as FTP client or server or as IIS (server) and beyond. However, just the fact you can do something does not mean you should. All we wish is to say is that though Hyper-V Server provides capabilities which are beyond VM virtualization, some practices might not be permitted by its license. That’s it, we’ve said it. Next.
Bonus — Remote Management
Servers are designed to be managed remotely, which is especially true with Server Core. Regardless of the server form or edition, today’s best practice consist of managing servers remotely, while having no local users logged-in.
Remote administration is made possible via proprietary remote management tools. Such tools by Microsoft include Remote Server Administration Tools (RSAT), Server Manager, MMC snap-in, Remote Desktop Services and last but not least, the new app in the block: Windows Admin Center (WAC), which is heavily promoted by Microsoft nowadays.
Unfortunately some remote management tools of Microsoft (e.g. RSAT) require Windows 10 in order to manage Windows Server 2019 or even 2016.
Windows Admin Center, a free remote management solution by Microsoft, can be installed on Server Core, and then accessed via a web-browser from older versions of Windows. In our case, we managed to manage Windows Server 2019 Datacenter Server Core, from either Chrome or Opera Browsers, running on Windows 7 without SP1. The photo below demonstrates adding a firewall rule to Server Core from remote, via Windows Admin Center (WAC).
While best practices correctly advise us to use remote administration tools to manage any and all servers, having the option to work on Server Core locally, in a user-friendly environment could prove invaluable, at times.
In conclusion
Server Core lacks some capabilities of the Desktop Experience editions, and thus is difficult to manage locally. We tried to soften the burden a little, and it may seems like we’ve been quite successful with that, doesn’t it!?
Desktop Experience is user-friendly though it consumes much resources (comparatively) and is naturally more prone to cyber attacks and restarts.
Server Core with our slight transformation might be the best of breed, enjoying both worlds: Having a GUI to allow management locally in one had, while being lean and mean thus enjoying all the benefits of Server Core (e.g. performance, less vulnerabilities, less restarts, etc.) at the same time.
At first we acknowledged the integrated GUI-based tools which are installed with Microsoft Server Core by default. There was nothing too special out there, though we were just warming up ��
We continued by acknowledging GUI-based SysInternals utilities, which improve productivity and allow enhanced capabilities such as active directory management, physical memory usage analysis sand more.
Before we continued to 3rd-party tools such as WinRar and Explorer++ (a file manager such as File Explorer), we’ve met with MiniShell (aka Server Manager Dashboard) for Windows Server 2012 Core. Just before desert we saw Hyper-V Manager alike tool, to manage VMs locally via GUI. And then we finished with an alternative shell startup, closing the circle by forming a complete desktop experience.
All in all, with those tools as well as others (e.g. TCPView, PortQueryUI) we managed to transform Server Core into quite a capable workstation, which is locally managed and is GUI-based.
You are now welcome to use either Server Core or Desktop Experience in the manner that works the best for you. Hopefully your range of options is slightly more flexible than just before.
Парсер Хабра
В службу поддержки стали поступать заявки как работать с Server 2019 Core без привычной графической оболочки. Мы решили показать работу с Windows Server 2019 Core и как установить на него GUI.
Не повторяйте это на рабочих машинах, не используйте Server Core как рабочий стол, отключите RDP, обезопасьте свою информационную систему, именно безопасность — это главная фишка «Core» инсталляции.
В одной из следующих наших статей мы рассмотрим таблицу совместимости программ с Windows Server Core. В этой статье мы затронем то, как установить оболочку.
Оболочка сторонними средствами
1. Сложный, но наиболее экономичный способ
Скачиваем файлы.
Сначала нам нужно скачать файл на сервер. Это можно сделать через SMB (общую папку) и Windows Admin Center. Invoke-WebRequest на Windows Server Core не работает из-за отсутствия Internet Explorer’a.
C помощью Powershell:
На сервере создаём новую папку:
Расшариваем общую папку:
На вашем ПК папка подключается как сетевой диск.
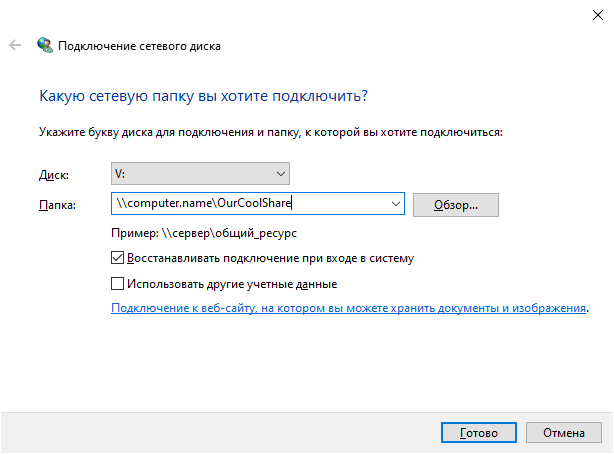
Переходим в общую папку и жмем кнопку отправить, выбираем файл.
Если вы не хотите запускать оболочку вручную при каждом входе в систему, то нужно добавить её в планировщик задач.
Без планировщика можно запустить через CMD:
Способ 2. Запускаем родной Explorer
Remember, no GUI
Server Core App Compatibility Feature on Demand (FOD), вернет в систему: MMC, Eventvwr, PerfMon, Resmon, Explorer.exe и даже Powershell ISE. Подробнее можете ознакомиться на MSDN. Существующий набор ролей и компонентов он не расширяет.
Запустите Powershell и введите следующую команду:
Затем перезагрузите сервер: 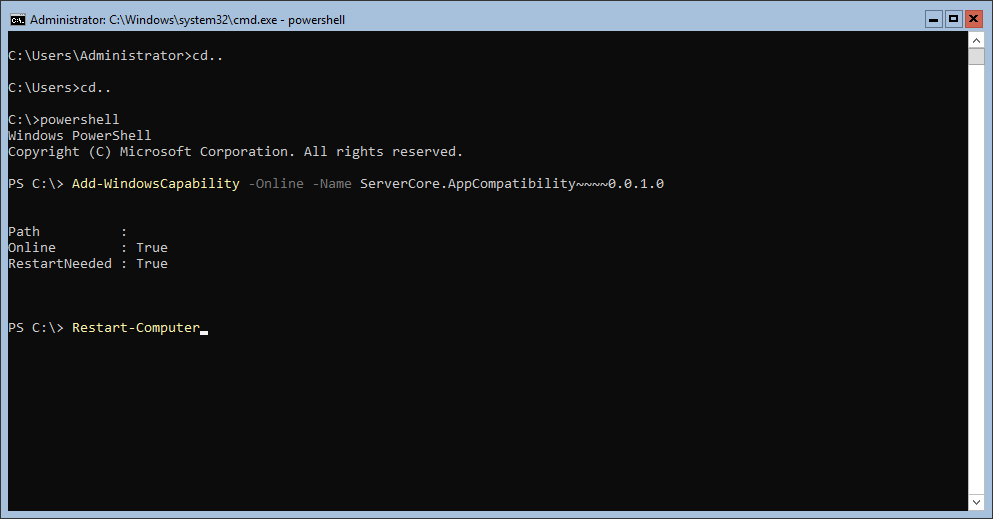
После этого вы сможете запускать даже Microsoft Office, но потеряете примерно 200 мегабайт ОЗУ навсегда, даже если в системе нет активных пользователей.
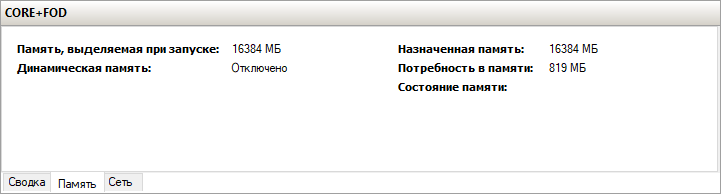
Windows Server 2019 c установленным Features on Demand
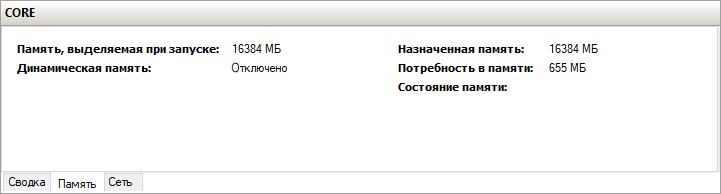
Windows Server 2019 CORE
На этом всё. В следующей статье мы рассмотрим таблицу совместимости программ с Windows Server Core.
Windows 2019 – Installing Windows 2019 Server with GUI
Today, it will be a quick post. We will basically perform a basic installation of Windows 2019 Server. This type of post is probably all around internet but we needed to test and check by ourselves if any major changes occurred. As you can guess, the installation nowadays is quite straight forward. The most difficult decision to take is which flavor/version of Windows 2019 Server to install. We will quickly go through some of the basics about Windows 2019 and then we will move on the installation part….
So,let’s start this !
Overview Windows 2019 Server
Windows Editions
As mentioned in our previous post, Windows 2019 server ship in 3 Editions
- Windows 2019 Essentials
- Windows 2019 Standard
- Windows 2019 Datacenter
When working on projects, most of the time the Windows 2019 Datacenter edition is used because there is no feature limitations and because it’s also a good choice when using it in highly virtualized environment. When using a Windows 2019 Standard edition, the licensing includes the right to run 2 additional Virtual machines while Datacenter allows you to run an unlimited of virtual machines without paying extra costs.
Windows Datacenter offers more features that the standard edition. Storage Replica, Storage Direct spaces, shielded virtual machines, software defined network… for example are not included in the Standard Edition.
Windows Servicing Channel Models
Another important element to take into account is the Windows servicing Channel a company want to use. As briefly explained in our previous post, a user can choose between two type of releases when working with Windows Server Operating system. You can choose between
- Long Term Service Channel (LTSC)
- Semi-Annual Channel (SAC)
This choice is important because it will define if a desktop interface can be used or not on top of your Server installation. Long Term service Channel (LTSC) would be the way forward if you need a desktop interface on your server and if you need to have a stable and predictable release cycle. Choosing LTSC release ensure that Desktop experience feature is available and you would benefit from a mainstream support for 5 years and extra 5 years for extended support.
Semi-annual Channel (SAC) release are made available twice a year and they will be supported for 18 months. The SAC release does not ship with any desktop interface and no option to install any. So, if you need a desktop interface (for example, you want to use Remote Desktop services), you should stick to the LTSC. SAC releases will probably include latest technology and features but no all companies can move to this aggressive cycle release
Step by Step installation
Assumptions
To perform this installation,
- we have downloaded the Windows 2019 Evaluation Edition which ships with Desktop Experience option.
- We have installed Windows 2019 and Hyper-v role on a physical machine (this is not explained on this post)
- We have created a virtual machine and installation will be performed on top of it
- We will install the Datacenter edition with Desktop experience in this guide
Quick Step by Step Guide
Step 1 – Your virtual machine is powered off
Step 2 – Open your virtual machine settings and mount the iso file, change the boot order if needed.
Step 3 – Boot your virtual machine
Step 4 – the windows installer will show up and will prompt you to Select your regional settings (Language and Keyboard layout)
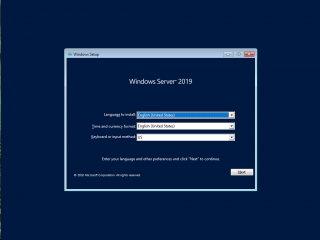
click on picture for better resolution
Step 5 – The Wizard start and you can see the Install now button. click on it to proceed with the installation.
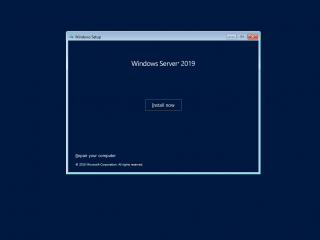
click on picture for better resolution
The setup wizard initialize and will prepare the next steps
click on picture for better resolution
Step 6 – in the selection dialog box, you can choose which Windows 2019 edition you want to use and with or without desktop interface. We have selected Datacenter + Desktop Experience option
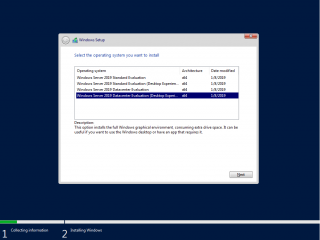
click on picture for better resolution
Step 7 – In the license agreement page, accept it and proceed
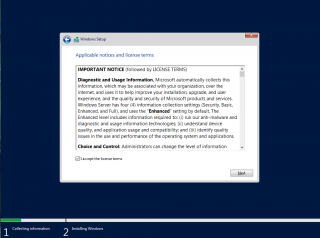
click on picture for better resolution
Step 8 – In the installation page, select the option custom.
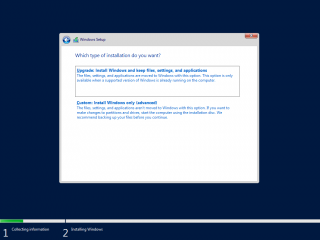
click on picture for better resolution
Step 9 – In the Disk page, accept default and proceed. The wizard will create all the necessary partition needed
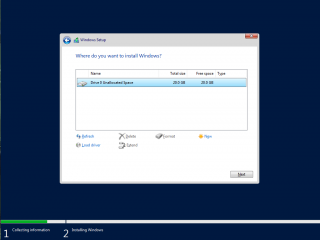
click on picture for better resolution
Step 10 – In the Installing Windows step, you can relax and wait for the machine to reboot
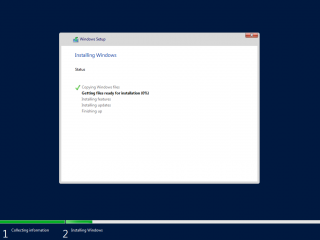
click on picture for better resolution
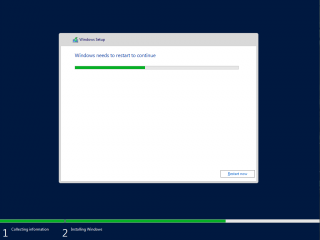
click on picture for better resolution
Step 11 – The system will reboot perform some post actions
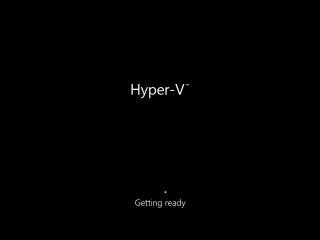
click on picture for better resolution
Step 12 – You will be presented with the Customize page where you basically need to provide password for the local admin account to be used
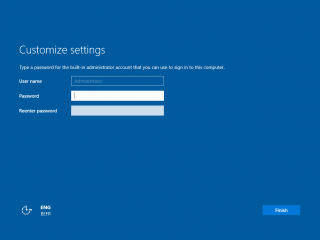
click on picture for better resolution
Step 13 – When done, you will be presented with the login page with the familiar background image used in Windows 2016 and Windows 10
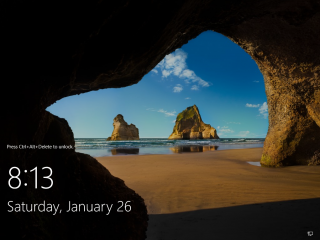
click on picture for better resolution
Step 14 – You can login and start customize your installation by providing computer name, join the machine to a domain, set network settings, install roles and anything you would need to do have a functional server that meets your requirements. When you open server manager (or when started automatically), you will see a popup messaging inviting you to test the Windows Admin Center.
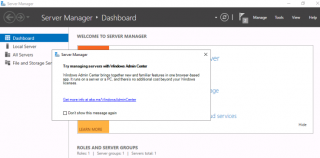
click on picture for better resolution
We are planning to install and play around with the new web interface that will provide another set of tool that can be used to manage remotely a server box. We might share our findings in a future post….
Final notes
As you can see, the process has not changed much. Installation process is quite straight forward and seems even simplify as almost no questions or customization settings are shown during the installation. Now that the installation has been performed, we will need to dig a little bit to see what has been changed and/or improved in this release. This might be the subject of a future post as well.
Windows server 2019 как запустить графическую оболочку
I agree with Dave.
Please refer to the figure below
Best Regards,
Frank
Please remember to mark the replies as an answers if they help.
If you have feedback for TechNet Subscriber Support, contact tnmff@microsoft.com
there is no such options, only standard or data center.
it’s not the first time i Install Windows.
it doesn’t even have the GUI install interface when you install it "Server Graphical Shell"
i think the link MS provided is server core
can we have a link to download the full server ISO not the core.
there is no such options, only standard or data center.
it’s not the first time i Install Windows.
it doesn’t even have the GUI install interface when you install it "Server Graphical Shell"
i think the link MS provided is server core
can we have a link to download the full server ISO not the core.
You got the wrong download. Check my post.
Regards, Dave Patrick .
Microsoft Certified Professional
Microsoft MVP [Windows Server] Datacenter Management
Disclaimer: This posting is provided "AS IS" with no warranties or guarantees, and confers no rights.