How to change the IP address on Ubuntu
In Ubuntu, the tool utilized for managing and configuring the network settings is known as “netplan”. netplan interacts with the kernel through the systemd-networkd and NetworkManager daemons which are also known as renderers. You have to choose any one from both of them. Netplan reads the network configurations from “/etc/netplan/*.yaml” files, saving the configuration settings for all network interfaces. If you use the netplan command in the Ubuntu terminal, it becomes easy to restart and change network settings.
Now, we will show you how to change the IP address on Ubuntu using terminal and GUI. So, let’s start!
How to change the IP address on Ubuntu terminal using netplan
First of all, list out the active network interfaces by using the “ip” command. The “ip” command is utilized in the Ubuntu terminal to assign, delete routes, put up or down interfaces, etc. Adding “link” in the “ip” command will display the link-layer information, name, and status of an interface, etc. Execute the below-given “ip link” command to know more about your network interfaces:
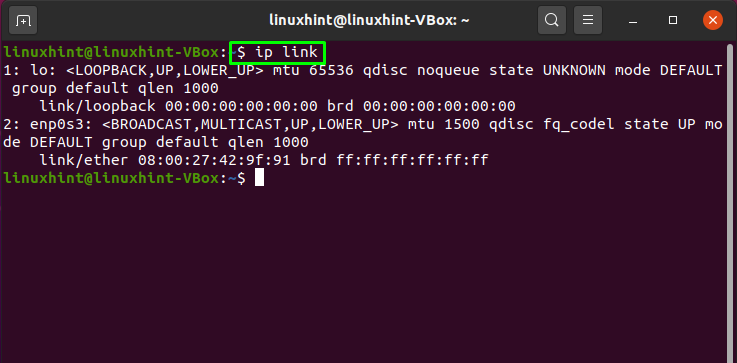
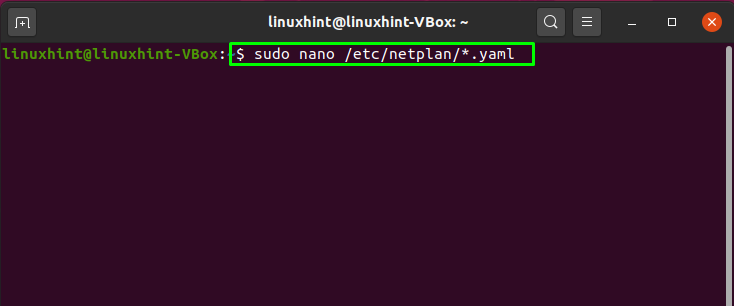
Next step is to open the “/etc/netplan/*.yaml” file in your nano editor:
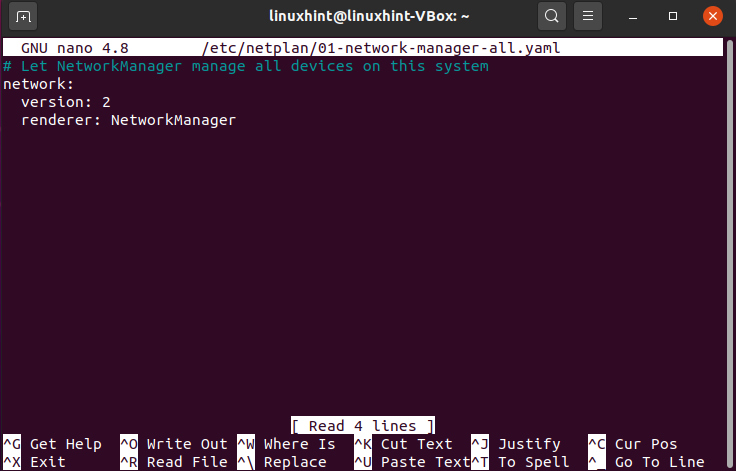
The opened “/etc/netplan/*.yaml” file will have the following information:
Now write out the following code in the “/etc/netplan/*.yaml” file to change the IP address on your system:
- dhcp4 and dhcp6 are IPv4 and IPv6 DHCP properties.
- enp0s3 is the network interface name for which we will change the IP address.
- addresses contain the sequence of addresses for the network interface.
- gateway4 contains the default gateway’s IPv4 address.
- nameservers comprise a series of IP addresses for nameservers.
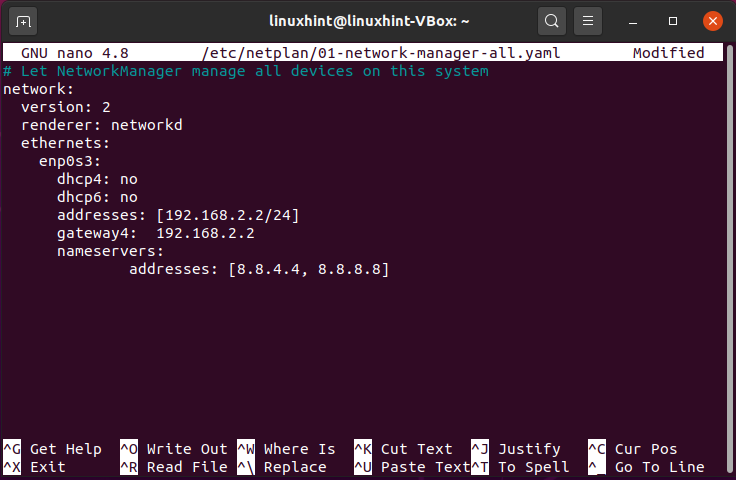
Press “CTRL+O” to save the changes we made in the file:

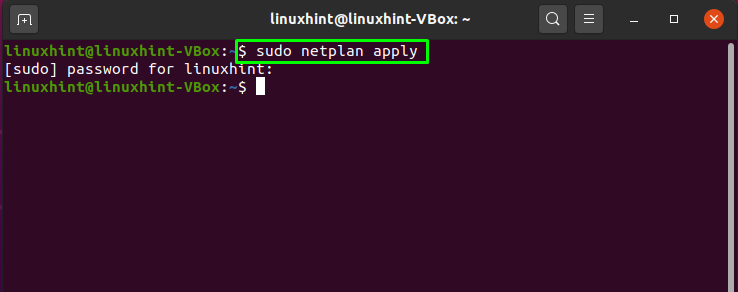
Apply the modified settings by utilizing the below-given netplan command in your terminal:
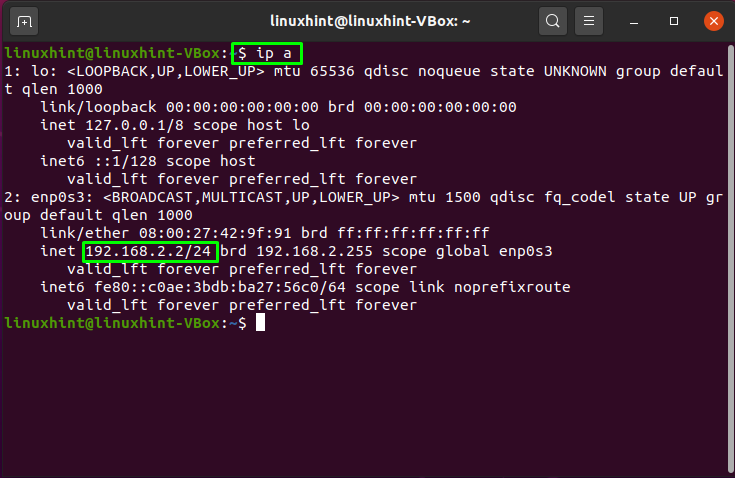
Now, check out that the IP address of the “enpos3” network interface is changed or not:
You can see that we have successfully changed the IP address on our Ubuntu system:
How to change the IP address on Ubuntu using GUI
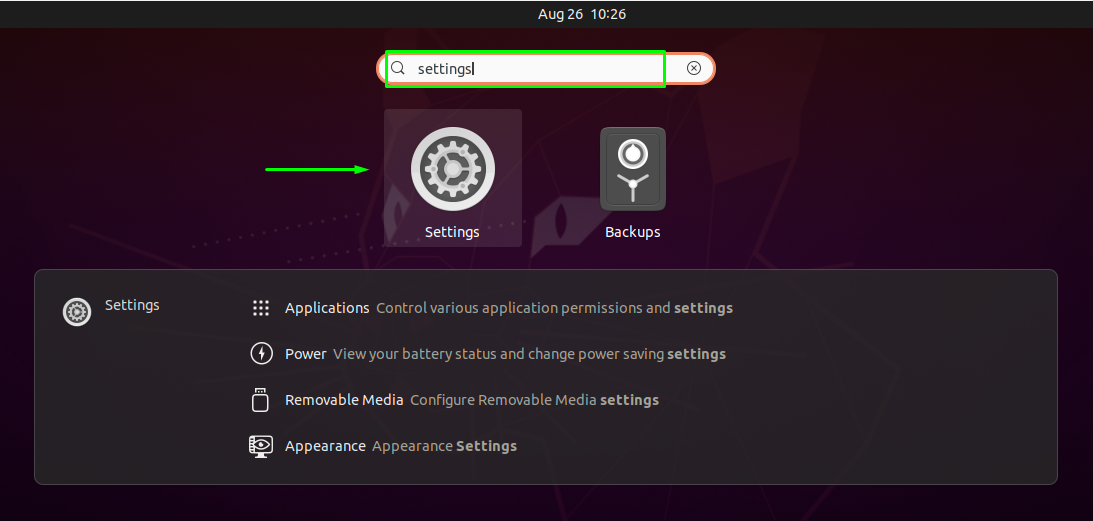
Yes, you read it right! Ubuntu also provides the option to change the IP address of your network interface using its Graphical User Interface (GUI). To do so, open up your system “Settings” application by searching it manually in the Application’s search bar:
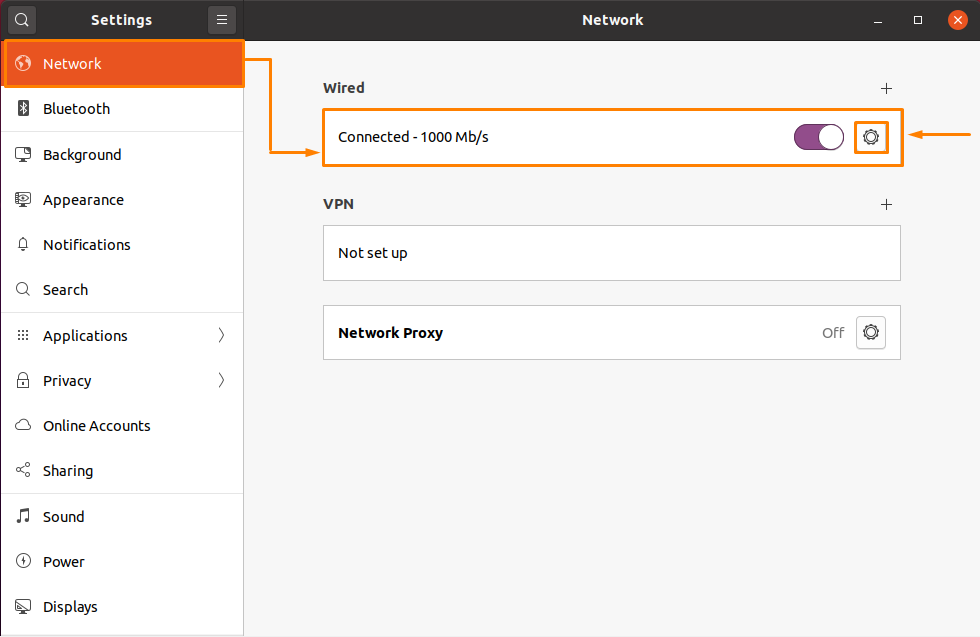
From the left side vertical menu, select the “Network” settings. After that, click on the “gear” icon to change the IP address of the selected network:
You will see a window displaying settings related to your wired network connection. Now, select the “IPv4” tab from the menu, and you will see that by default “Automatic (DHCP)” IPv4 method is enabled on your system:
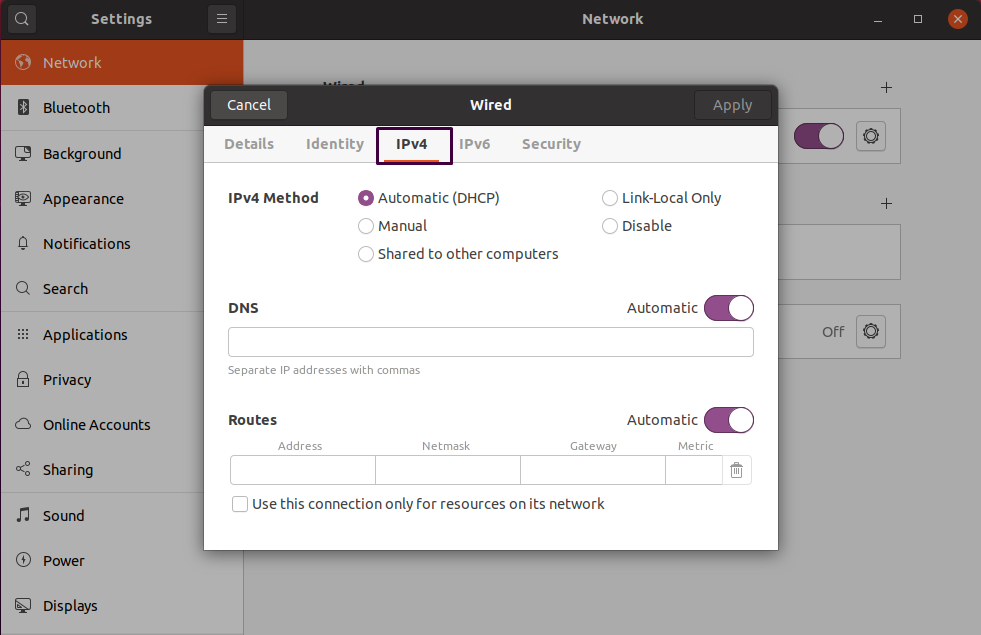
Select the “Manual” option; then, add the new IP address, Netmask, Gateway, and DNS-related information in the given fields. Lastly, click on the “Apply” button:

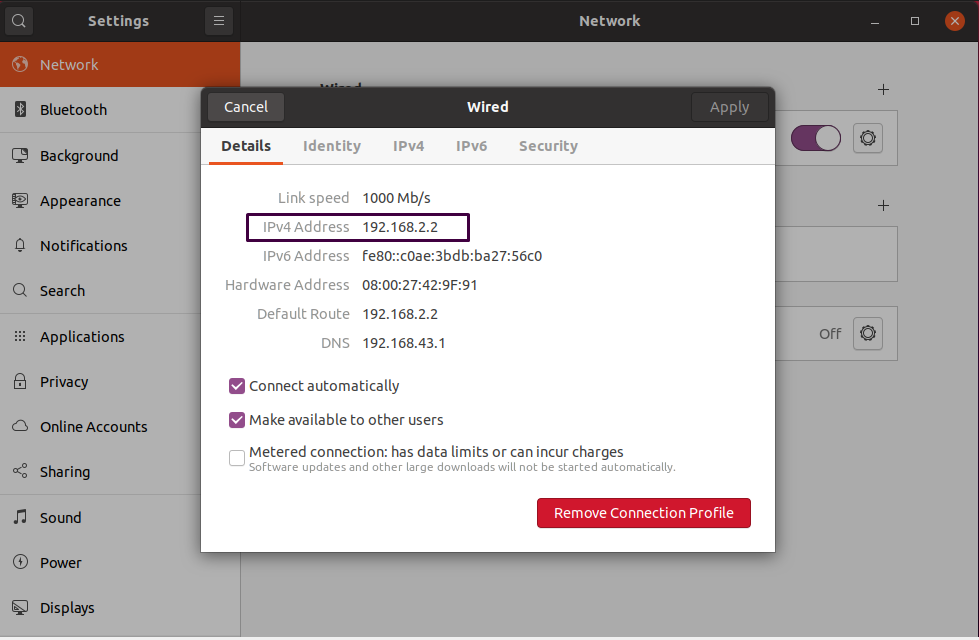
All done! You can check out the updated information by selecting the “details” tab of your network interface:
Conclusion
Ubuntu provides you the option to change the IP address of your network interface, whether you want to do it for port forwarding or running any media server on your system. In an Ubuntu system, netplan” is the network management tool capable of configuring and managing the network settings. This article showed you how to change the IP address using the “netplan” utility in the Ubuntu terminal. The procedure for changing the IP address using Ubuntu GUI is also provided in the article.
About the author

Sharqa Hameed
I am a Linux enthusiast, I love to read Every Linux blog on the internet. I hold masters degree in computer science and am passionate about learning and teaching.
Sorry, you have been blocked
This website is using a security service to protect itself from online attacks. The action you just performed triggered the security solution. There are several actions that could trigger this block including submitting a certain word or phrase, a SQL command or malformed data.
What can I do to resolve this?
You can email the site owner to let them know you were blocked. Please include what you were doing when this page came up and the Cloudflare Ray ID found at the bottom of this page.
Cloudflare Ray ID: 7a2580d07c3c77c1 • Your IP: Click to reveal 88.135.219.175 • Performance & security by Cloudflare
Как настроить параметры сети в Ubuntu
Знание того, как настраивать и отображать сетевые параметры, необходимо при установке сервера или рабочего стола Ubuntu. Это также полезно для устранения неполадок с подключением к Интернету. Базовая конфигурация сети включает настройку IP-адреса, маски подсети для внутренней связи и шлюза для подключения к внешним сетям. В этой статье я приведу вам примеры базовой конфигурации, необходимой для настройки сети в Ubuntu с помощью командной строки или графического интерфейса Ubuntu Network Manager. Шаги были протестированы на Ubuntu 18.04 LTS и Ubuntu 20.04 LTS, но будут работать и на более новых версиях Ubuntu.
Базовая настройка сети требует:
- Установка/изменение IP-адреса
- Настройка/изменение имени хоста
- Редактирование файла hosts
Установка/изменение IP-адреса
Есть несколько способов установить IP-адрес в Ubuntu. Вы можете настроить сетевой интерфейс для использования динамического IP-адреса с помощью DHCP-сервера или вручную установить статический IP-адрес..
Способ №1: настройка сети в командной строке
В Ubuntu вы можете установить свой IP-адрес с помощью команд терминала.
Первый тип netstat -I найти имя интерфейса. Затем введите следующую команду:
Затем, чтобы добавить шлюз по умолчанию, добавьте следующую команду:

Способ №2: Настройка сети с помощью графического интерфейса
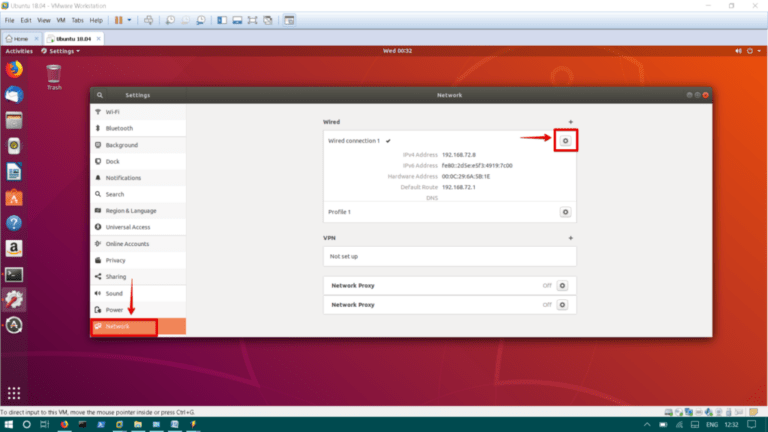
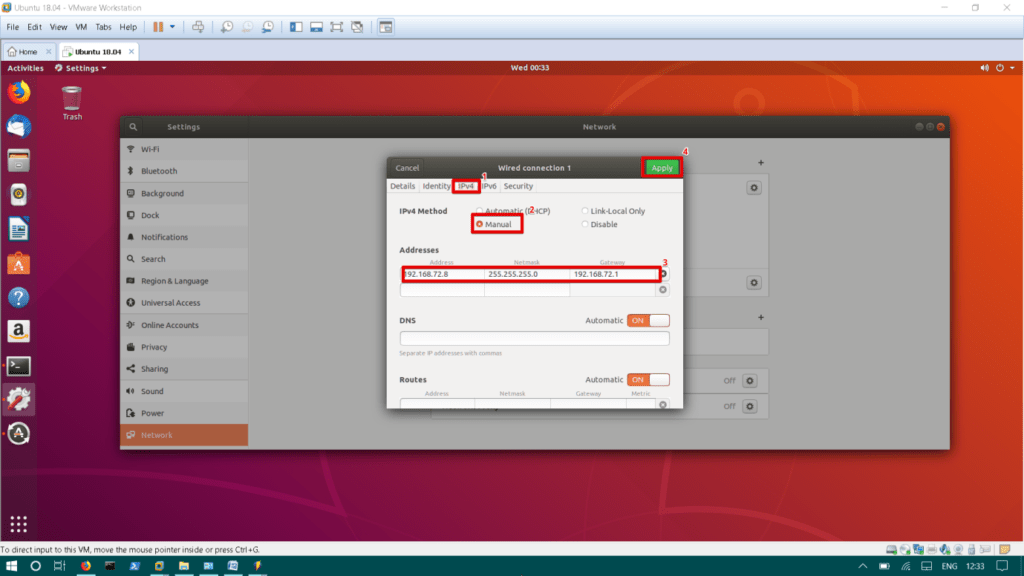
Вы можете установить IP-адрес через графический интерфейс пользователя в Ubuntu. На рабочем столе щелкните меню «Пуск» и выполните поиск Settings. В окне настроек нажмите кнопку Network. Затем на правой панели выберите интерфейс и щелкните значок шестеренки, чтобы открыть настройки для этого интерфейса.
В настройках IPv4 вы можете выбрать Automatic (DHCP) чтобы система могла получать динамически IP-адрес.
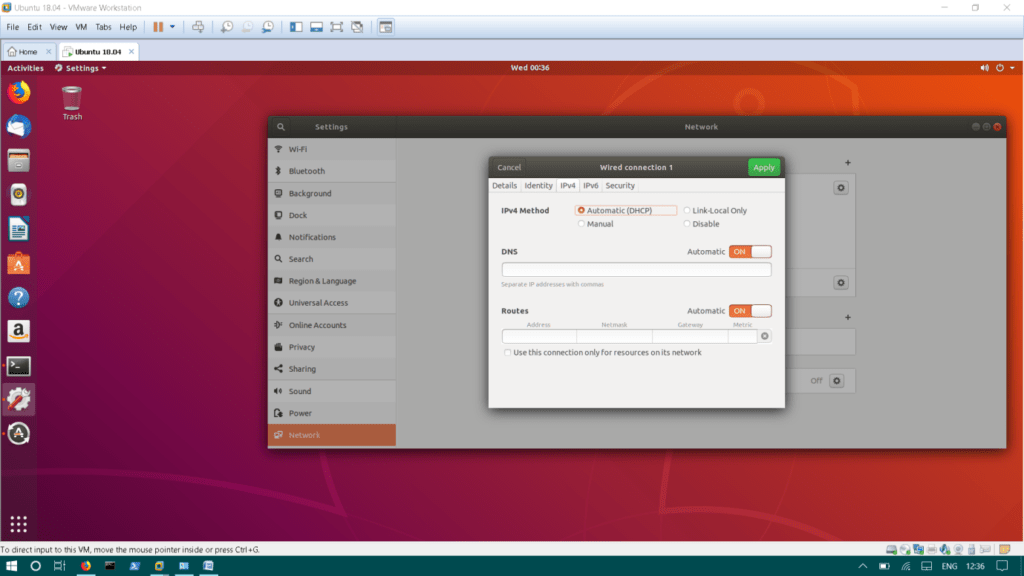
Если вы хотите установить статический IP-адрес, нажмите кнопку Manual. Введите IP-адрес, маску подсети и шлюз по умолчанию. Затем нажмите на Apply для сохранения текущих настроек.
Способ №3: настроить сеть, отредактировав файл /etc/interfaces
Вот еще один метод, который вы можете использовать для настройки IP-адреса. Чтобы установить IP-адрес динамически, вы должны отредактировать /etc/network/interfaces. В /etc/network/interfacesсохраняется базовая конфигурация интерфейсов.
Изменить /etc/network/interfaces введя следующую команду в терминале.
Затем добавьте следующие строки:
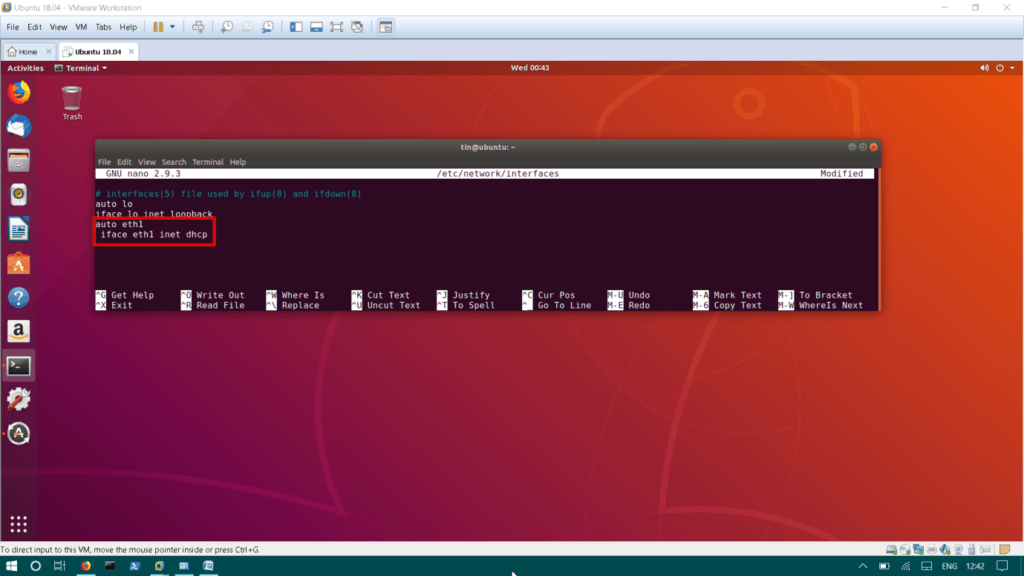
Сохраните файл и перезапустите сетевые службы с помощью приведенной ниже команды.
Чтобы установить статический IP-адрес, вы должны отредактировать /etc/network/interfaces
Добавьте следующие строки в /etc/network/interfaces.
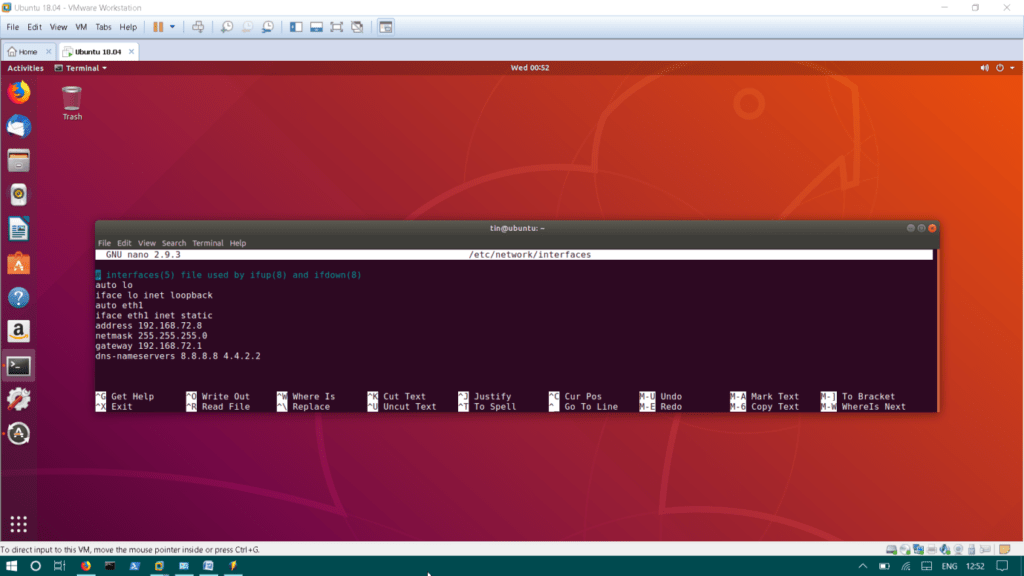
Сохраните файл и перезапустите сетевые службы.
Настройка/изменение имени хоста
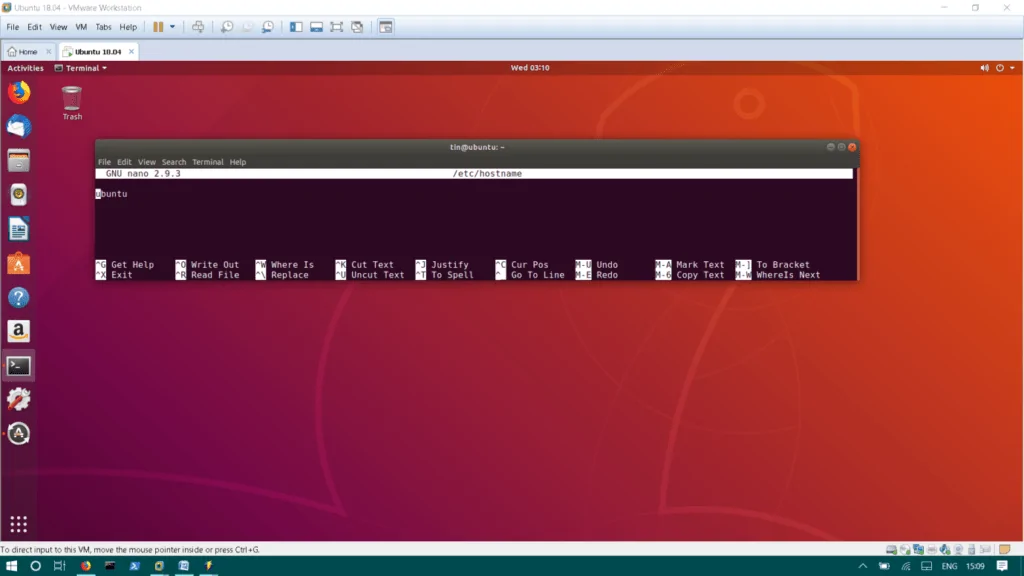
Имя хоста ОС Ubuntu настраивается в файле /etc/hostname.
Редактировать /etc/hostname введите следующую команду:
Этот файл содержит только имя хоста файла, измените имя, а затем сохраните его.
Редактирование файла /etc/hosts
Файл hosts сопоставляет имя хоста с IP-адресом локально. Например, у вас есть сервер в вашей локальной сети, вместо того, чтобы запоминать его IP, вы можете сопоставить его IP с именем в вашем файле /etc/hosts. Это позволит вам получить доступ к этой машине с именем вместо IP.
Чтобы отредактировать файл hosts, введите:
Добавьте IP-адрес и имя сервера в файл hosts в следующем формате.
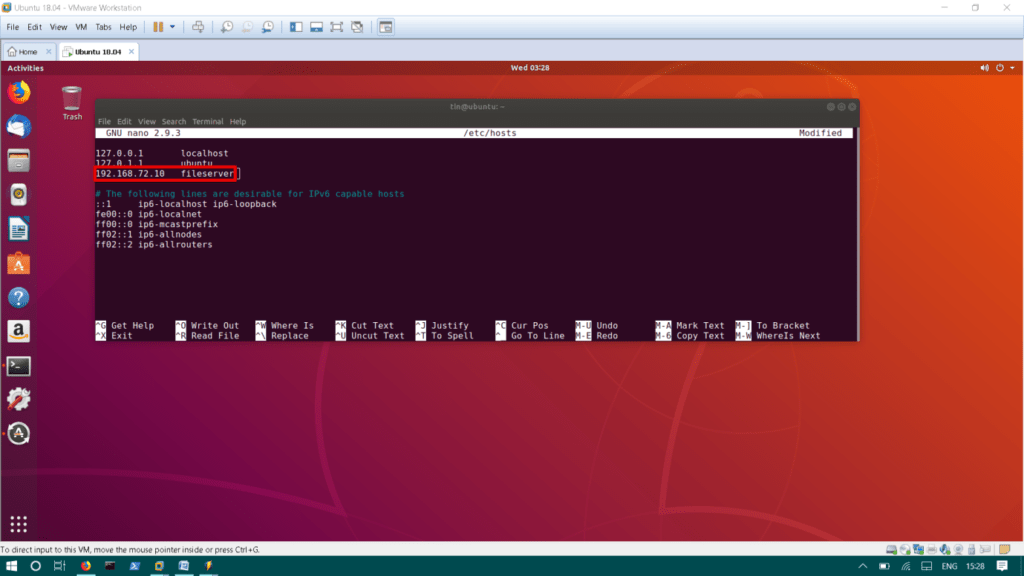
Сохраните файл и перезагрузите систему, чтобы изменения вступили в силу.
Это все, что вам нужно для настройки сети в Ubuntu для начала. Это были базовые конфигурации, есть гораздо более продвинутые параметры, которые вы можете настроить на своем компьютере с Ubuntu.
How do I request a new IP address from my DHCP server using Ubuntu Server?
I know there is a simple command for this, but how do I tell my Ubuntu server instance to request a new IP address from the DHCP server on eth0?
4 Answers 4
man page: dhclient

To release the current IP address:
To obtain a fresh lease:
Another issue I ran in to was that dhclient kept requesting the same IP from the DHCP server. Running the command dhclient -r did not resolve this. Therefore, after reading the man pages more thoroughly, I found that if I edited the file /var/lib/dhcp3/dhclient.leases to remove all lease references to the specific adaptor, in my case eth0 . Then running sudo dhclient eth0 worked as expected and assigned me a new/different IP.
My situation was perhaps unique, but it required that my server pull an address from a higher range than was previously issued. The DHCP server was configured to do this, unless a specific IP address was requested regardless of the range. Since dhclient was specifically requesting the old IP address, based on the information in the dhclient.leases file, the DHCP server was always returning the same address.
When you run «sudo /etc/init.d/dhcp3-server restart» does it give something like:
Stopping DHCP server: dhcpd3. Starting DHCP server:dhcpd3.
If not, it’s not running.
Then just be sure, check if your client sends out a request for a lease, take a look at your /var/logs/deamon.log file. There should be a bunch of DHCP requests in there. If not, the problem is with your client (and we will take it from there).
If your client is ok, just forget about firestarter for the moment and let’s try to get it working without it. To make sure your DHCP server is up and running. Type «sudo /etc/init.d/dhcp3-server stop» and then «sudo /etc/init.d/dhcp3-server start». Then it should be running, assuming it’s properly installed on your box.
I have included a copy of my dhcpd.conf file.
Finally, take a look at your server’s /var/log/messages file if it gets the requests and replies to it with a valid lease. It also might give you an idea what’s wrong with your configuration file (if there’s something wrong with it ofcourse). If you can’t make anything of this, post your messages file and I will take a look lateron.